Open-Source Secret Management with Infisical
A step-by-step guide to deploying open-source secret management platform, Infisical, on Railway, Render, and DigitalOcean.
In recent years, we have seen several high-profile data breaches due to poor secrets management practices, resulting in millions of sensitive records compromised and hundreds of millions of dollars in financial losses. Secrets management is critical for an organization's application development and deployment life cycle because it ensures that sensitive information such as passwords, API keys, and other credentials are securely stored and managed. Additionally, a good strategy facilitates secure collaboration and deployment of applications across different environments, thereby promoting agile and efficient development practices.
There are several commercial and open-source secrets management solutions, with Hashicorp Vault probably being the most popular one. While Vault is widely used and highly regarded, users often complain about the complexity of setting it up and integrating with their CI/CD pipelines. Enter Infisical, a relatively new entrant to this space, hoping to lure folks with an improved developer experience.
What is Infisical?
Infisical is an open-source, end-to-end encrypted secrets management platform that organizations can use to manage secrets like passwords, API keys, database credentials, and configurations. It offers several cool features:
- Fully managed cloud as well as a self-hosted option
- User-friendly web interface and programmatic access (SDKs, API)
- Command-line interface (CLI) to fetch and inject secrets into frameworks
- Native integrations with cloud services like GitHub, Vercel, Netlify etc.
- Secret versioning and point-in-time recovery
- Role-based access controls and audit logs
- Secret scanning and leak prevention (similar to Trufflehog)
Deploy Infisical using One-Click Starter on Railway
Railway is a modern app hosting platform that makes it easy to deploy production-ready apps quickly. Sign up for an account using GitHub, and click Authorize Railway App when redirected. Review and agree to Railway's Terms of Service and Fair Use Policy if prompted. Railway does not offer an always-free plan anymore, but the free trial is good enough to try this. Launch the Infisical one-click starter template (or click the button below) to deploy the app instantly on Railway.

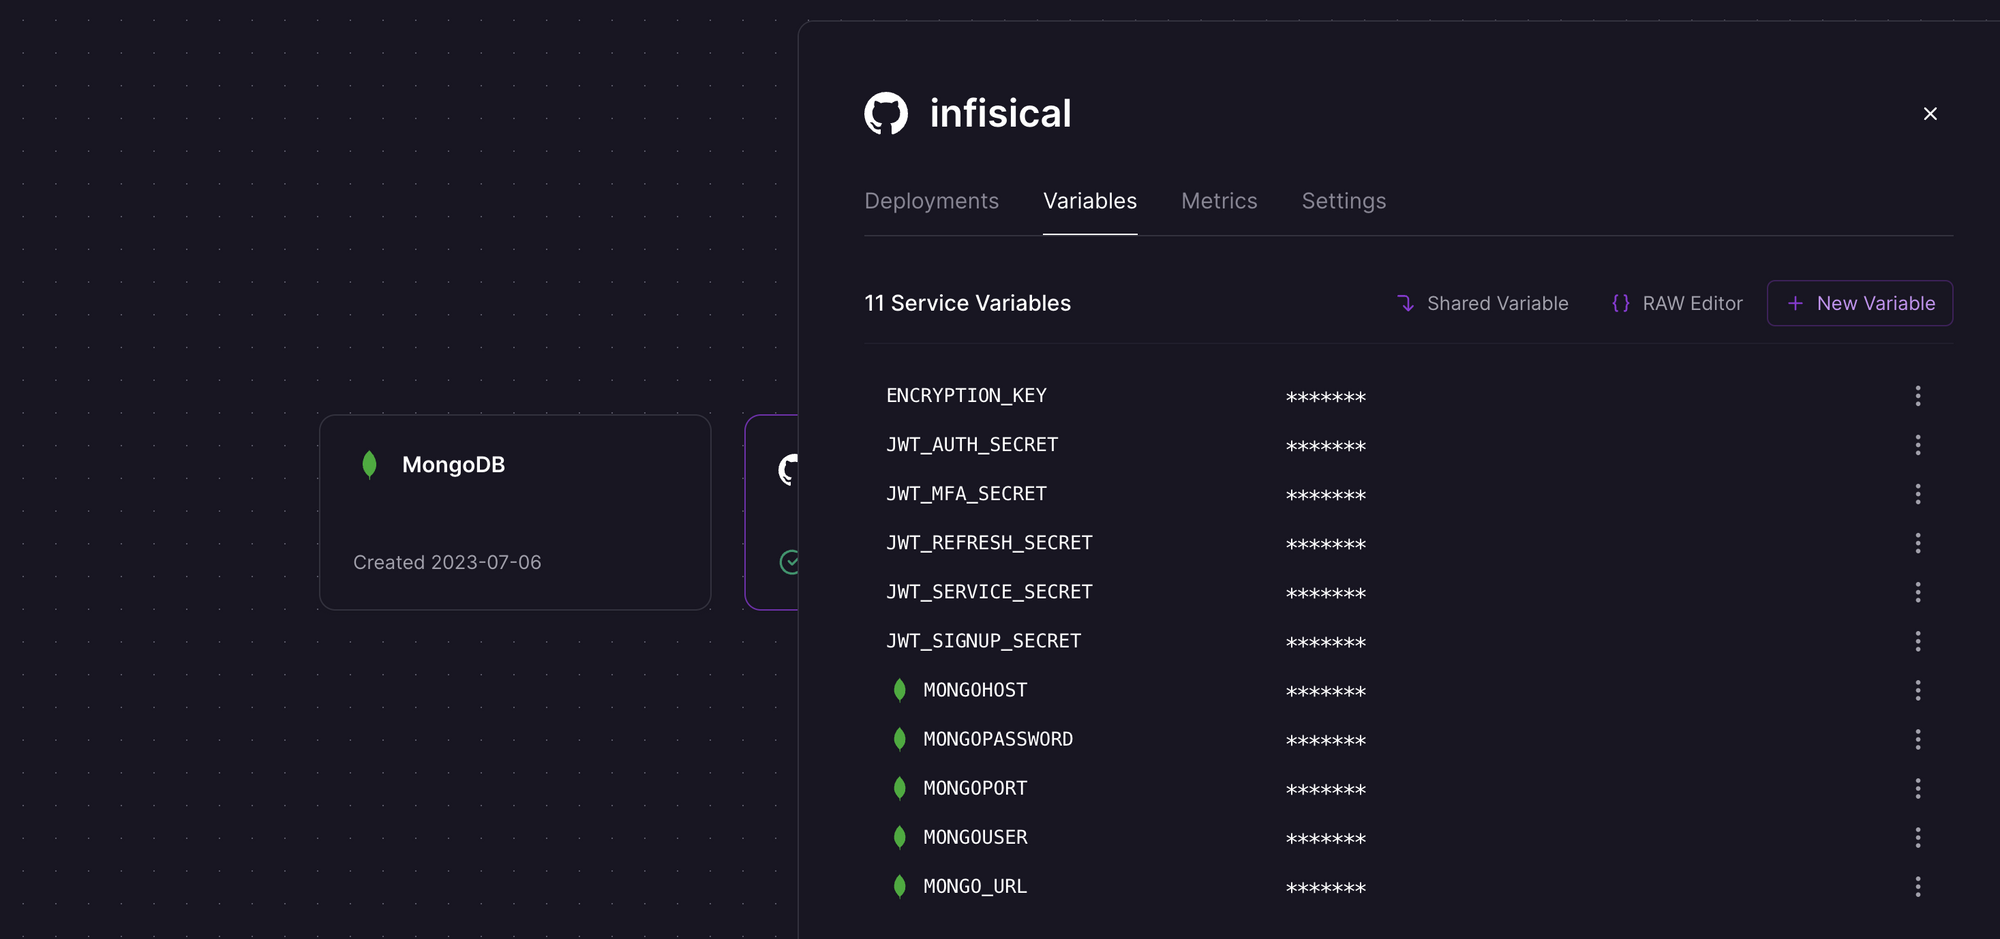
You'll be given an opportunity to change the default repository name and set it private, if you'd like. Infisical requires you to provide a few environment variables, listed below. For each variable, populate the value, and click Deploy; the deployment will kick off immediately.
ENCRYPTION_KEY: required, default:noneAUTH_SECRET: required, default:noneMONGO_URL: required, default:none; hidden in the template, this will be auto-populated by Railway once the MongoDB instance is created.REDIS_URL: required, default:none; hidden in the template, this will be auto-populated by Railway once the Redis instance is created.

If you want to set up multi-factor authentication, send invite links to teammates via email, or send alerts such as suspicious login attempts, you'll also need to configure the email service. The one-click template does not include the following optional SMTP environment variables; if you need them, add them to the service in the Railway Variables tab, and redeploy the service to take effect. See this guide for configuration details of specific email providers.
SMTP_HOST: hostname to connect to for SMTP connectionsSMTP_USERNAME: SMTP credentialsSMTP_PASSWORD: SMTP credentialsSMTP_PORT: port to connect to for SMTP connectionsSMTP_SECURE: default isfalse; iftrue, SMTP connection will use TLSSMTP_FROM_ADDRESS: email address for sending emailsSMTP_FROM_NAME: name label for sending emails
You can also configure additional environment variables to sync secrets to third party services, or integrate with external authentication providers. See this guide for additional details. Once the deployment completes, Infisical will be available at a default xxx.up.railway.app domain - launch this URL to access the app. If you are interested in setting up a custom domain, I covered it at length in a previous post - see the final section here.
Deploy Infisical using Docker Image on Render
Render is another modern app hosting platform that makes it easy to deploy production-ready apps quickly. Sign up for an account using email or one of the Git providers, and create the Infisical web service. While Render offers a managed PostgreSQL service, it does not offer a document database like MongoDB, which is required by Infisical. To work around this limitation, let's provision a managed MongoDB instance on Railway instead.
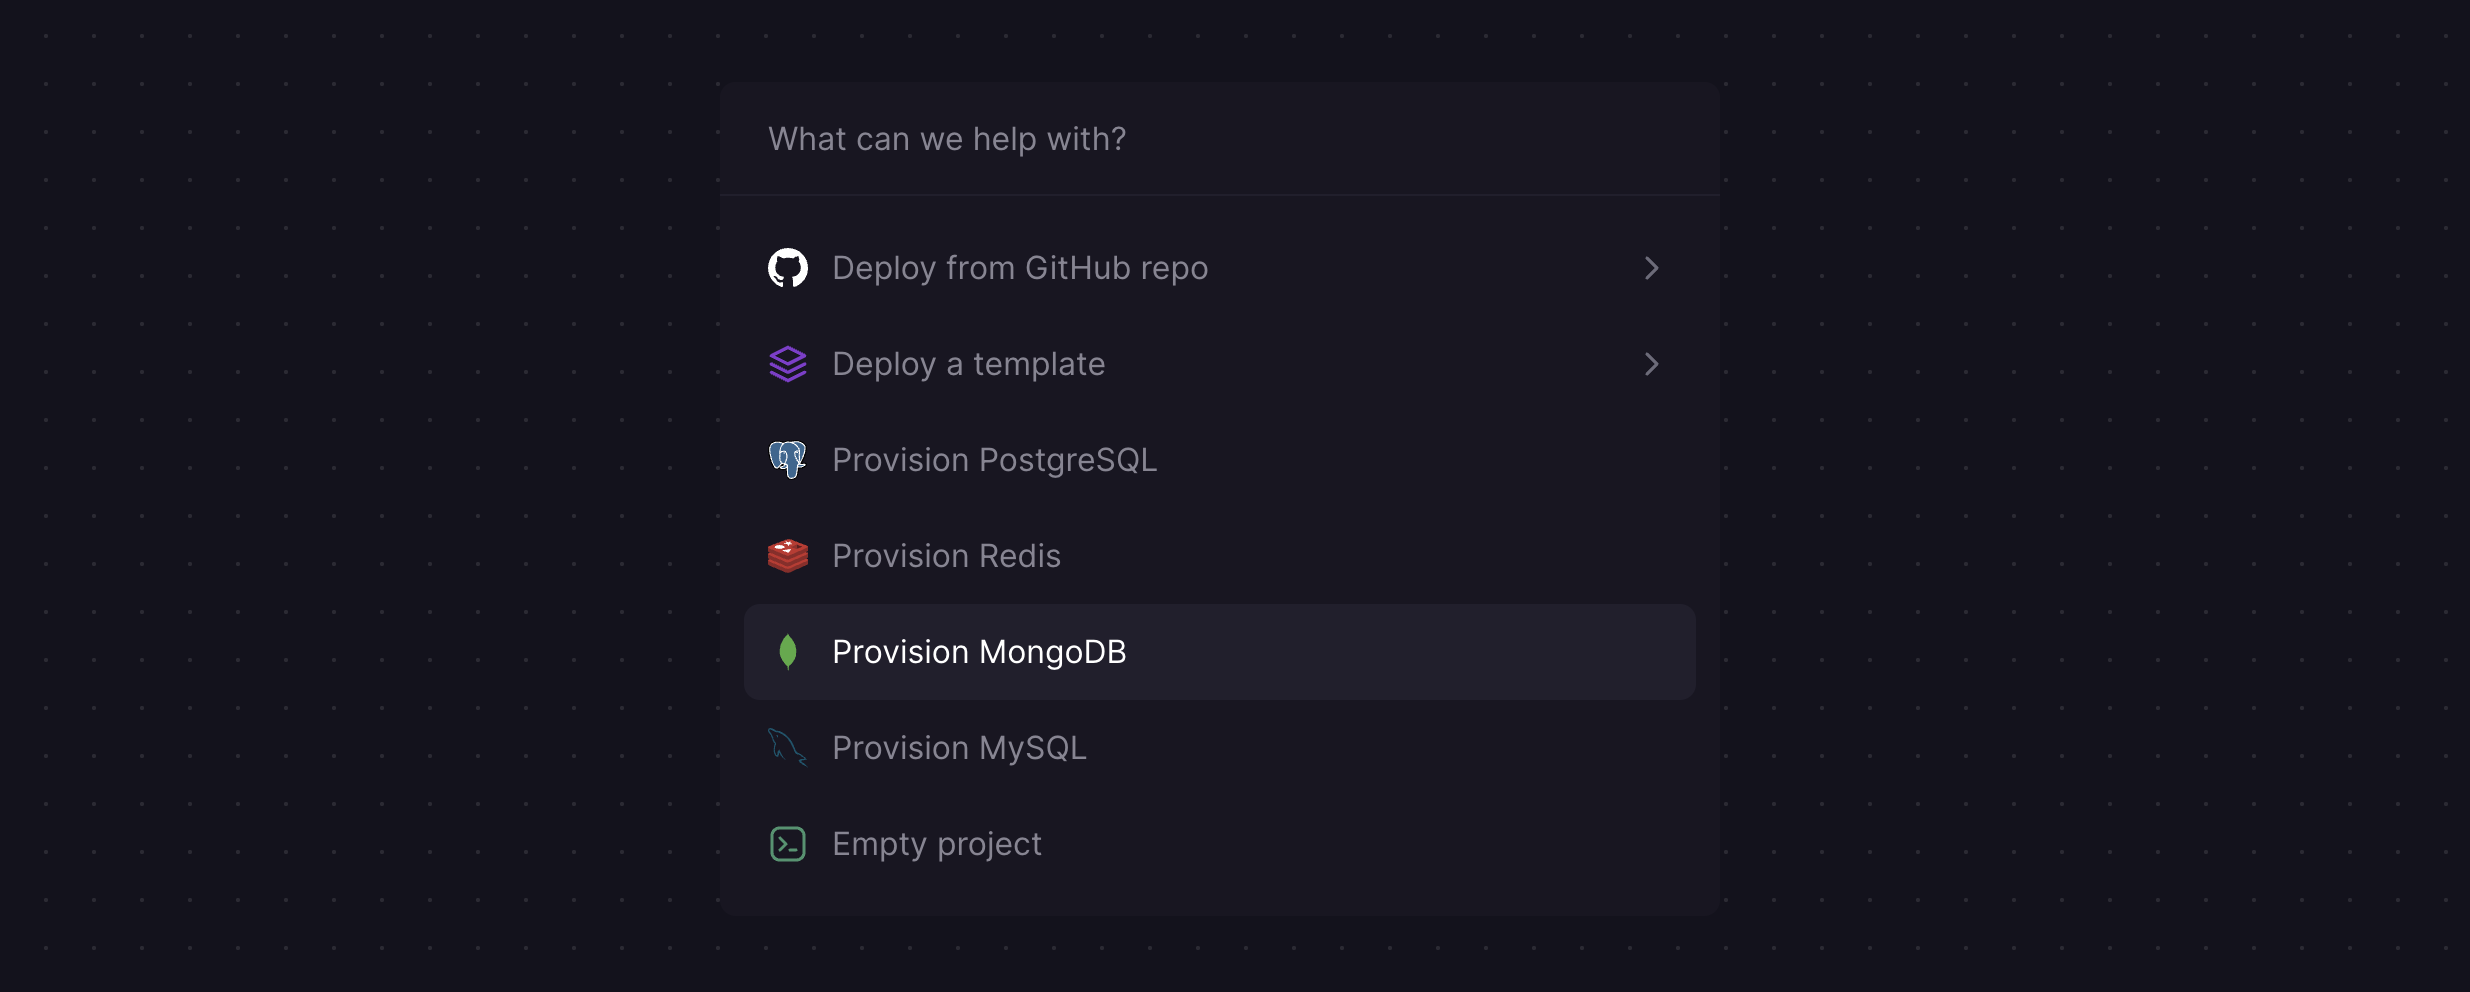
Assuming you already have a Railway account (if not, see the previous section), create a new project and provision a MongoDB instance.
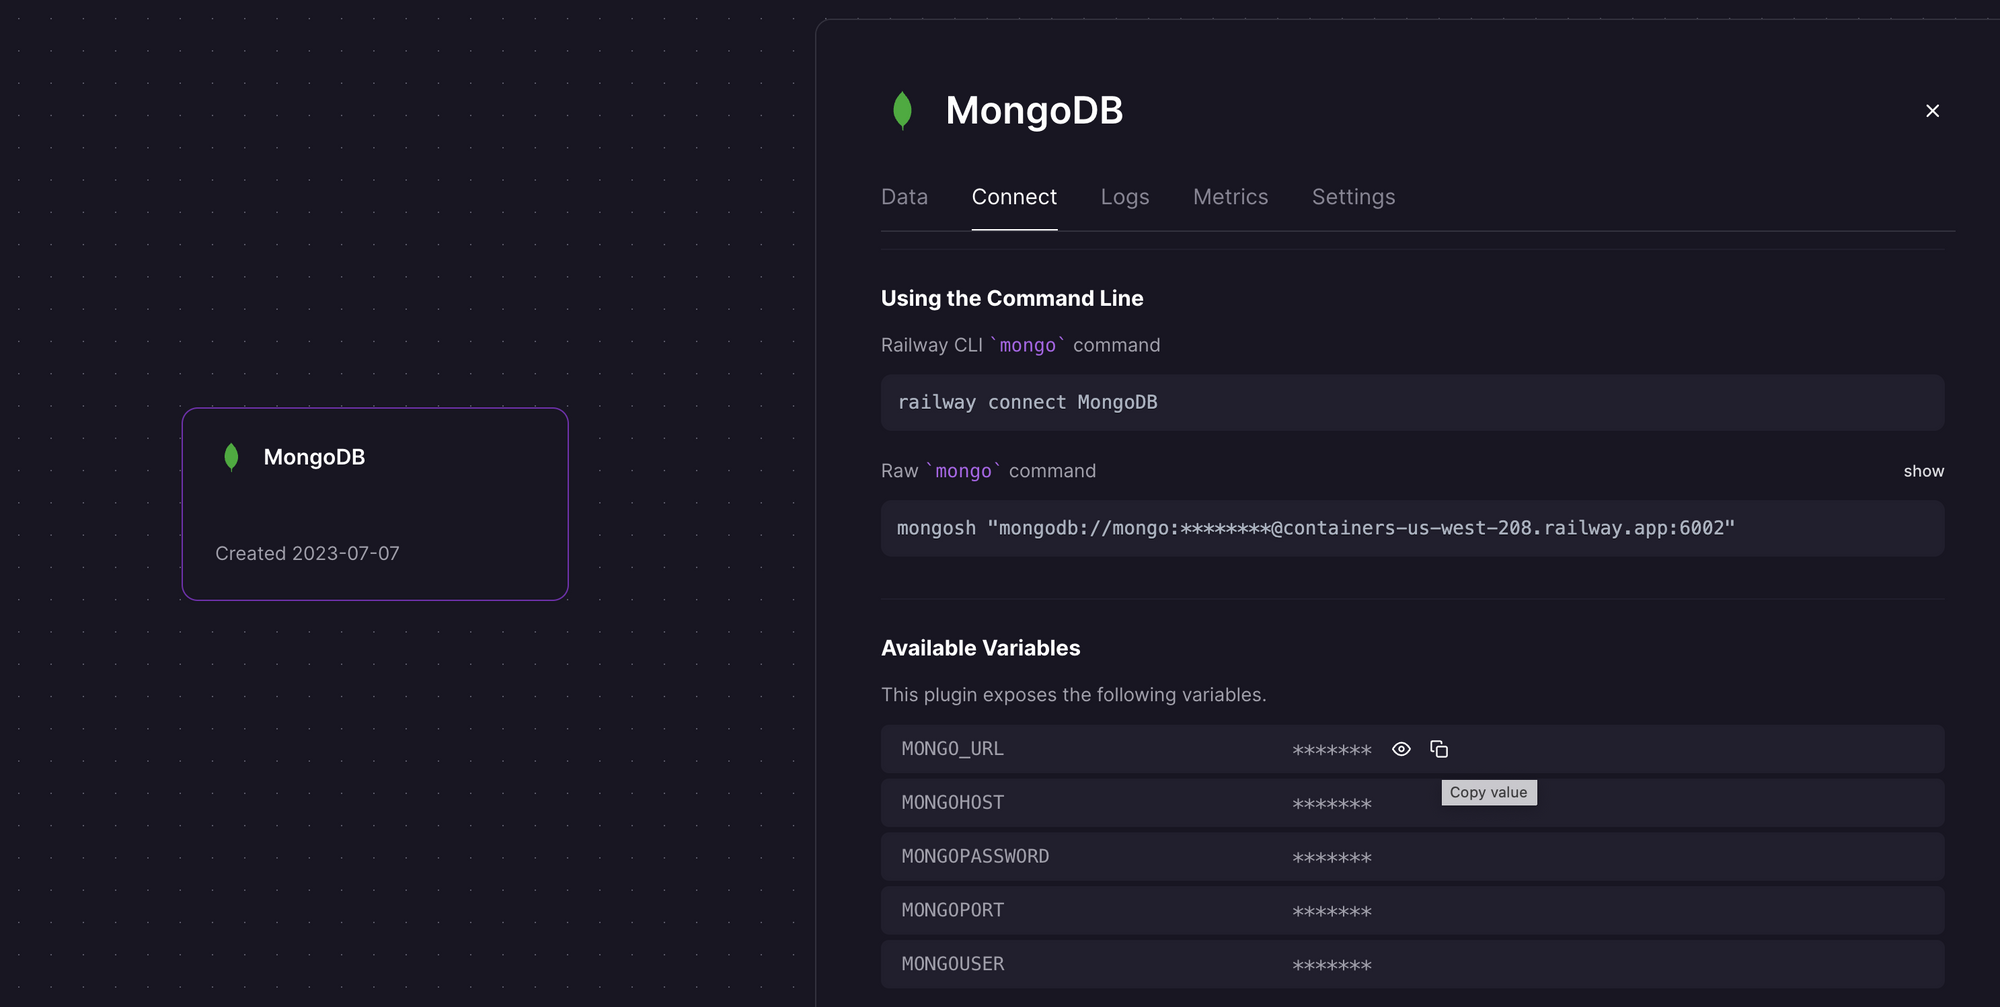
Once provisioned, click on the instance and look for the MONGO_URL variable under the Connect tab. Copy the value - we'll need it on Render shortly.
Log in to the Render dashboard, and click New Web Service.

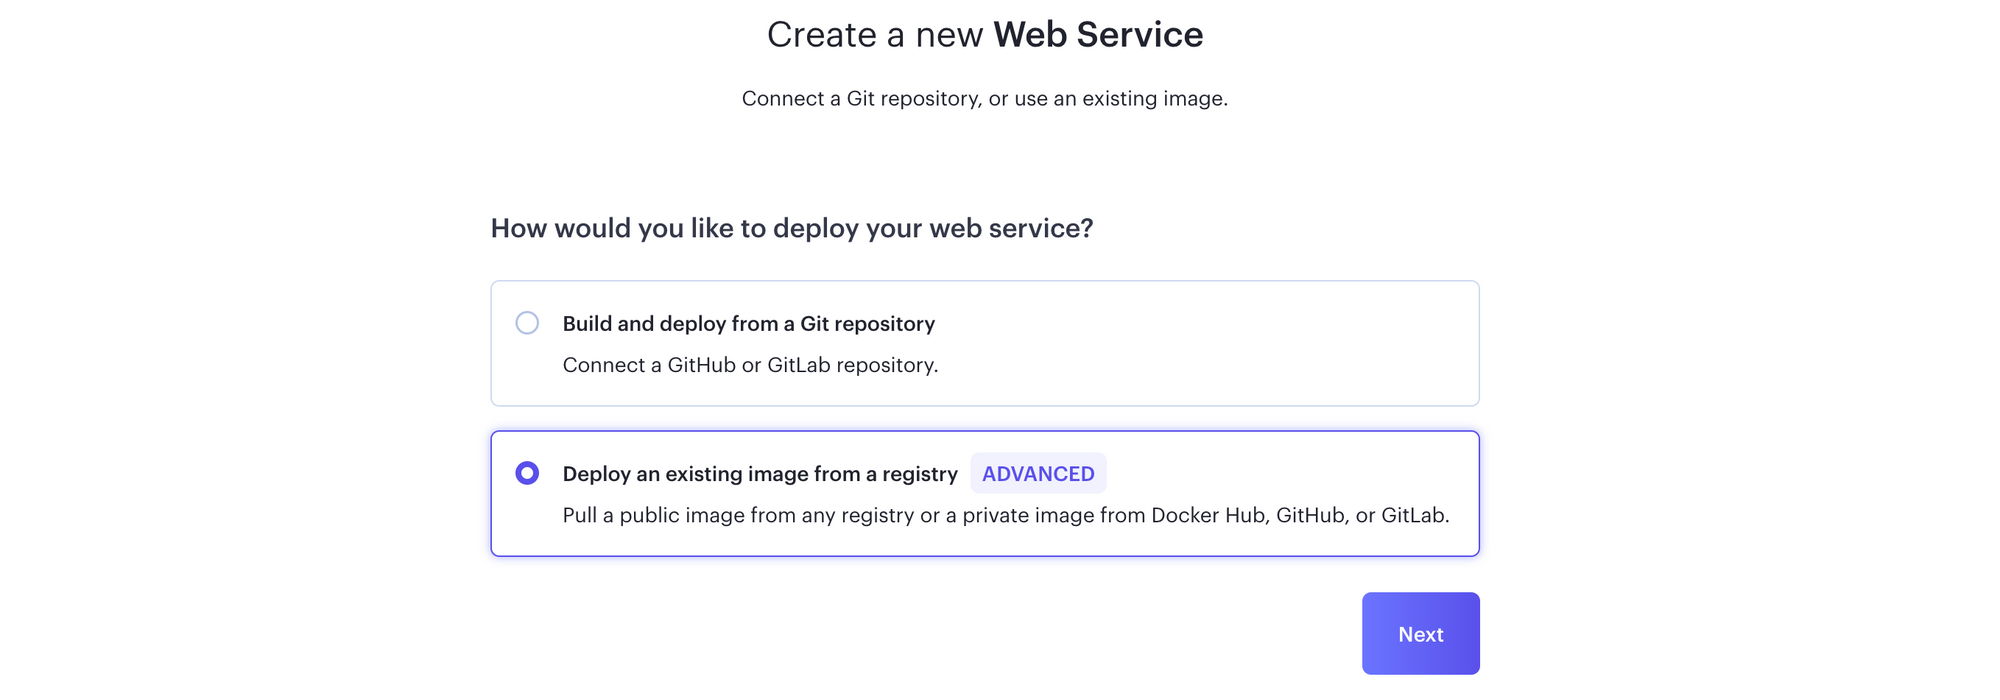
You can either deploy from the Infisical git repository, or from a registry image. Select the Deploy an existing image from a registry option and click Next.
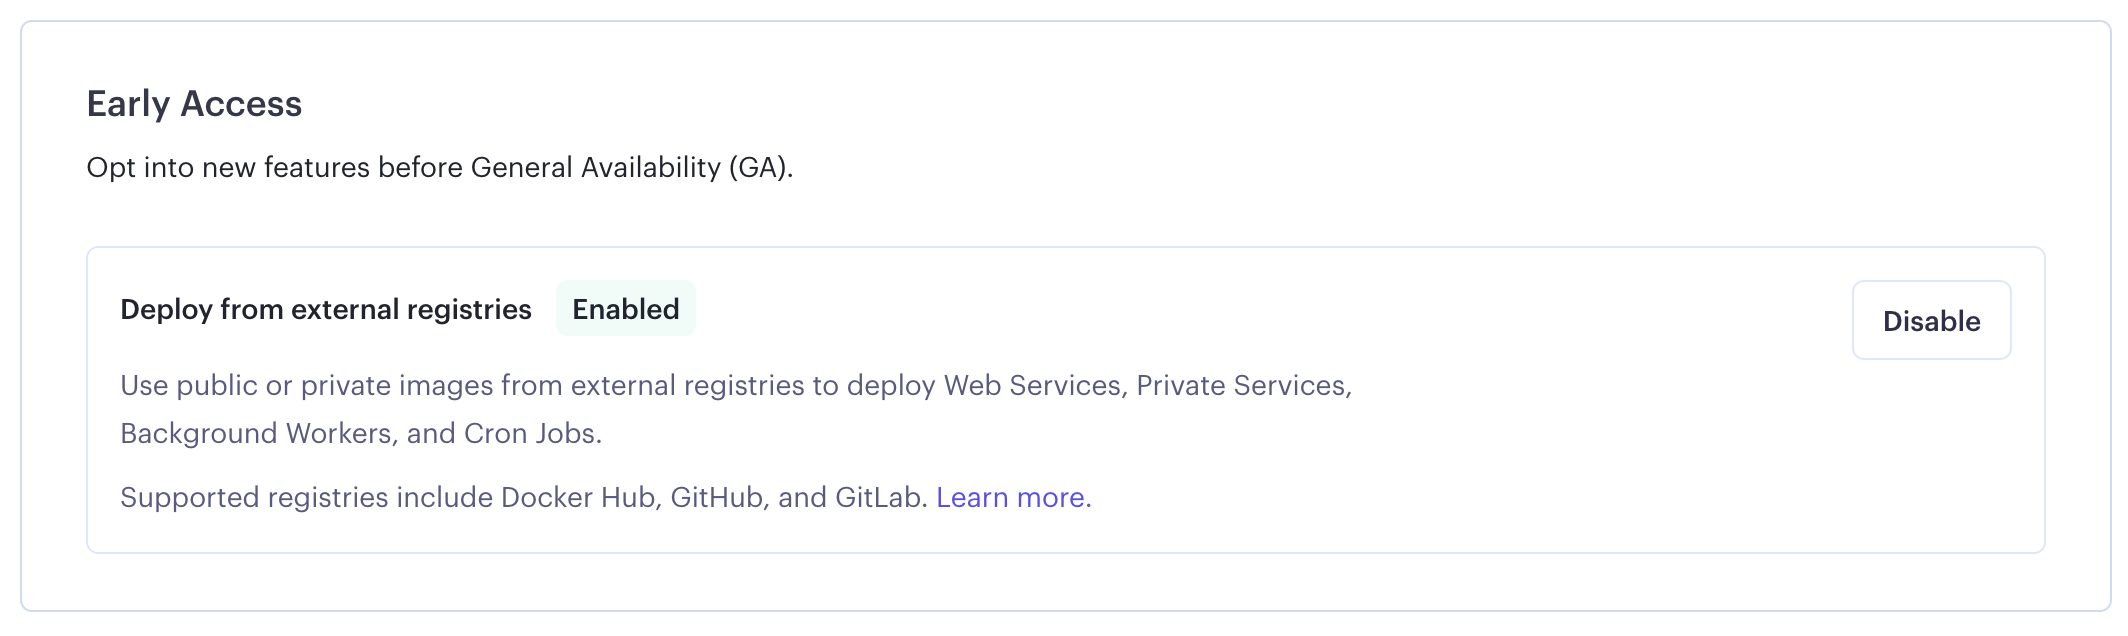
If you don't see the second option, you may need to enable the Deploy from external registries feature from the Early Access section of your profile.
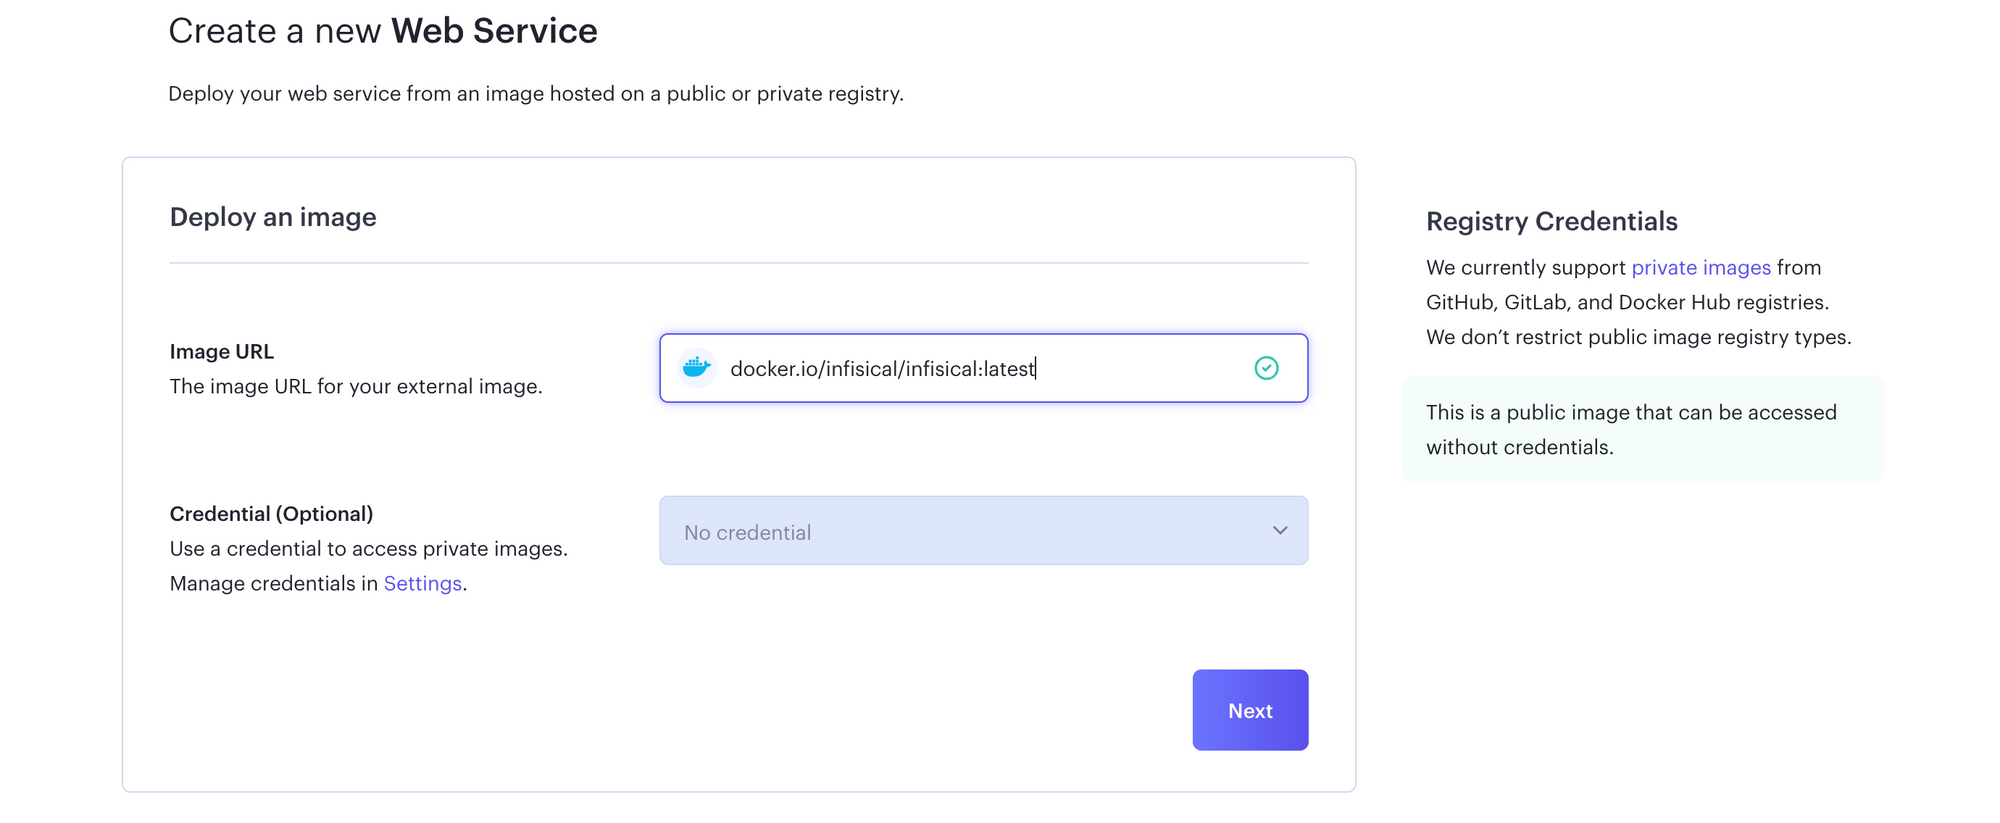
Provide the docker image location, and click Next.
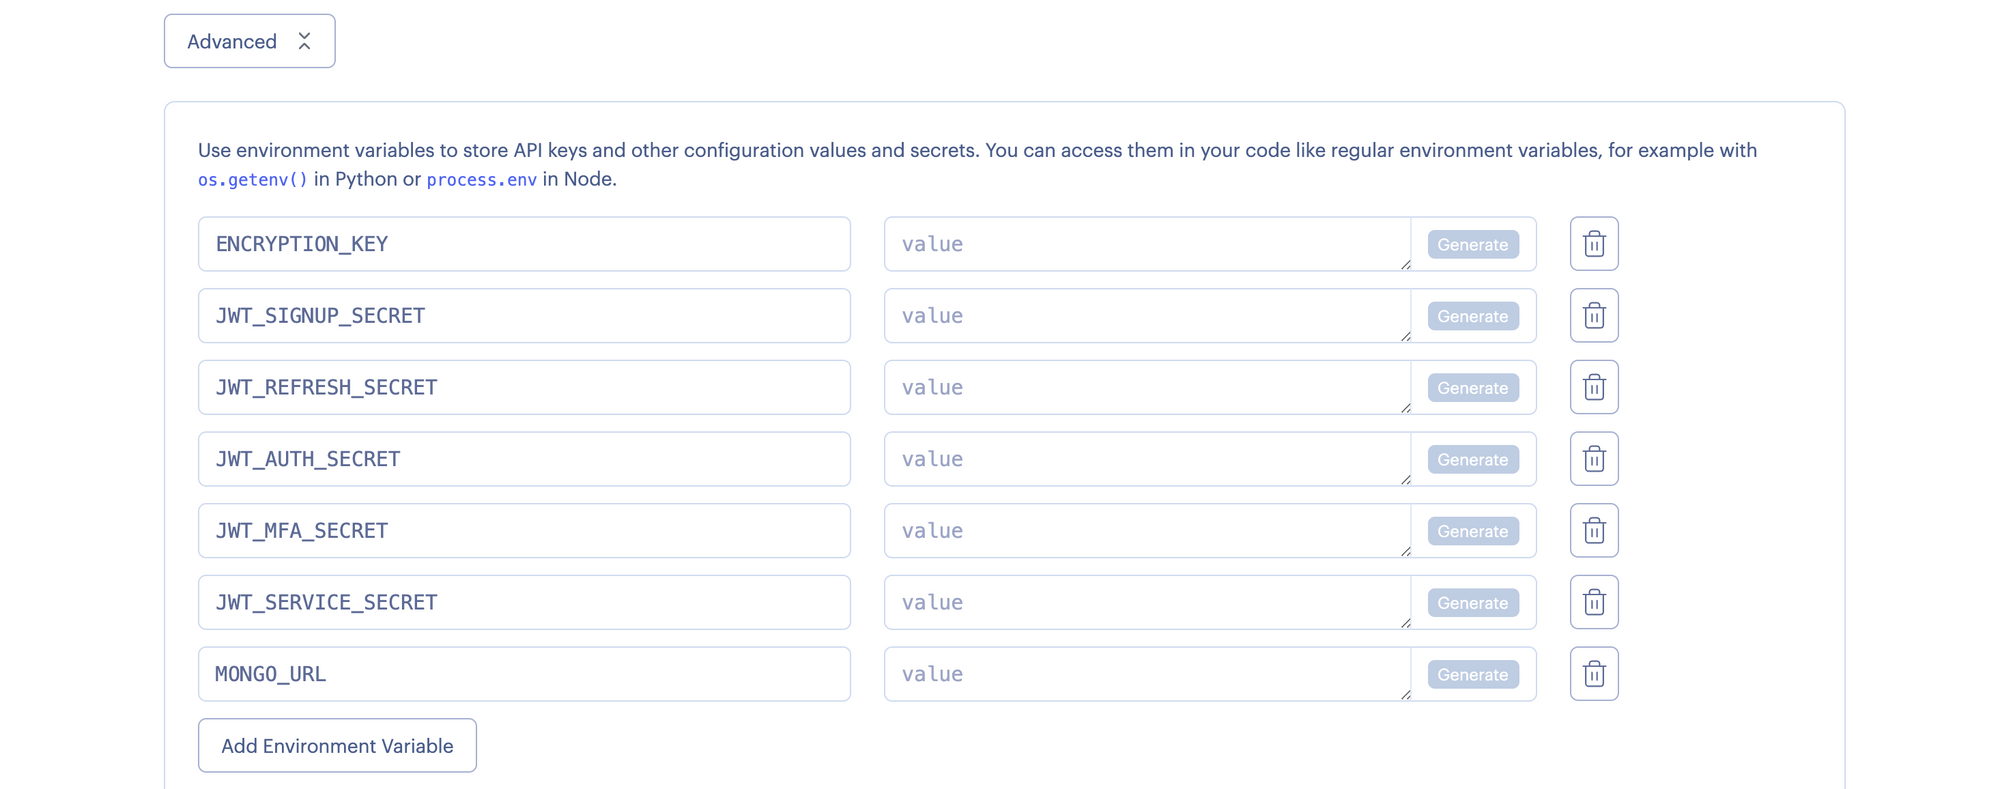
Specify a name (say infisical) for your web service, choose the default Free plan, and click Advanced to specify the necessary environment variables. Click the Generate button to auto-populate values for all the variables except MONGO_URL, for which you should specify the Railway MongoDB URL you copied earlier. Click Next to create the web service. Shortly, the Infisical app will be available at a default xxx.onrender.com domain. If you want to set up a custom domain, see this guide from Render.
Deploy Infisical using 1-Click App on DigitalOcean
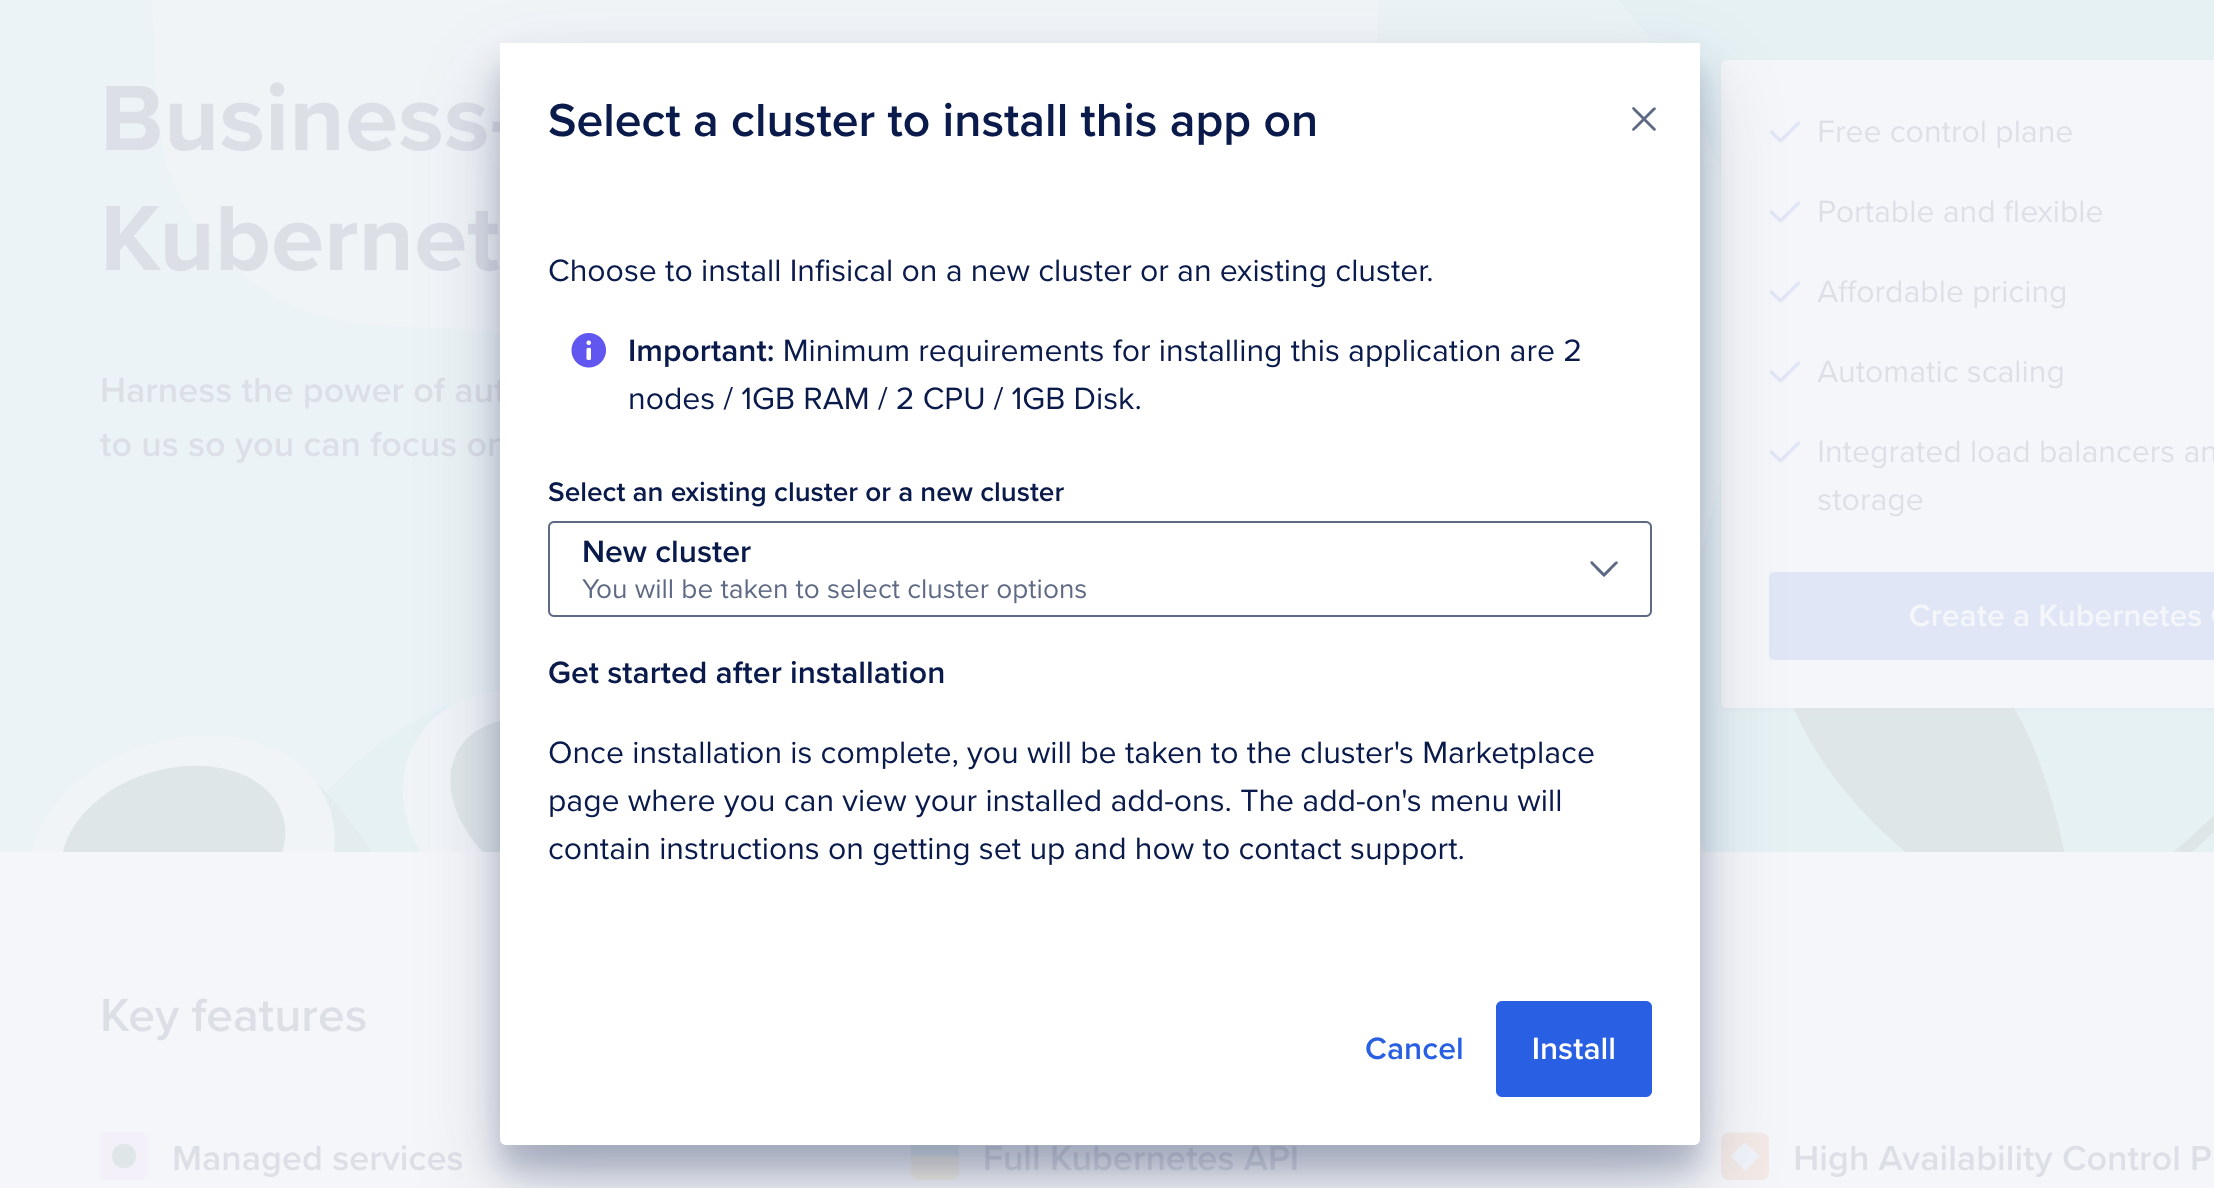
Infisical can also be deployed on a Kubernetes cluster using a 1-click application from the DigitalOcean marketplace. By deploying on Kubernetes, you can ensure that the application is fault-tolerant, highly available, and scalable. To make the deployment process streamlined, the 1-click app uses Kubernetes helm charts under the hood. If you don't have a DigitalOcean account, sign up here - you’ll receive a $200, 60-day credit when you add a valid payment method. Set up your team and project, and click this link or the button below.

Select a new Kubernetes cluster to install this app on, and click Install. Note that if you need to make changes to the default settings (e.g. environment variables), you'll need to deploy the helm charts manually instead of this 1-click method.
Choose the datacenter region, Kubernetes version (the latest version is the default and recommended), cluster capacity (3 nodes with default node plan), cluster name, and click Create Cluster. Once the deployment completes, launch Infisical web interface using the load balancer's IP addressed created by Kubernetes.
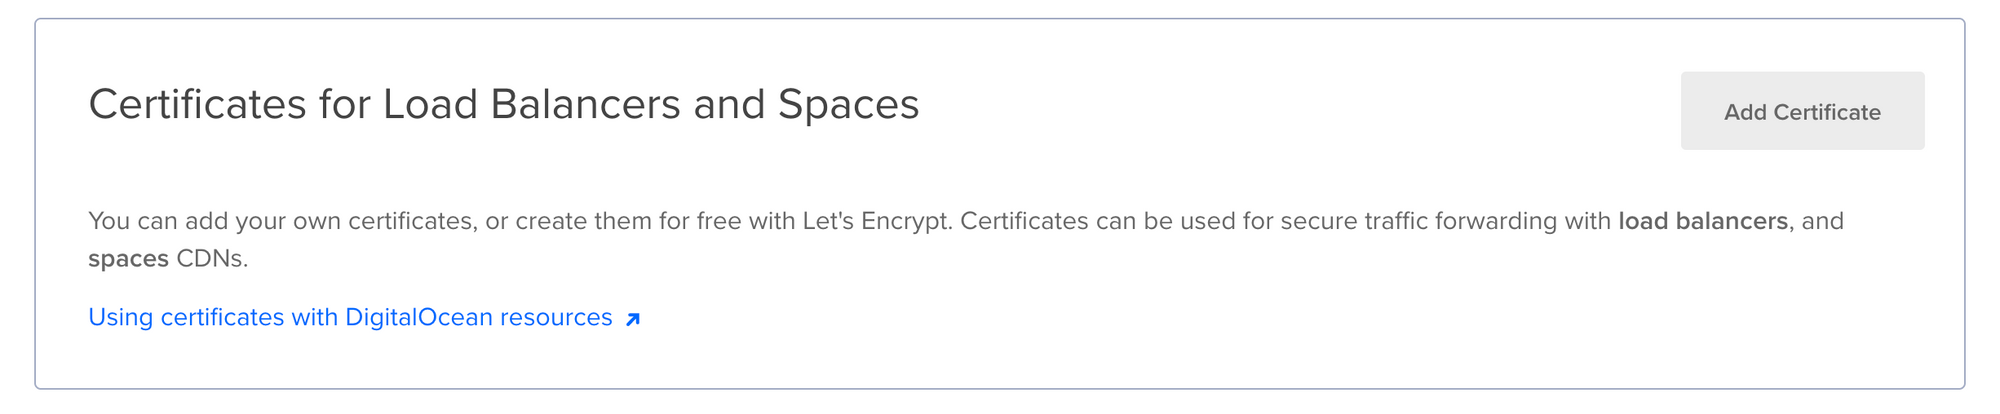
By default, a TLS certificate is not provisioned and the communication occurs over an unencrypted channel. If you manage your domain with DigitalOcean DNS, you can use DigitalOcean to generate and automatically renew a free Let's Encrypt certificate. To do this, navigate to Settings > Security in DigitalOcean, and click Add Certificate to add a free Let's Encrypt certificate to the load balancer (follow this guide). If you manage your DNS with a different provider, you'll need to use the Bring your own certificate option instead.
Getting Started with Infisical Secrets Management
Once you have deployed Infisical, whether on Railway, Render or DigitalOcean, launch the web interface to get started. Click Sign up and then Sign up with email, and provide the email address to use. Complete the additional details, specify a password, and click Sign Up.

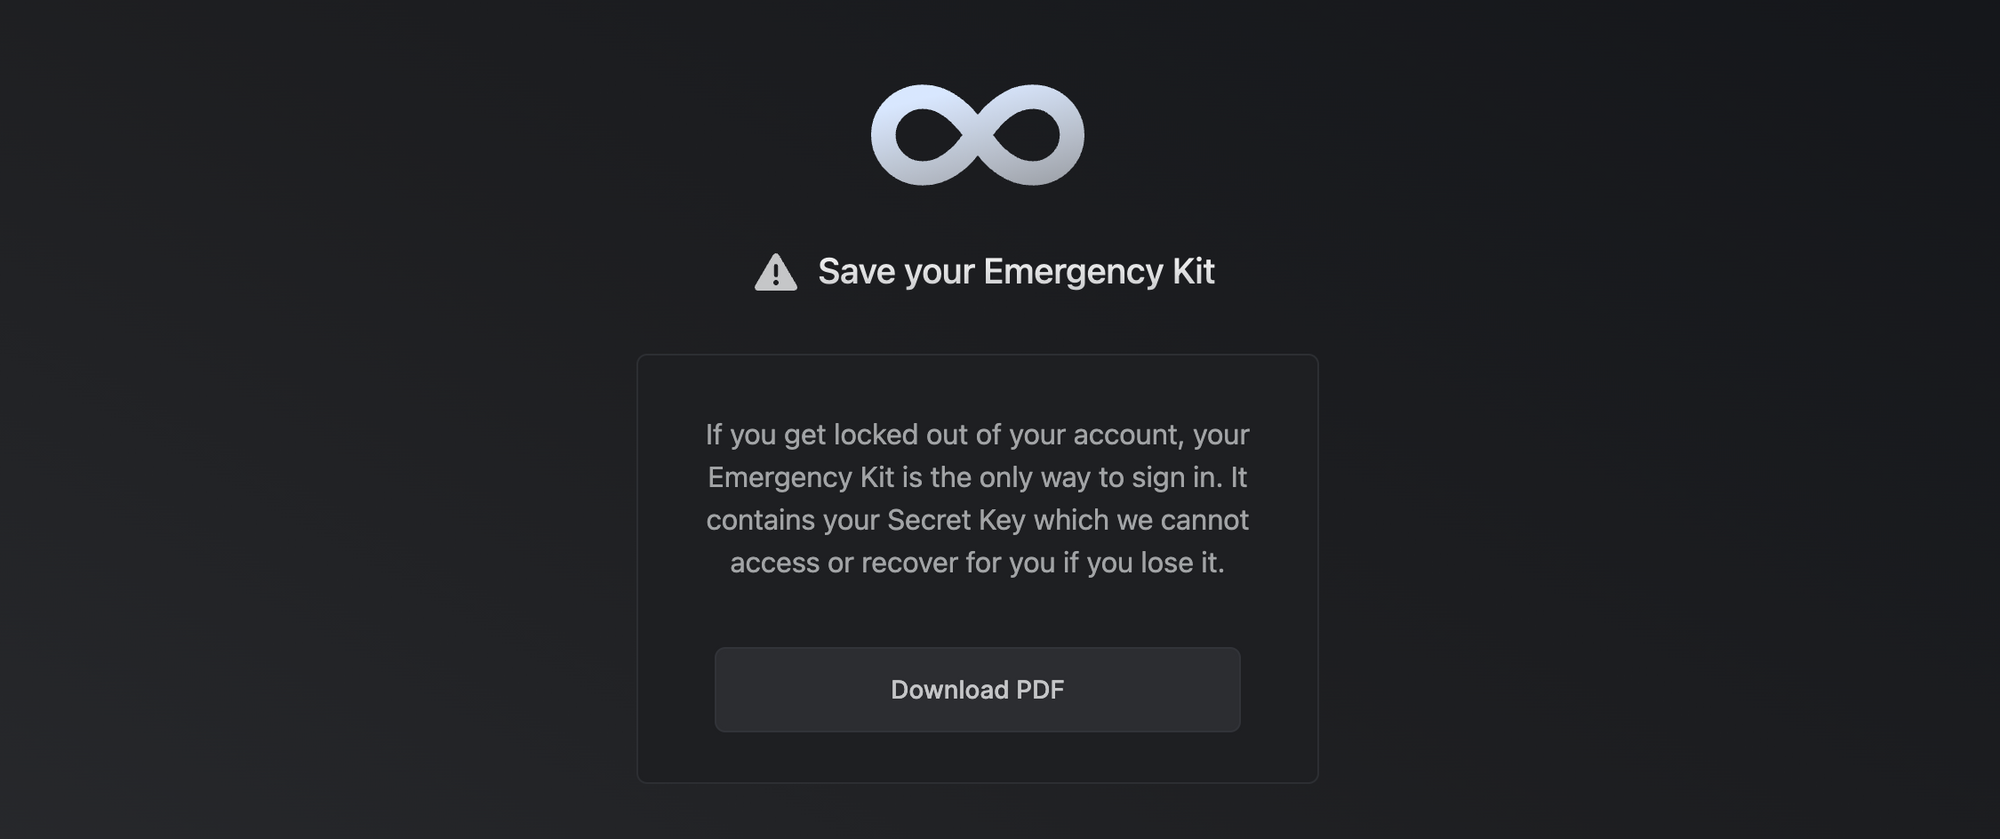
Infisical uses end-to-end encryption (E2EE) to store and share secret values. It uses secure remote password for authentication, and public-key cryptography for secret sharing and sync; see their security statement for more details. In case you are locked out of your account, the Secret Key documented in the Emergency Kit is the only way to access and recover your account. You are recommended to download, print, or otherwise keep it digitally and physically secure.
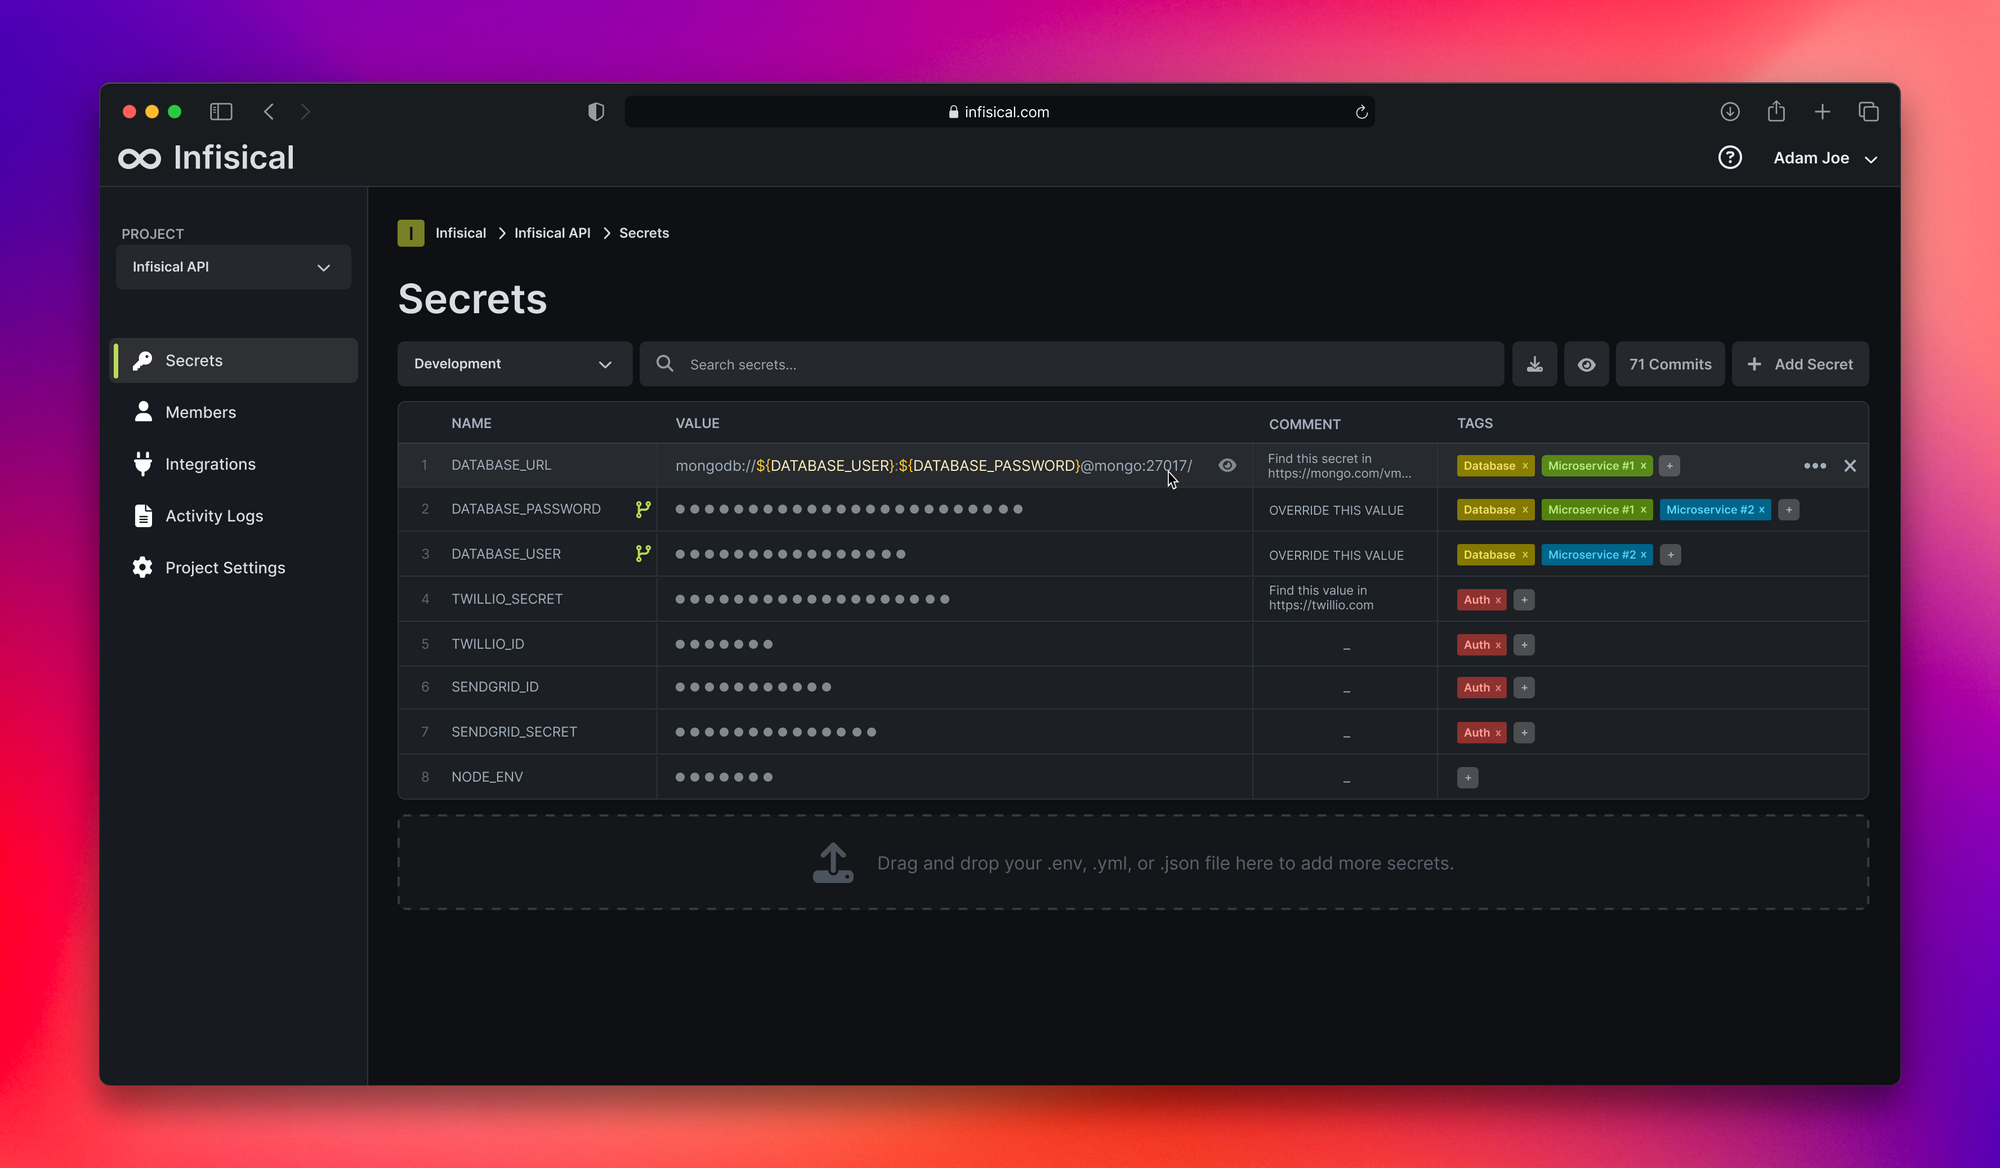
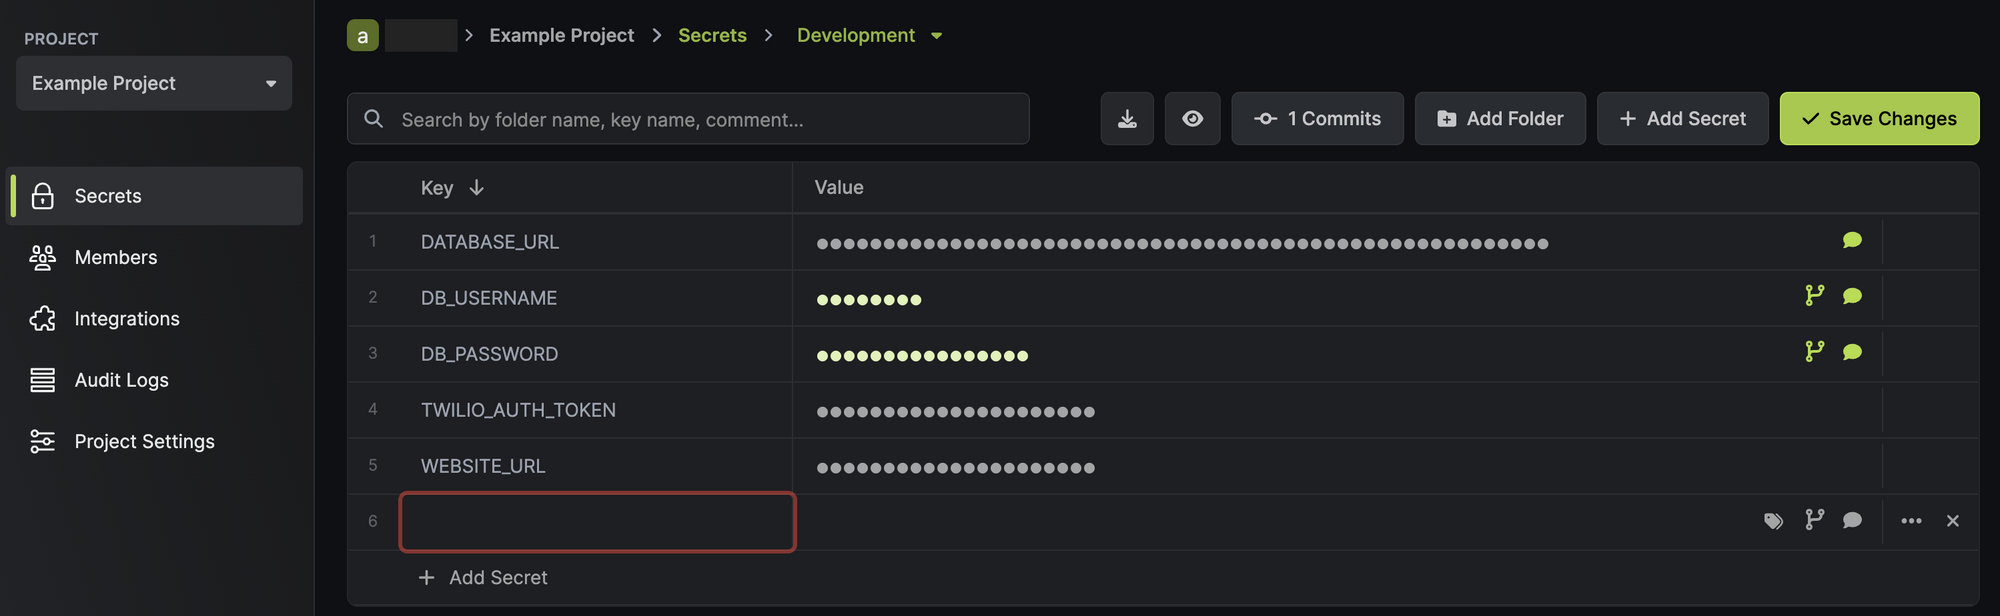
Once you download the PDF kit, you'll be taken to the dashboard, which provides a quick overview of the secrets stored across predefined project environments. By default, you'll see Development, Staging, and Production pre-populated.
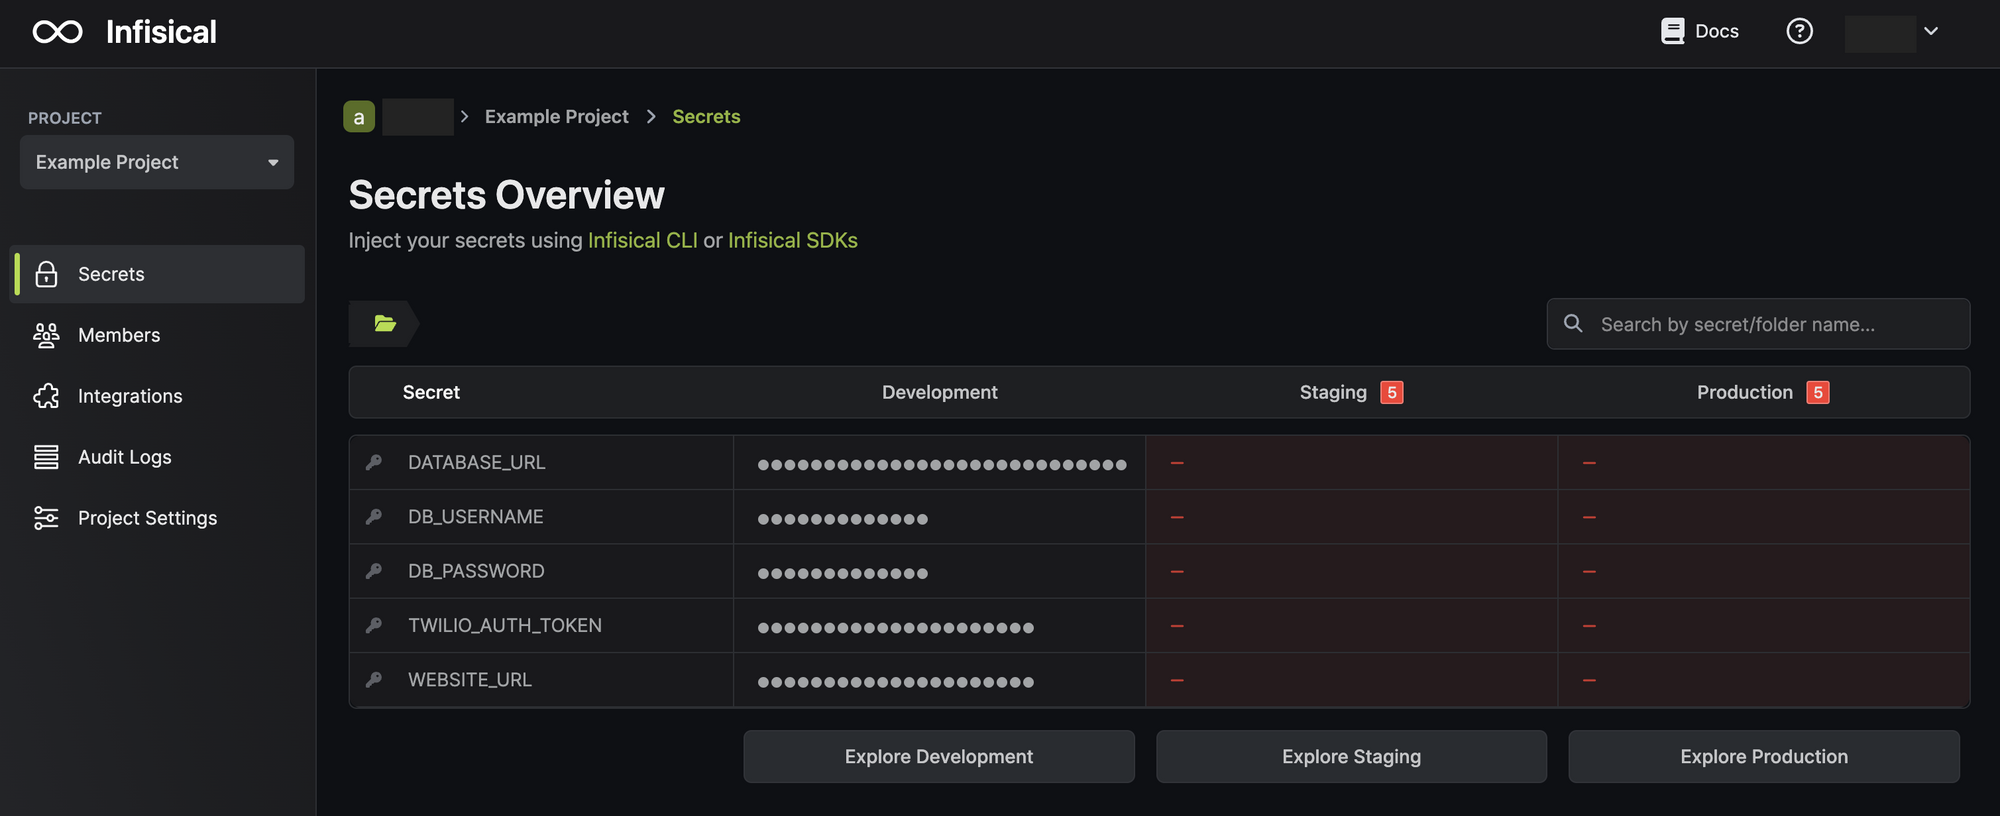
Click on either of the environments to view existing secrets, and to create a new secret. You can create a secret manually, programmatically using the SDKs or API, or by uploading secret files (.env, .json, or .yml).
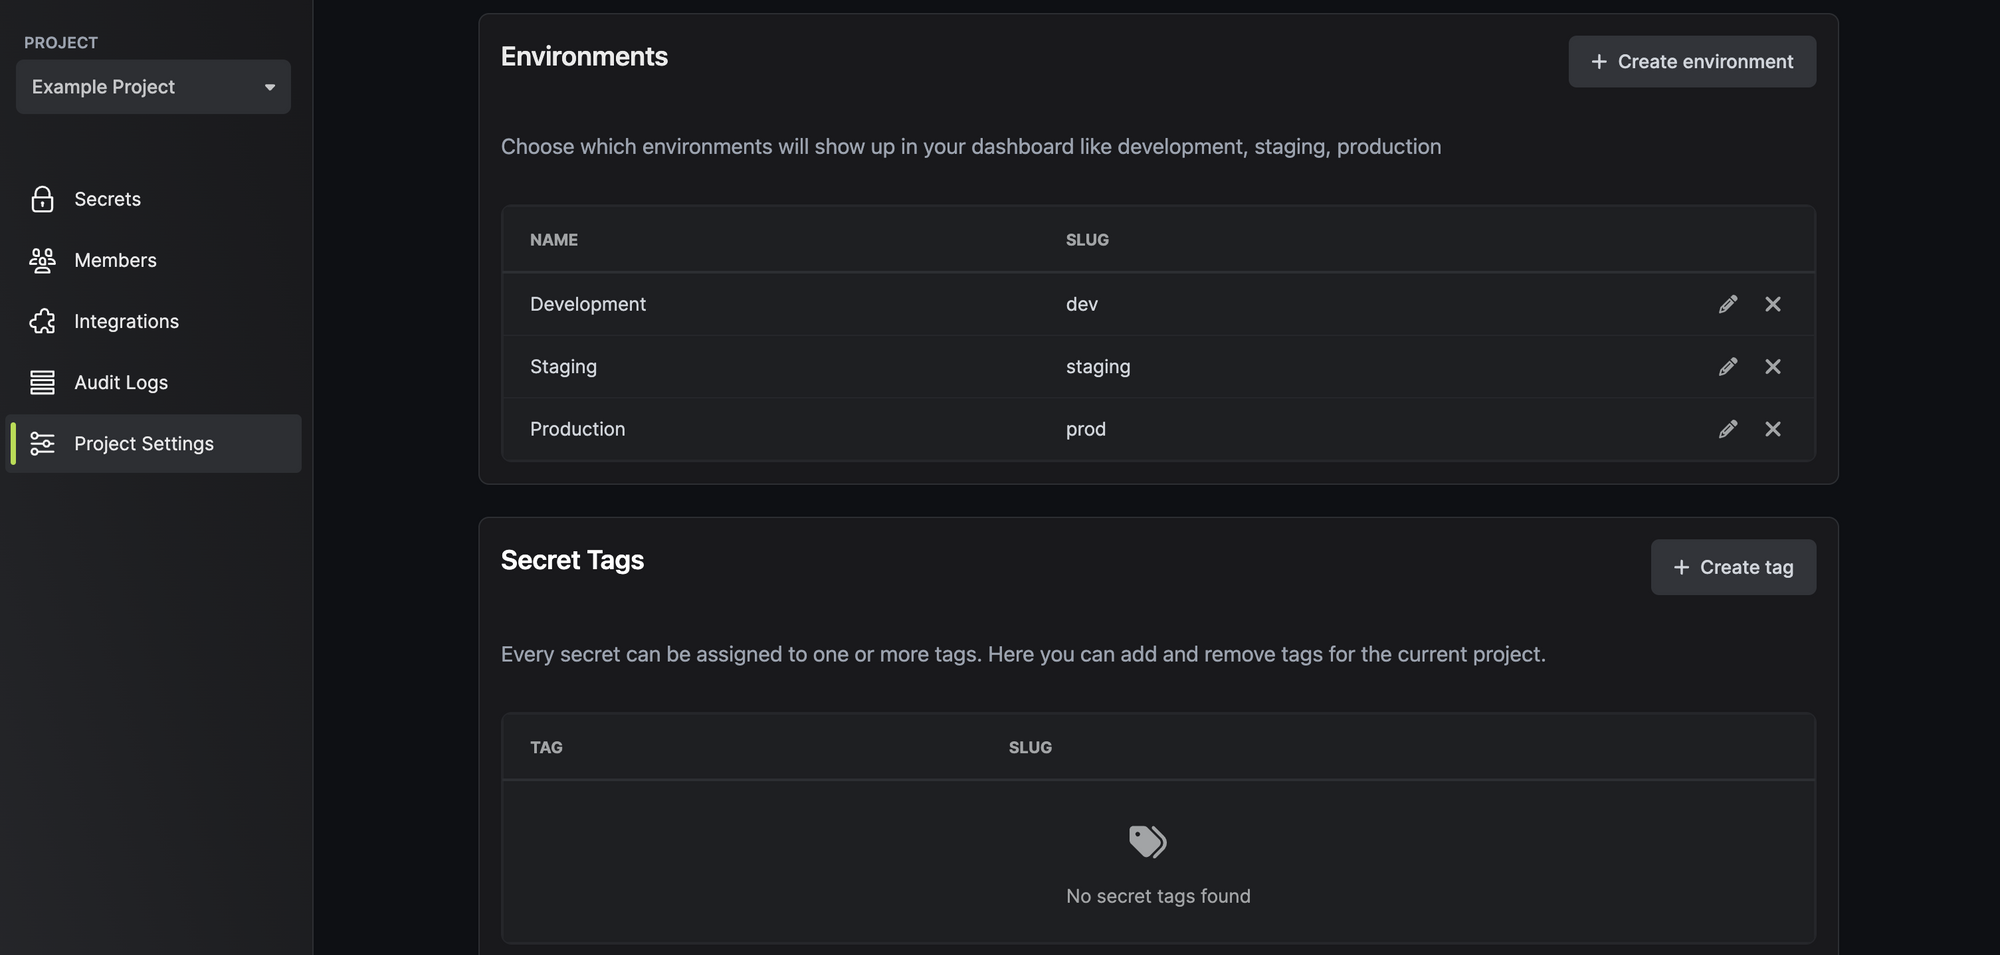
You can assign roles and privileges to individual users across your environments from the Members tab. You can create or modify project environments, secret tags, and decide whether E2EE is necessary for your organization from Project Settings. You can also create service tokens for authenticating the Infisical CLI or granting Infisical SDKs access to specific environments and secret scopes.
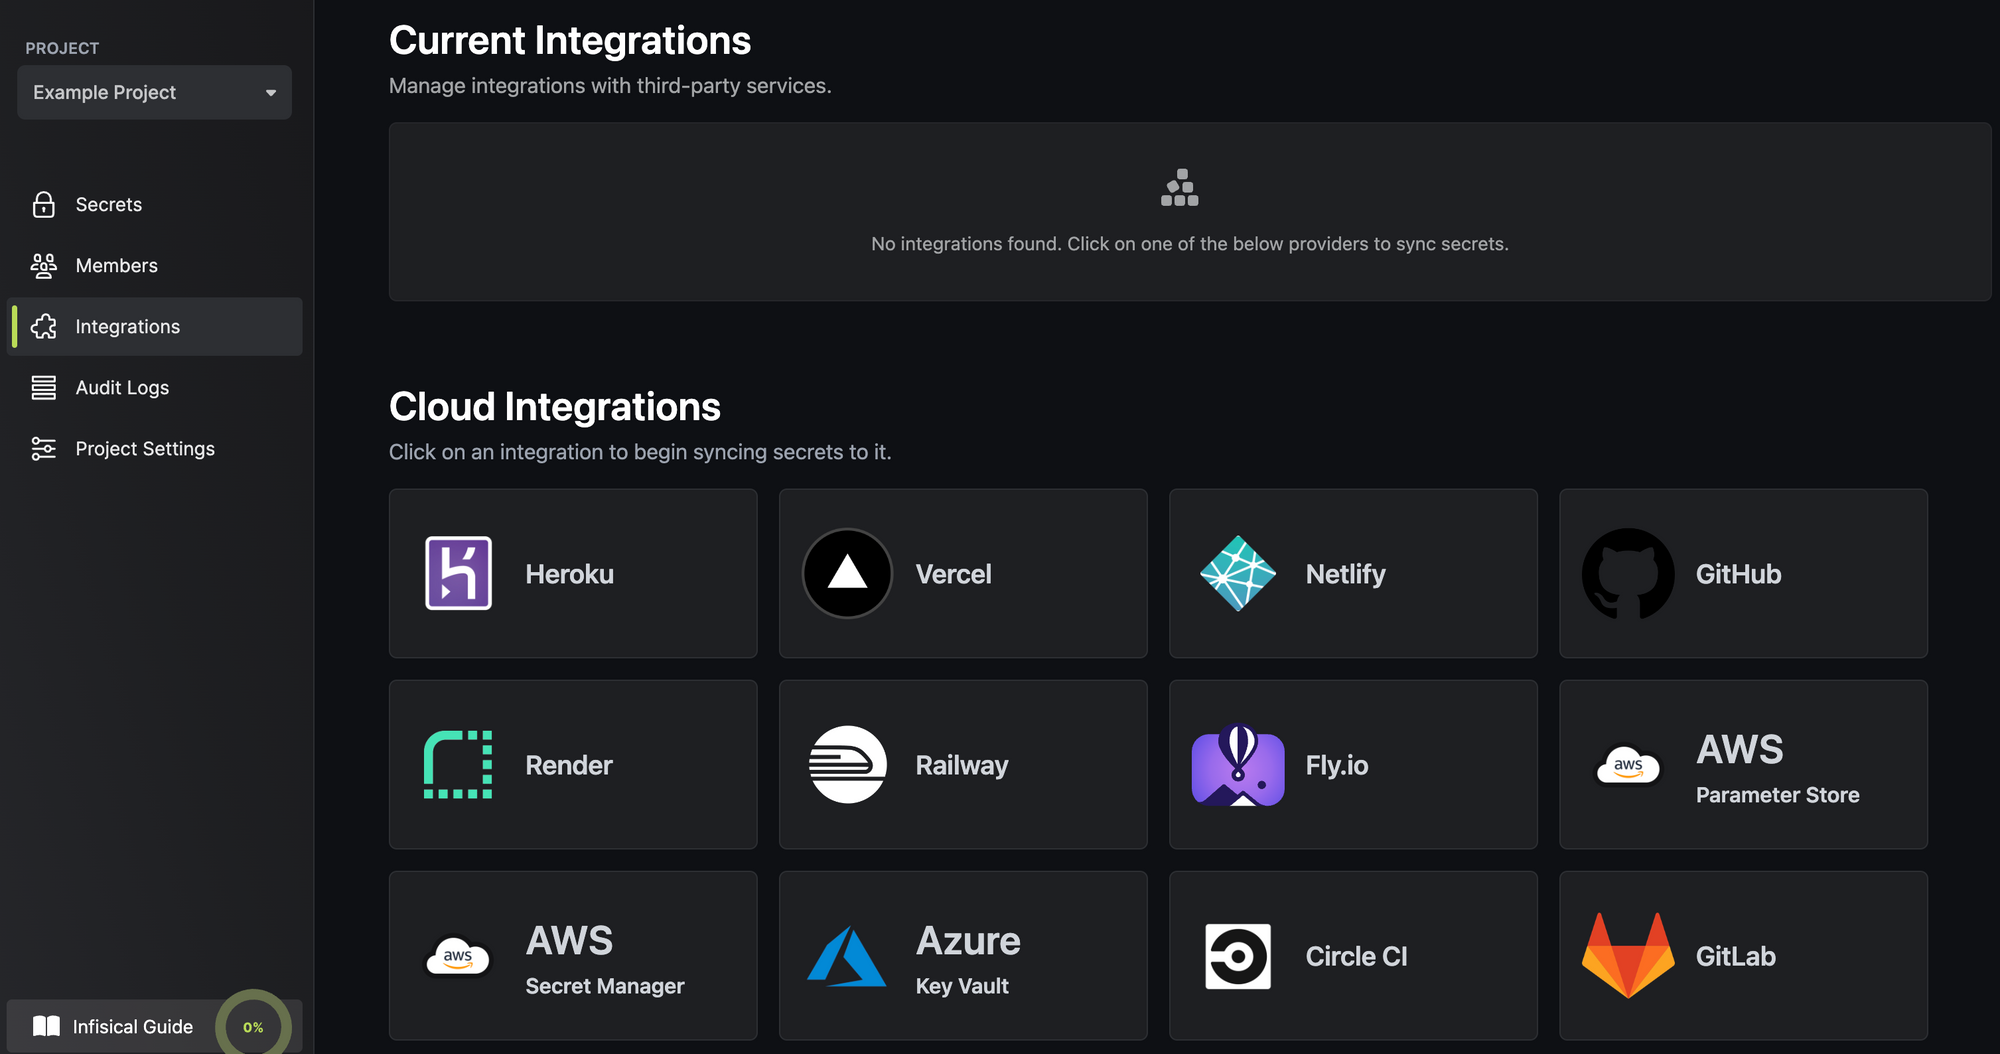
Infisical offers 50+ integrations with cloud service providers and frameworks to sync secrets with CI/CD pipelines and for other operations. Click on Integrations to view and configure access to the providers.
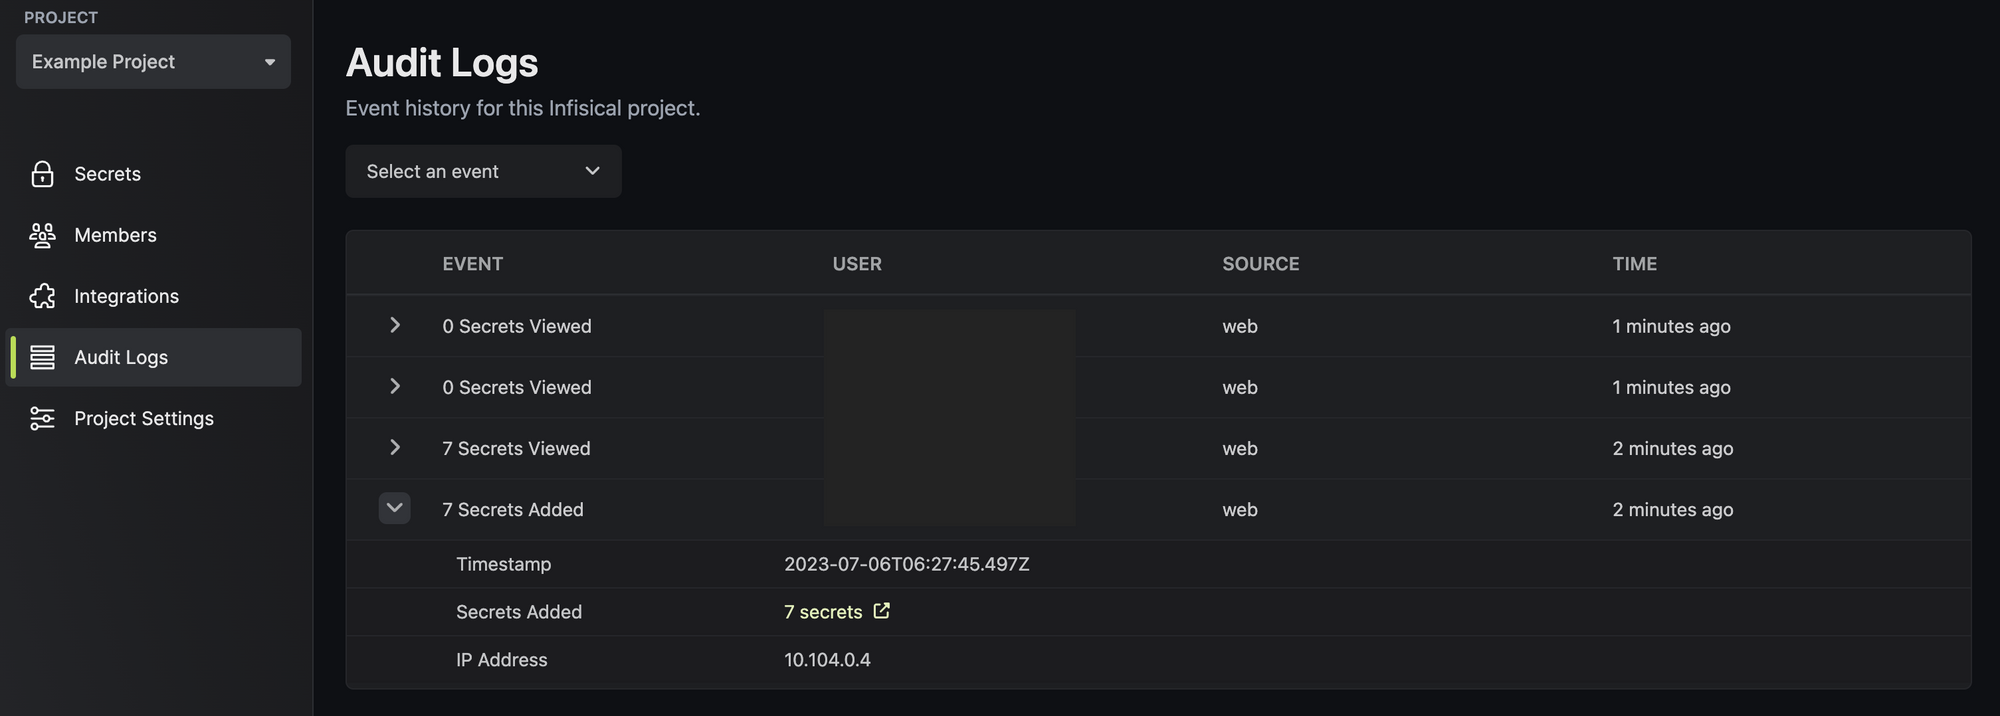
Finally, click on Audit Logs to view all actions going through Infisical, including the operation, user and timestamp.
As you can see, Infisical is quite powerful in what it offers, with plenty more capabilities on the roadmap.