How to Deploy a Static Website with Caddy on Railway
A step-by-step guide to deploying a static website with Caddy Server on Railway.
A couple of months ago, I covered the deployment of a static website with NGINX on Railway. We used NGINX for that walk-through which, while powerful, is also a fairly bloated web server, and often an overkill for simple use cases. Enter Caddy.
What is Caddy Server?
Caddy is a powerful yet simple, Go-based open-source web server. Written in a memory-safe language, it compiles to a single, static binary, making it easy to run Caddy practically anywhere, even in containers. Caddy obtains and renews TLS certificates automatically, staples OCSP responses, and even performs automatic HTTPS rewrites. The modular architecture serves a whole host of use cases from simple static file serving (which we will cover today) to more complex use cases like dynamic reverse proxying and handling Kubernetes ingress.
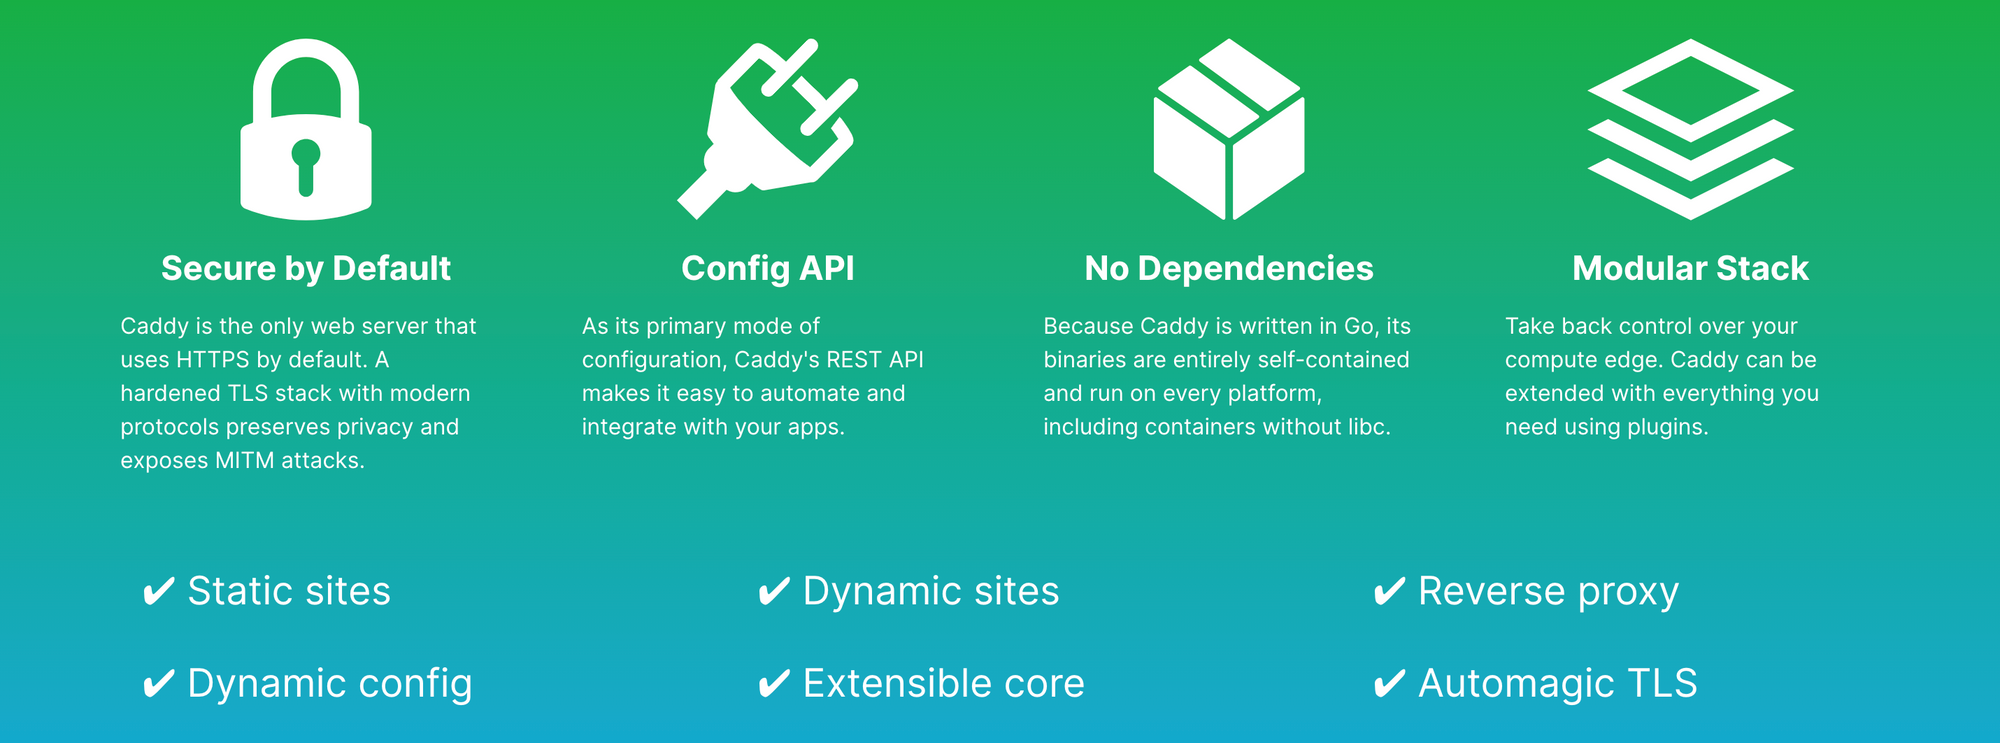
While Caddy's native config language is JSON, most users prefer the Caddyfile - a simple, human-readable config file which works well for most configurations. Caddy is also dynamically configurable using a RESTful JSON API, making it easy to automate and integrate with your applications.
What is Railway?
Railway is a modern app hosting platform that makes it easy to deploy production-ready apps quickly. Railway offers persistent database services for PostgreSQL, MySQL, MongoDB, and Redis, as well as application services with a Github repository as the deployment source. For the latter, Railway can automatically determine the application runtime and deploy the service. Railway offers several one-click starters for common applications and use cases, but they do not have one for Caddy Server at the moment, so I'll deploy from my GitHub repository instead.
Deploy Your Static Website on Railway
Log into your GitHub account and fork my caddy-server repository (I'm going to rename it caddy-on-railway here). By default, the site/ directory gets deployed as a static site, but you can change this from the Dockerfile. Replace the default index.html and styles.css files with your own and add other files as necessary.
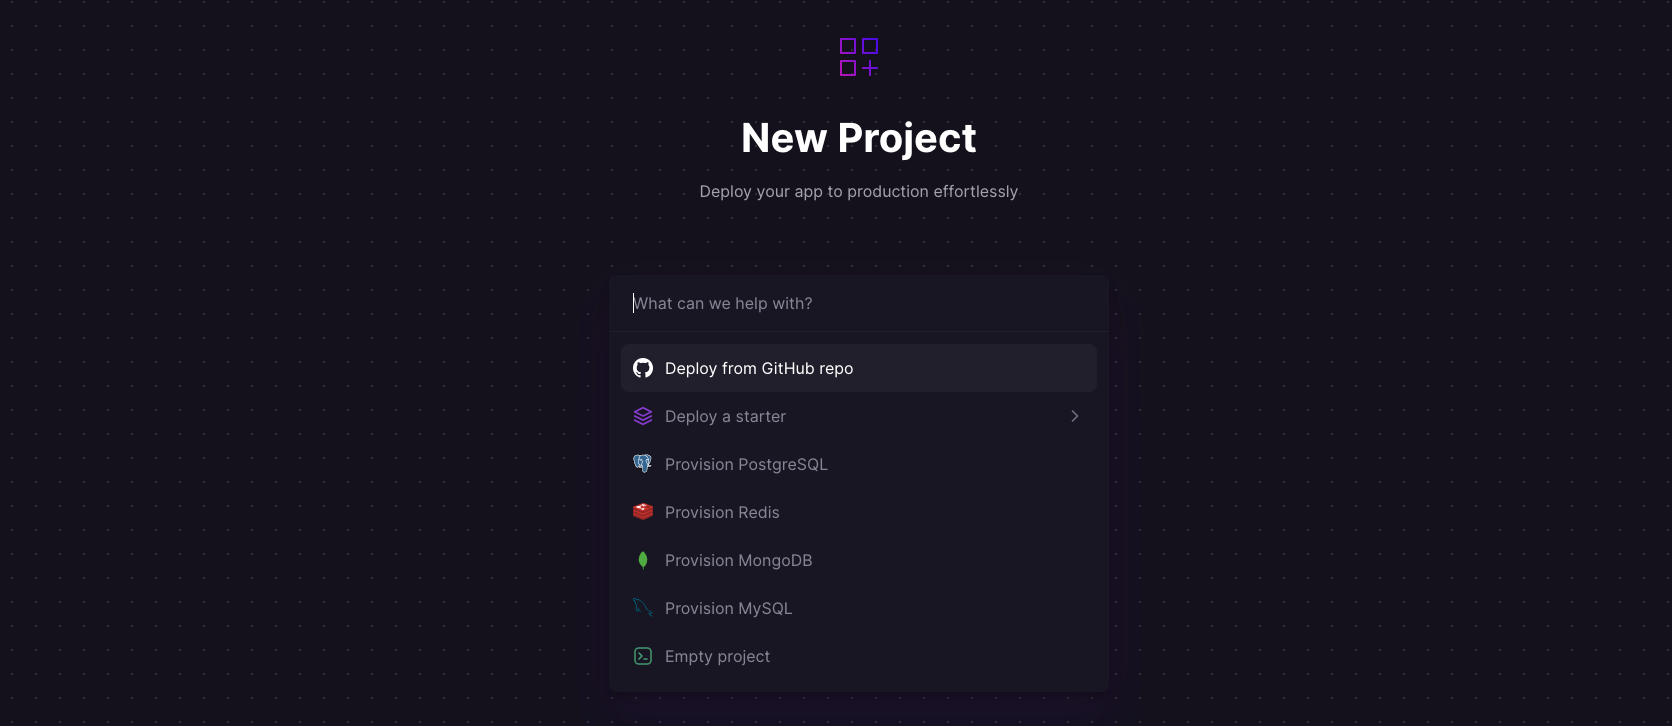
Sign up for an account with Railway using email or GitHub (or log in if you already have an account). If using GitHub, click Authorize Railway App when redirected. Review and agree to Railway's Terms of Service and Fair Use Policy. Click on + New Project > Deploy from GitHub repo, and select your repository.
The deployment will kick off immediately and complete with a Webserver detected message. You need to do two things:
- From the
Settingstab, clickEnablenext to thexxx.up.railway.appdomain name to expose the service to the internet. - From the
Variablestab, add aNew VariablecalledPORTwith the value80, and clickAdd.
Railway will trigger a redeployment shortly. Wait a few seconds - if you click the URL before the service is ready, you may see errors. Once ready, your static website will be available at the xxx.up.railway.app domain.
Railway handles certificate management in this scenario, and we do not need Caddy to repeat it. By excluding hostnames or IP addresses in the Caddyfile, we have already prevented automatic HTTPS activation in Caddy. We can also disable it explicitly by adding auto_https off in the Caddyfile. This will, however, be important when running Caddy in a non-managed environment like DigitalOcean.
Configure a Custom Domain (Optional)
I covered this at length in my previous post - see the final section here.
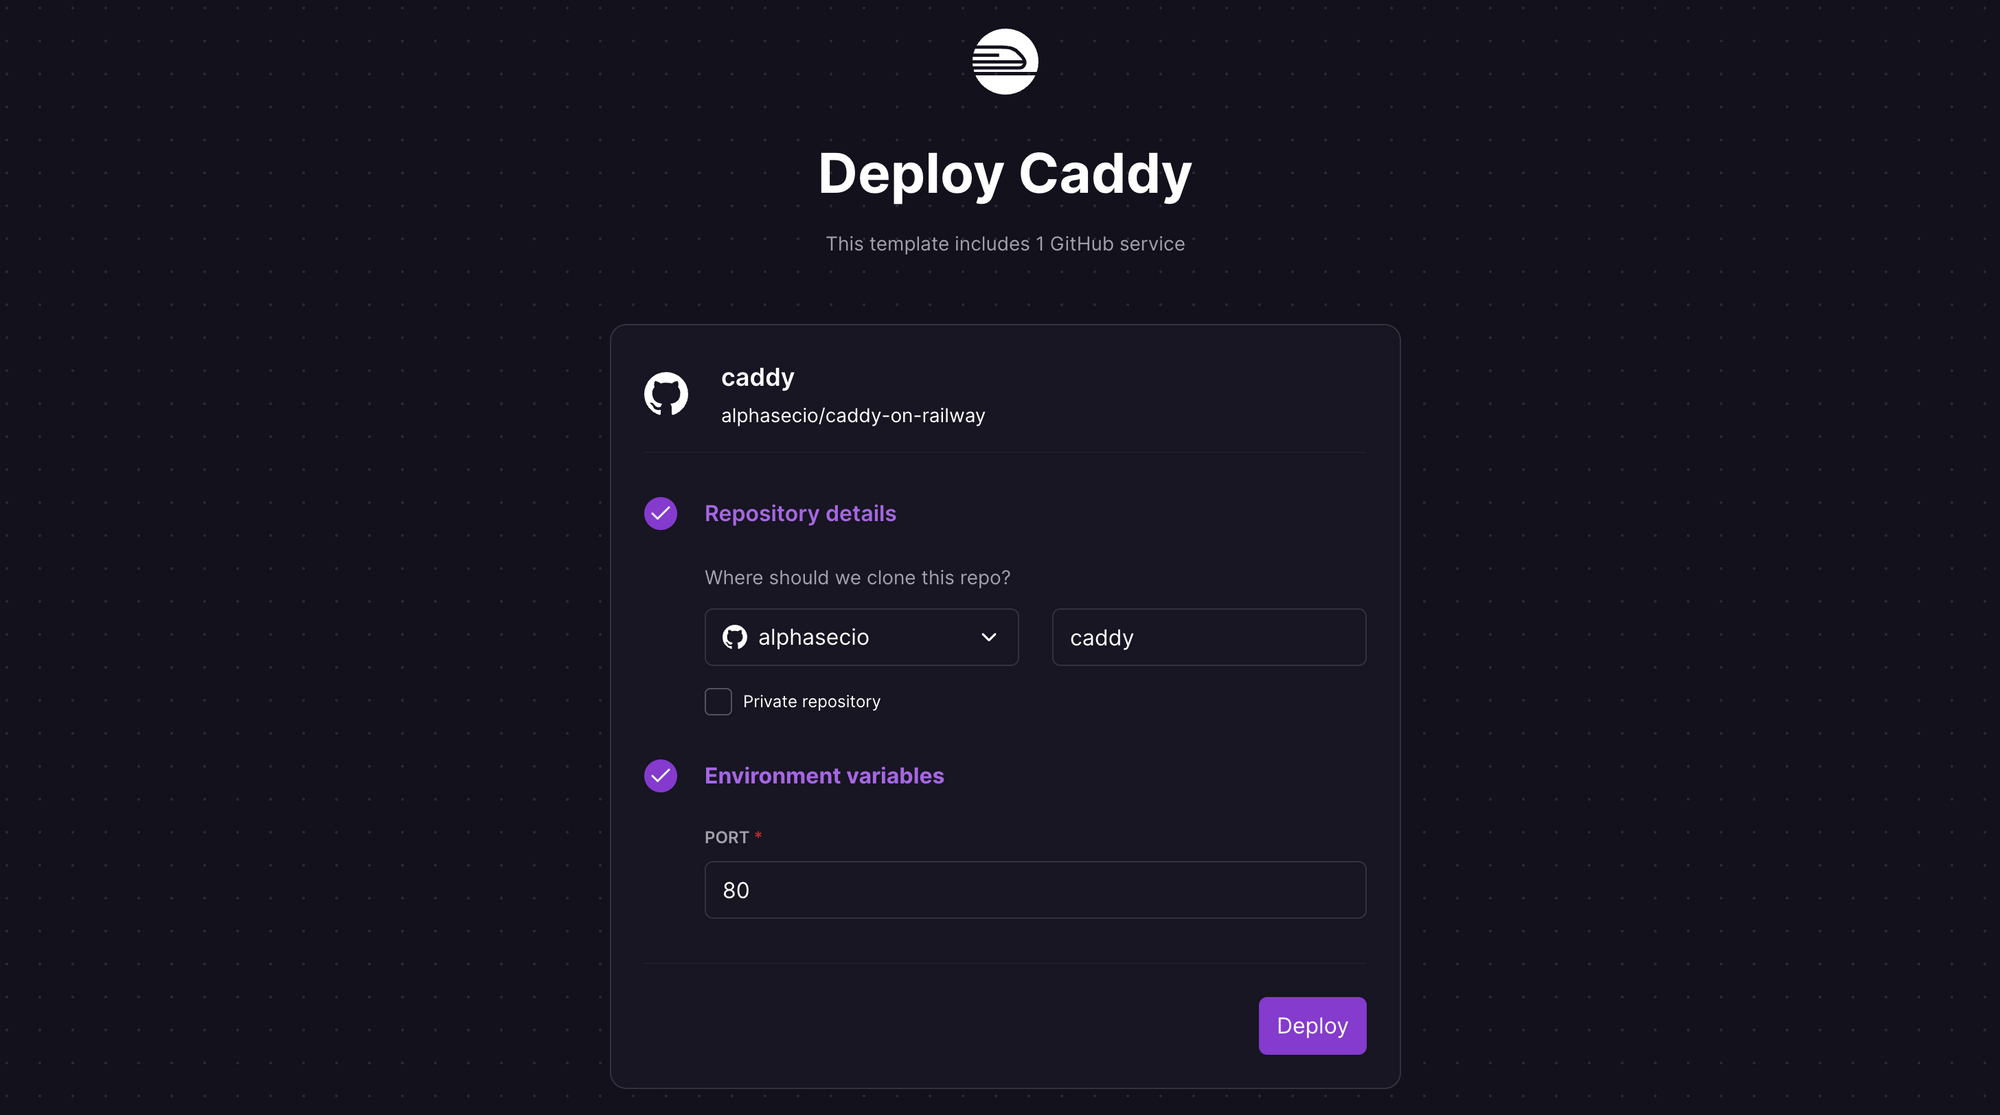
One-Click Deployment
Finally, if you prefer a one-click deployment, simply click this button.

Assuming you have already connected to GitHub, you'll get a service deployment prompt like this - click Deploy and you are done.