Getting Started with Webhooks: Part 1 - Webhook Servers
A comprehensive two-part guide to understanding webhooks; this part focuses on webhook servers.
Webhooks are one of the most common integration patterns in modern software - they allow one system to notify another when something happens, in real time, without polling. In this two-part series, we'll build a webhook server using Node.js and Express (Part 1) and a webhook client using Streamlit (Part 2) from scratch, and deploy both as a two-service template on Railway.
What is a Webhook?
Our world is more intertwined than ever - a digital experience on any given day is the (mostly) harmonious result of a complex web of interconnected systems. These systems are often built using different languages and frameworks, deployed in different locations and modes, billed using different consumption models, and yet, share a common trait - they need to communicate with each other and share data.
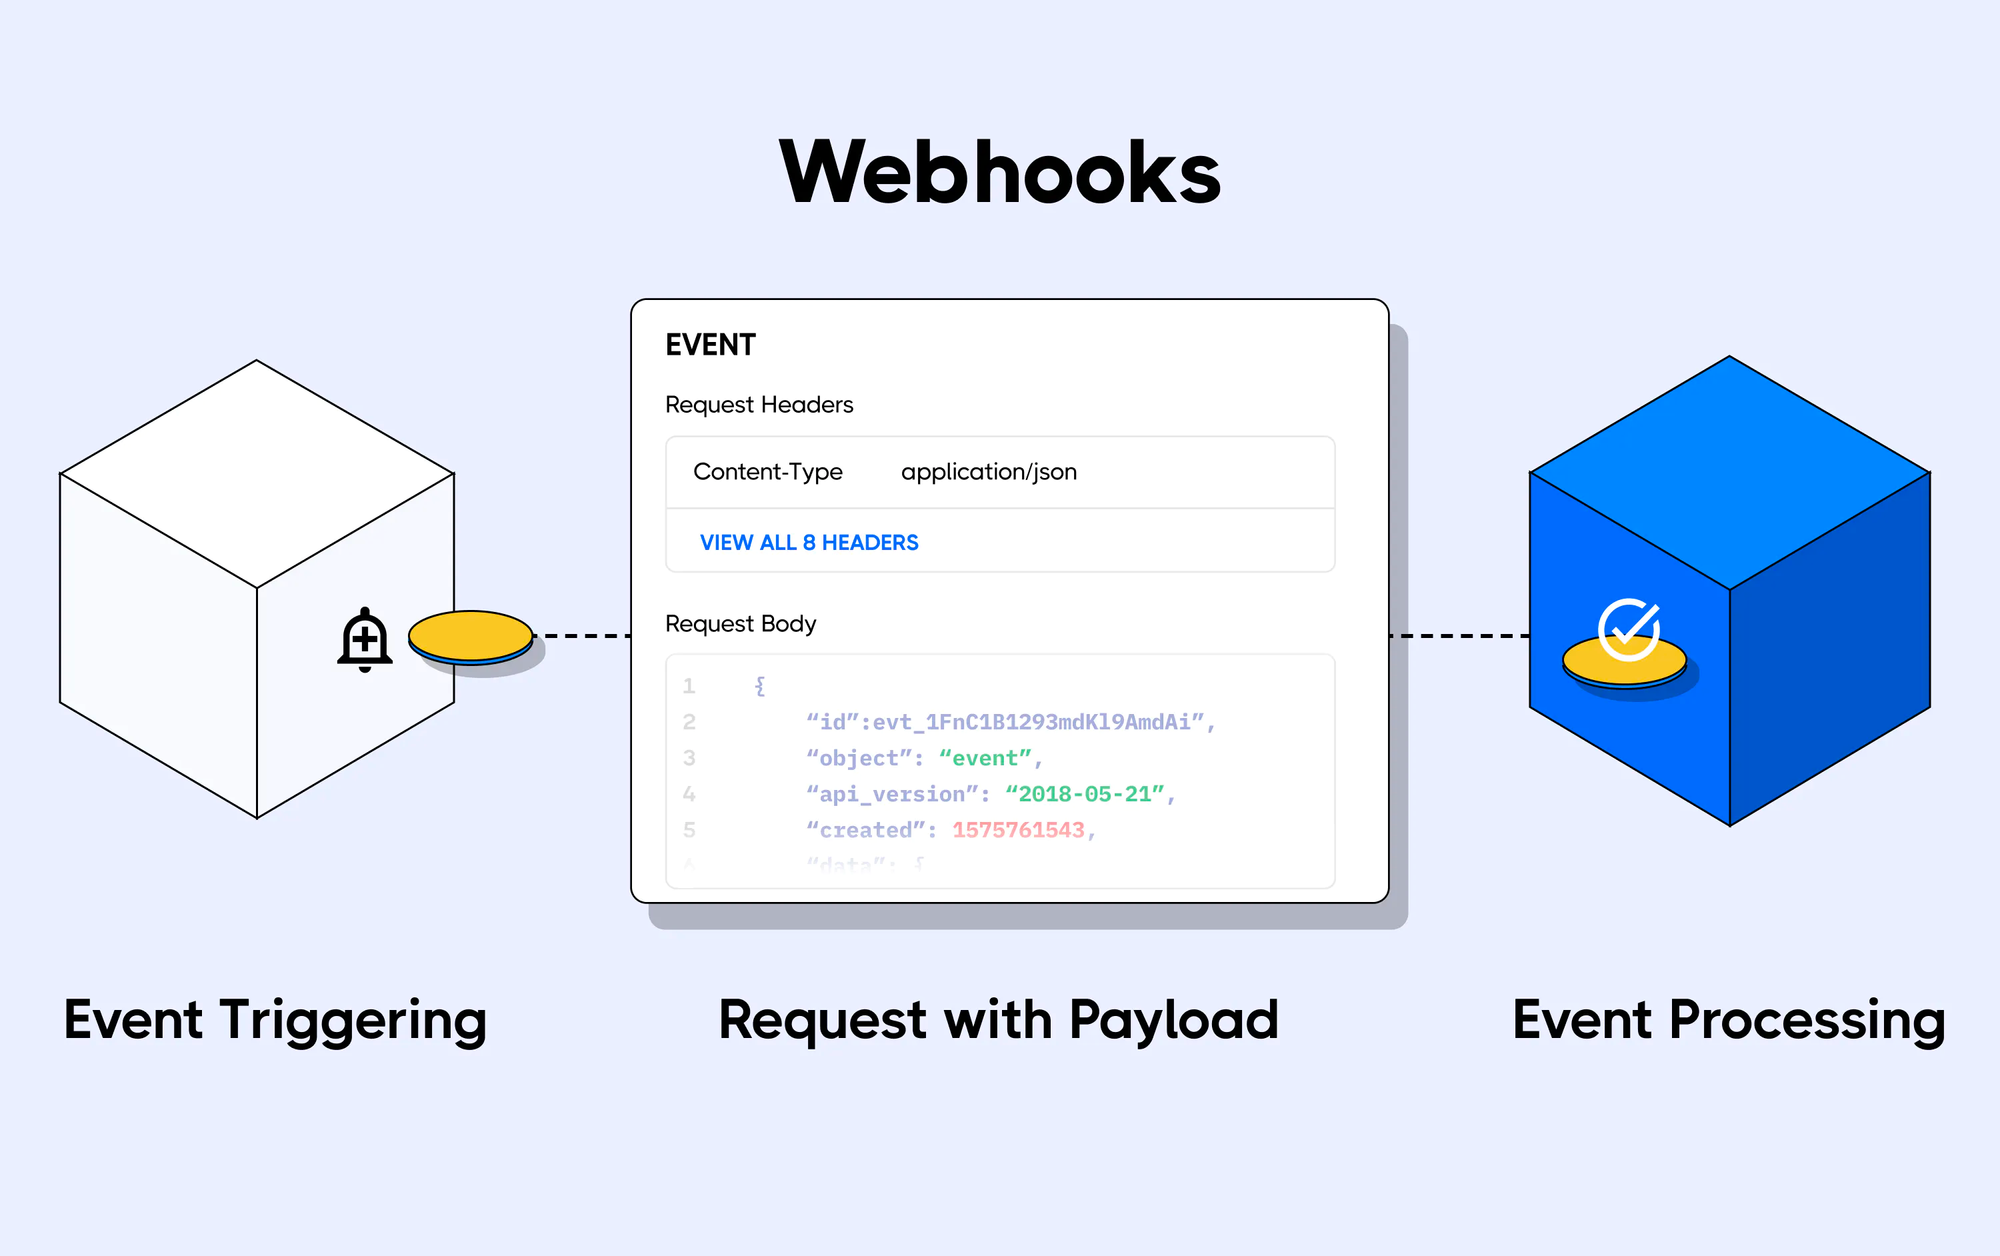
Data is typically shared across heterogenous systems in two ways, via either a push or a pull mechanism. Push notifications often take the form of webhooks. A webhook is an HTTP request (or, in the words of Wikipedia, "user-defined HTTP callbacks"), triggered by an event in a source system and sent to a destination system, often with a payload of data. According to Hookdeck, webhooks provide a way for one system (the source) to "speak" (HTTP request) to another system (the destination) when an event occurs, and share information (request payload) about the event that occurred.
Often used in SaaS platforms like GitHub, Shopify, Stripe, Twilio, and Slack, webhooks are a powerful tool for web developers to receive real-time notifications and data updates from other web applications. Webhooks are versatile and easy to use, and can be used to trigger a wide range of actions, such as sending an email, updating a database, or triggering further downstream actions. To receive webhook requests, you have to register for one or more of the events (also known as topics) for which the platform offers a webhook. Once the webhook registration for an event is complete, you will receive webhook requests at the destination URL you provided each time the event occurs.
The primary alternative to webhooks is polling-based integration, where a client repeatedly requests data from a server at fixed intervals. While this method can be simpler to set up, it can lead to increased latency and resource consumption.
What We're Building - The Webhook Server
The webhook server in this series:
- Listens for POST requests on
/webhook/:event— a single parameterised route that handles any event type - Optionally verifies an HMAC-SHA256 signature on incoming requests
- Logs the event type, headers, and body
- Returns the received payload as JSON
The server is built with Node.js and Express. Here's an excerpt from the server.js; you can find the complete source code here.
const express = require("express");
const cors = require("cors");
const crypto = require("crypto");
const app = express();
const port = process.env.PORT || 3000;
// Middleware
app.use(cors());
app.use(express.json());
app.use(express.urlencoded({ extended: true }));
// HMAC-SHA256 signature verification
function verifySignature(req, secret) {
const signature = req.headers["x-webhook-signature"];
if (!signature) return false;
const expected = `sha256=${crypto
.createHmac("sha256", secret)
.update(JSON.stringify(req.body))
.digest("hex")}`;
try {
return crypto.timingSafeEqual(
Buffer.from(signature),
Buffer.from(expected)
);
} catch {
return false;
}
}
// Routes
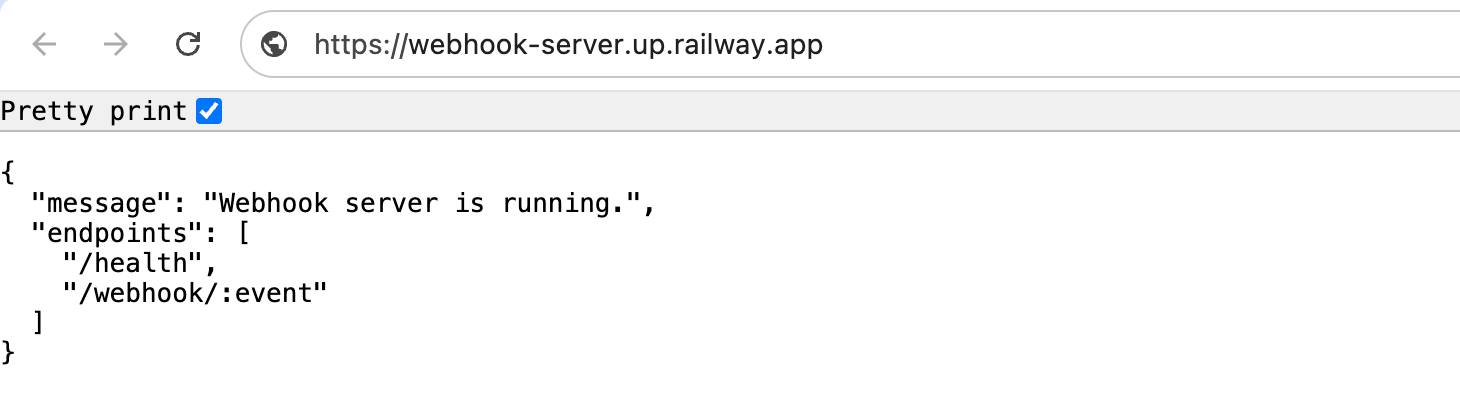
app.get("/", (req, res) => {
res.json({ message: "Webhook server is running.", endpoints: ["/health", "/webhook/:event"] });
});
app.get("/health", (req, res) => {
res.json({ status: "ok" });
});
app.post("/webhook/:event", (req, res) => {
const { event } = req.params;
const eventType = req.headers["x-event-type"] || event;
// Verify signature if WEBHOOK_SECRET is set
if (process.env.WEBHOOK_SECRET) {
if (!verifySignature(req, process.env.WEBHOOK_SECRET)) {
console.warn(`[${new Date().toISOString()}] Invalid signature for event: ${eventType}`);
return res.status(401).json({ error: "Invalid signature." });
}
}
console.log(`[${new Date().toISOString()}] Webhook received`);
console.log("Event:", eventType);
console.log("Headers:", req.headers);
console.log("Body:", JSON.stringify(req.body, null, 2));
res.json({
message: `Webhook received successfully.`,
event: eventType,
receivedData: req.body,
});
});
// Error handler (must be registered after routes)
app.use((err, req, res, next) => {
console.error("Error:", err.stack);
res.status(500).json({ error: "Internal Server Error" });
});
app.listen(port, () => {
console.log(`Webhook server running at http://localhost:${port}/`);
});Deploying the Webhook Server on Railway
You can deploy the webhook server with the one-click Railway template:

Once the deployment completes, the webhook server will be available at a default xxx.up.railway.app domain - launch this URL and verify that the webhook server is running. If you are interested in setting up a custom domain, I covered it at length in a previous post - see the final section here.
The Railway template deploys the server with a railway.toml that sets the start command and health check path automatically:
[deploy]
startCommand = "node server.js"
healthcheckPath = "/health"
A Few Thoughts
Parameterised Routes
The server uses a single route /webhook/:event. The :event segment matches any value — user.created, payment.succeeded, deploy.finished — and is available as req.params.event. This mirrors how real webhook providers work and means you don't need to add a new route for every event type.
HMAC-SHA256 Signature Verification
This is the most important security concept in webhook handling. Without it, anyone who discovers your endpoint URL can send arbitrary payloads to it. The pattern works like this:
- Both sides share a secret string (set as
WEBHOOK_SECRETon the server) - The sender hashes the payload body with the secret using
HMAC-SHA256 - The sender sends the hash as a header:
X-Webhook-Signature: sha256=<hex_digest> - The receiver independently computes the same hash and compares — if they match, the payload is authentic
The comparison uses crypto.timingSafeEqual rather than === to prevent timing attacks, where an attacker could infer the correct signature by measuring how long the comparison takes.
WEBHOOK_SECRET is optional in this implementation — if it's not set, all requests are accepted. This makes the server easy to test without secrets, while being production-ready when the variable is set.
Health Endpoint
The /health endpoint returns { "status": "ok" } and is used by Railway's health check system to confirm the service started correctly. Without it, Railway falls back to TCP port detection, which is less reliable.
In Part 2, we'll build the Streamlit client that signs and sends requests to this server, also deployed on Railway as part of the same template.