How to Set up Your Own VPN Server using Algo
A step-by-step guide to setting up your own VPN server using Algo and WireGuard on DigitalOcean.
Virtual Private Networks (VPNs) have long been used to hide the origin IP address for privacy reasons, or to access geo-restricted services, or to surf the internet securely on public wifi networks. Most VPN providers collect and store session metadata and logs though, and while you may not be doing anything nefarious, the feeling of being monitored can be unnerving. This leads you to two choices - find privacy-focused VPN services, or host the VPN server yourself.
If you prefer the first option, have a look at my post on private VPN providers. If, instead, you are a do-it-yourself privacy nerd, this post is for you. Read on to understand how you can use Algo with WireGuard and set up your own VPN server on DigitalOcean.
What is WireGuard?
WireGuard® is a security-focused virtual private network (VPN) protocol that also aims to be faster and simpler than traditional protocols like IPsec and OpenVPN. WireGuard securely encapsulates IP packets over UDP; it uses public-key cryptography for the initial handshake, but leaves key distribution responsibilities to higher layers. WireGuard is preferred by most new-age VPN software and is also my protocol of choice. Read this post first if you want a primer on WireGuard.

What is Algo VPN?
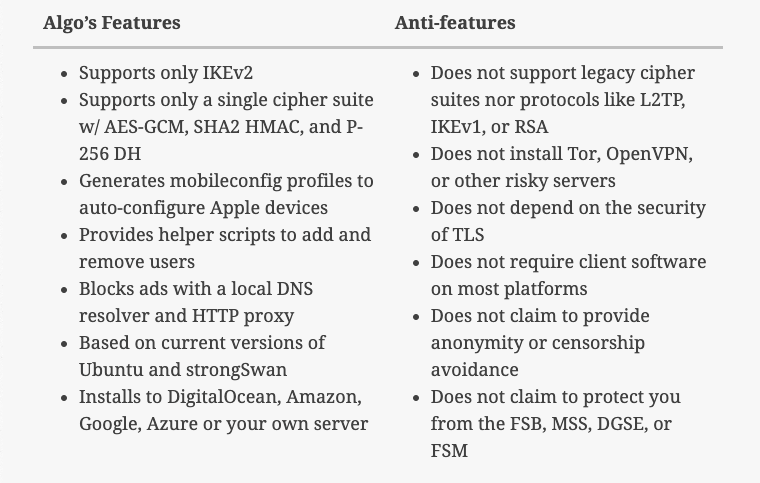
Algo was introduced in 2016 by Trail of Bits, a security research and services provider, as a self-hosted VPN server focused on security and ease of use. It is open source, and relies on modern protocols and cipher suites. For folks looking to host their own VPN servers, OpenVPN has generally been the preferred option, but it relies on TLS and has had several security issues in the past, so I dropped it in favour of Algo VPN. FWIW, Tailscale is also a rapidly growing alternative that uses social logins, and I plan to explore it in a future post.
From Algo's Github page:
Algo VPN is a set of Ansible scripts that simplify the setup of a personal WireGuard and IPsec VPN.
Here are some additional features from Algo's launch announcement - this post also includes commentary into the origins of Algo and tradeoffs from Trail of Bits.
Create an Ubuntu Instance on DigitalOcean
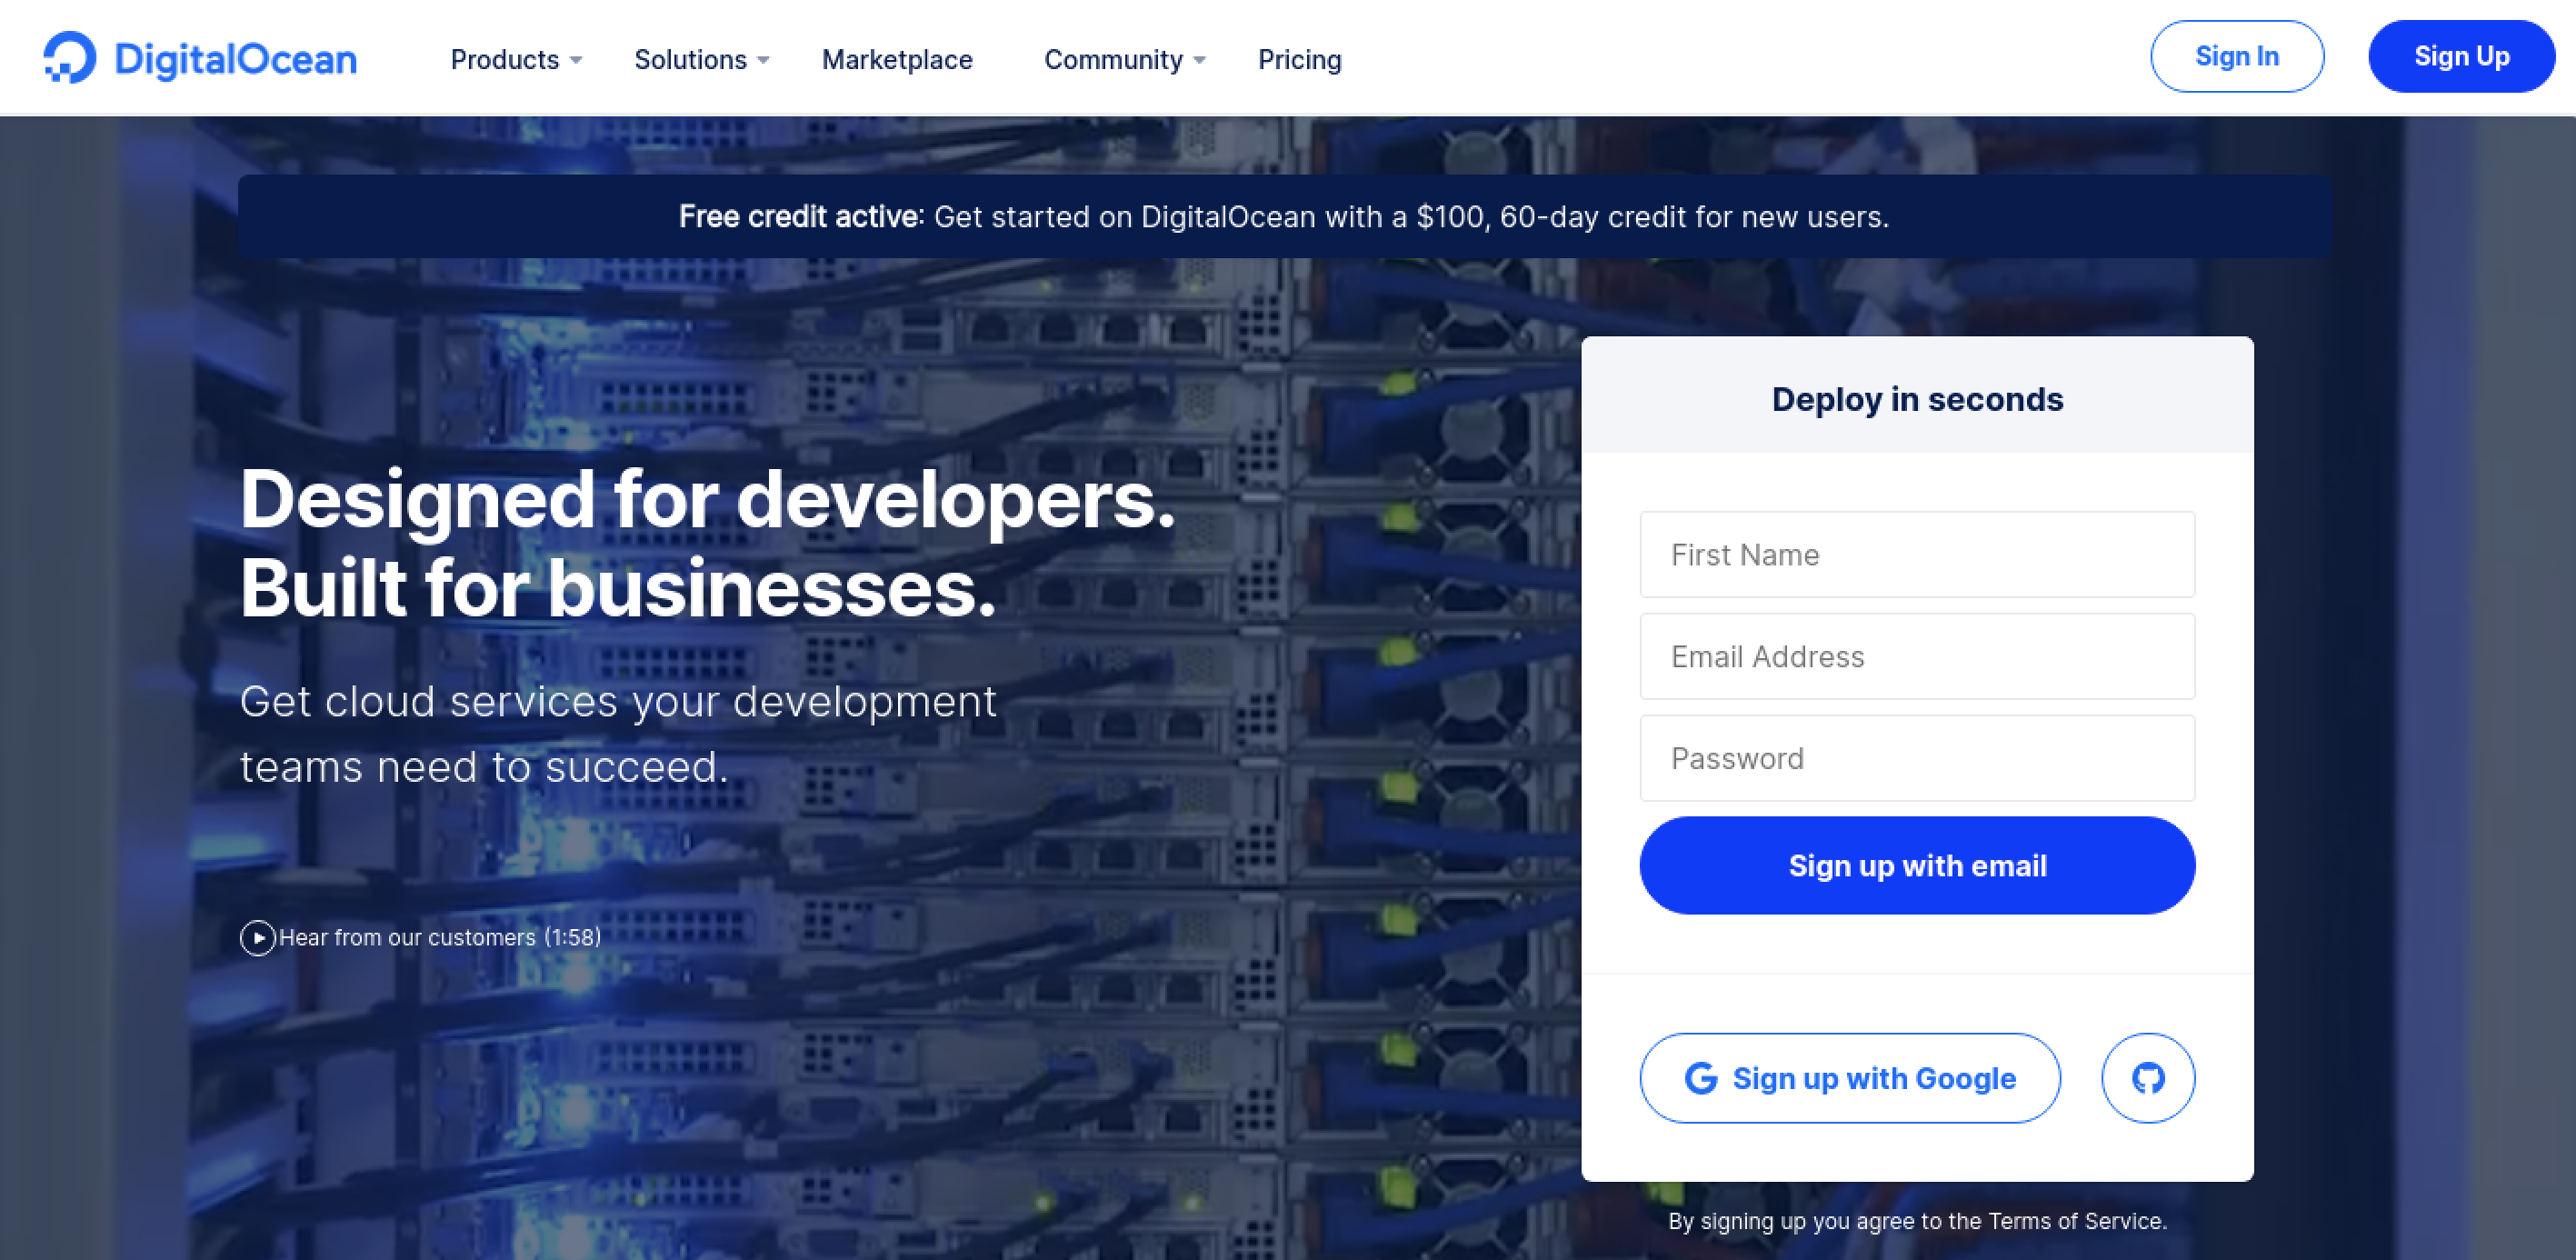
Let's start with DigitalOcean now - if you don't have an account, sign up here. If you sign up using my link, you’ll receive a $200, 60-day credit as soon as you add a valid payment method to your account. And while this is not as generous as the always-free products offered by GCP or AWS, it is enough to get started and decide whether self-hosting is for you or not.
Assuming you are familiar with droplet creation in DigitalOcean, I won't go into step-by-step detail. Basically, you need to choose a plan, an image (Ubuntu 20.04), the data center region, an authentication option (password for now, but SSH in a real environment) and the hostname. The region you choose will probably be the most important consideration here - keep your VPN use cases in mind as you decide. Note the public IP address of the droplet once it has been created.
Deploy Algo VPN Server
Hardening the Ubuntu instance is outside the scope of this post but, if you plan to rely on it for serious work, do consider securing the image before installing Algo.
Select your droplet and launch the Droplet Console as root from the menu options. Run the following commands to update the instance, and install the Algo VPN package along with its dependencies.
# Update the package metadata and packages to the latest versions
apt update && apt upgrade

# Clone the Algo repository from Github into algo directory
git clone https://github.com/trailofbits/algo.git

# Install Python 3 supporting packages; Python should already be present
apt install -y --no-install-recommends python3-virtualenv

# Change to the algo directory and install remaining dependencies
cd algo
python3 -m virtualenv --python=/usr/bin/python3 .env
source .env/bin/activate
python3 -m pip install -U pip virtualenv
python3 -m pip install -r requirements.txt
Now is the time for you to think through the users and devices that will access this VPN server. Ideally, create a separate entry for each device/user combination. If you want to add or delete users later, you must select yes at the Do you want to retain the keys (PKI)? prompt during deployment.
# Open config.cfg in your favourite text editor
nano config.cfg

# Update the users section and save the file; example below
users:
- algo_mac
- algo_iphone
- algo_android
- algotest_mac
Let's start the Algo deployment now.
# From the algo directory, deploy Algo and follow the prompts
./algo

[Cloud prompt]
What provider would you like to use?
    1. DigitalOcean
    2. Amazon Lightsail
    3. Amazon EC2
    4. Microsoft Azure
    5. Google Compute Engine
    6. Hetzner Cloud
    7. Vultr
    8. Scaleway
    9. OpenStack (DreamCompute optimised)
    10. CloudStack (Exoscale optimised)
    11. Linode
    12. Install to existing Ubuntu 18.04 or 20.04 server (for more advanced users)

Enter the number of your desired provider
: 12

[VPN server name prompt]
Name the vpn server
[algo]
: algo

[Cellular On Demand prompt]
Do you want macOS/iOS clients to enable "Connect On Demand" when connected to cellular networks?
[y/N]
: N

[Wi-Fi On Demand prompt]
Do you want macOS/iOS clients to enable "Connect On Demand" when connected to Wi-Fi?
[y/N]
: N

[Retain the PKI prompt]
Do you want to retain the keys (PKI)? (required to add users in the future, but less secure)
[y/N]
: N

[DNS adblocking prompt]
Do you want to enable DNS ad blocking on this VPN server?
[y/N]
: N

[SSH tunneling prompt]
Do you want each user to have their own account for SSH tunneling?
[y/N]
: N

[local : pause]
https://trailofbits.github.io/algo/deploy-to-ubuntu.html
Local installation might break your server. Use at your own risk.
Proceed? Press ENTER to continue or CTRL+C and A to abort...: <ENTER>

[local : pause]
Enter the IP address of your server: (or use localhost for local installation):
[localhost]
<ENTER>

[local : pause]
Enter the public IP address or domain name of your server: (IMPORTANT! This is used to verify the certificate)
[localhost]
: <PUBLIC_IP_ADDRESS_OF_DROPLET>
The installation will take a couple of minutes. Once done, you'll get the following congratulatory message. Make note of and store the p12 and SSH keys password in a secure location - it will not be displayed again.
ok: [localhost] => {
"msg": [
[
"\"#       		Congratulations!                           #\"",
"\"#            Your Algo server is running.   	                   #\"",
"\"# Config files and certificates are in the ./configs/ directory.#\"",
"\"#         Go to https://whoer.net/ after connecting             #\"",
"\"#   and ensure that all your traffic passes through the VPN.    #\"",
"\"#              Local DNS resolver 172.18.168.73                 #\"",
""
],
"\"#  The p12 and SSH keys password for new users is <PASSWORD>  #\"\n",
"    ",
"    "
]
}
Configure DigitalOcean Firewall
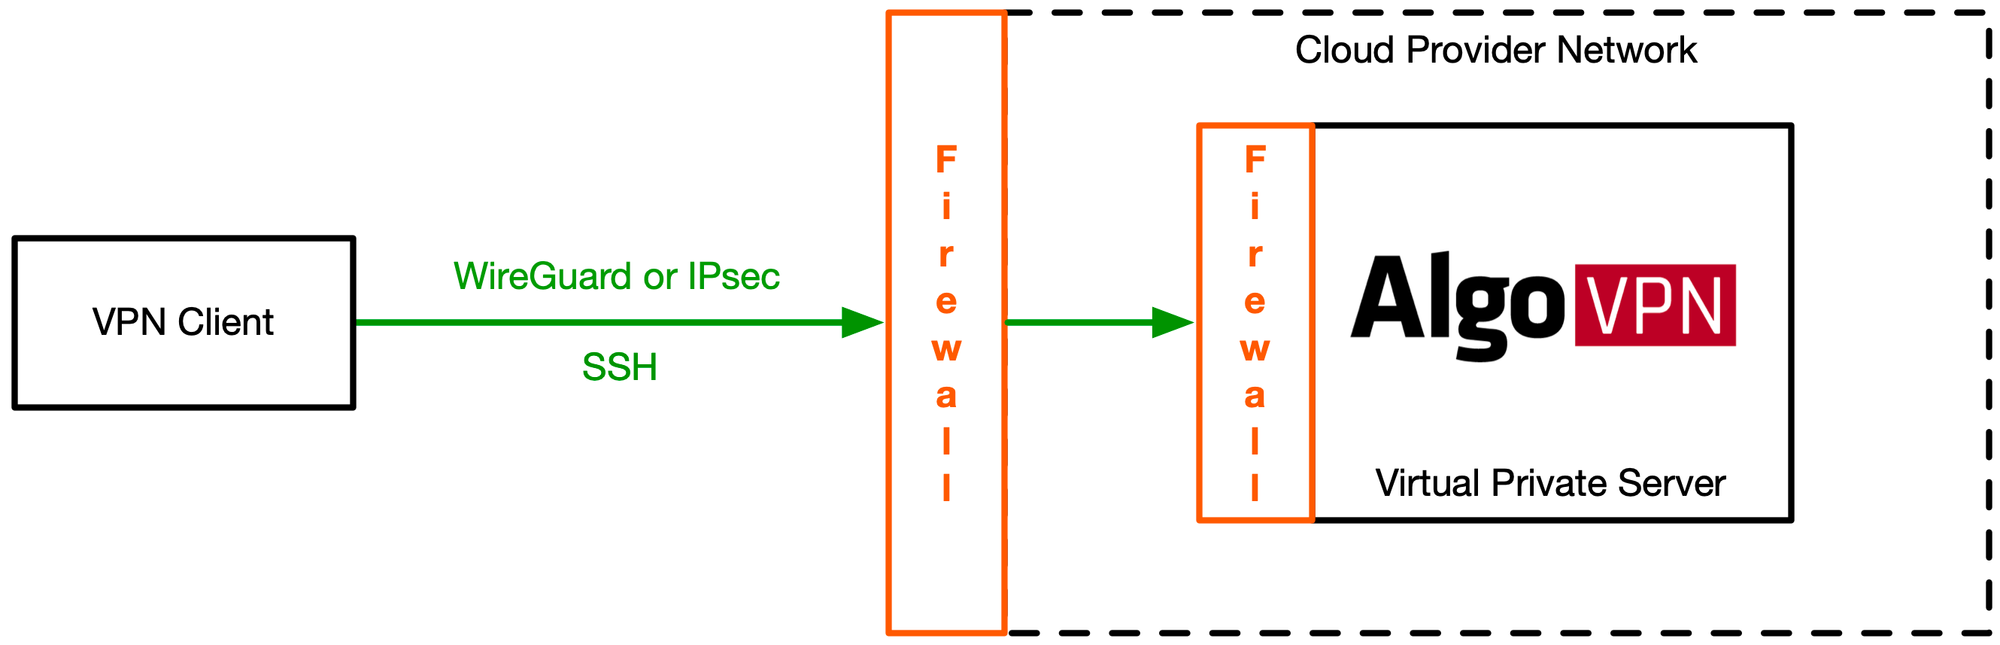
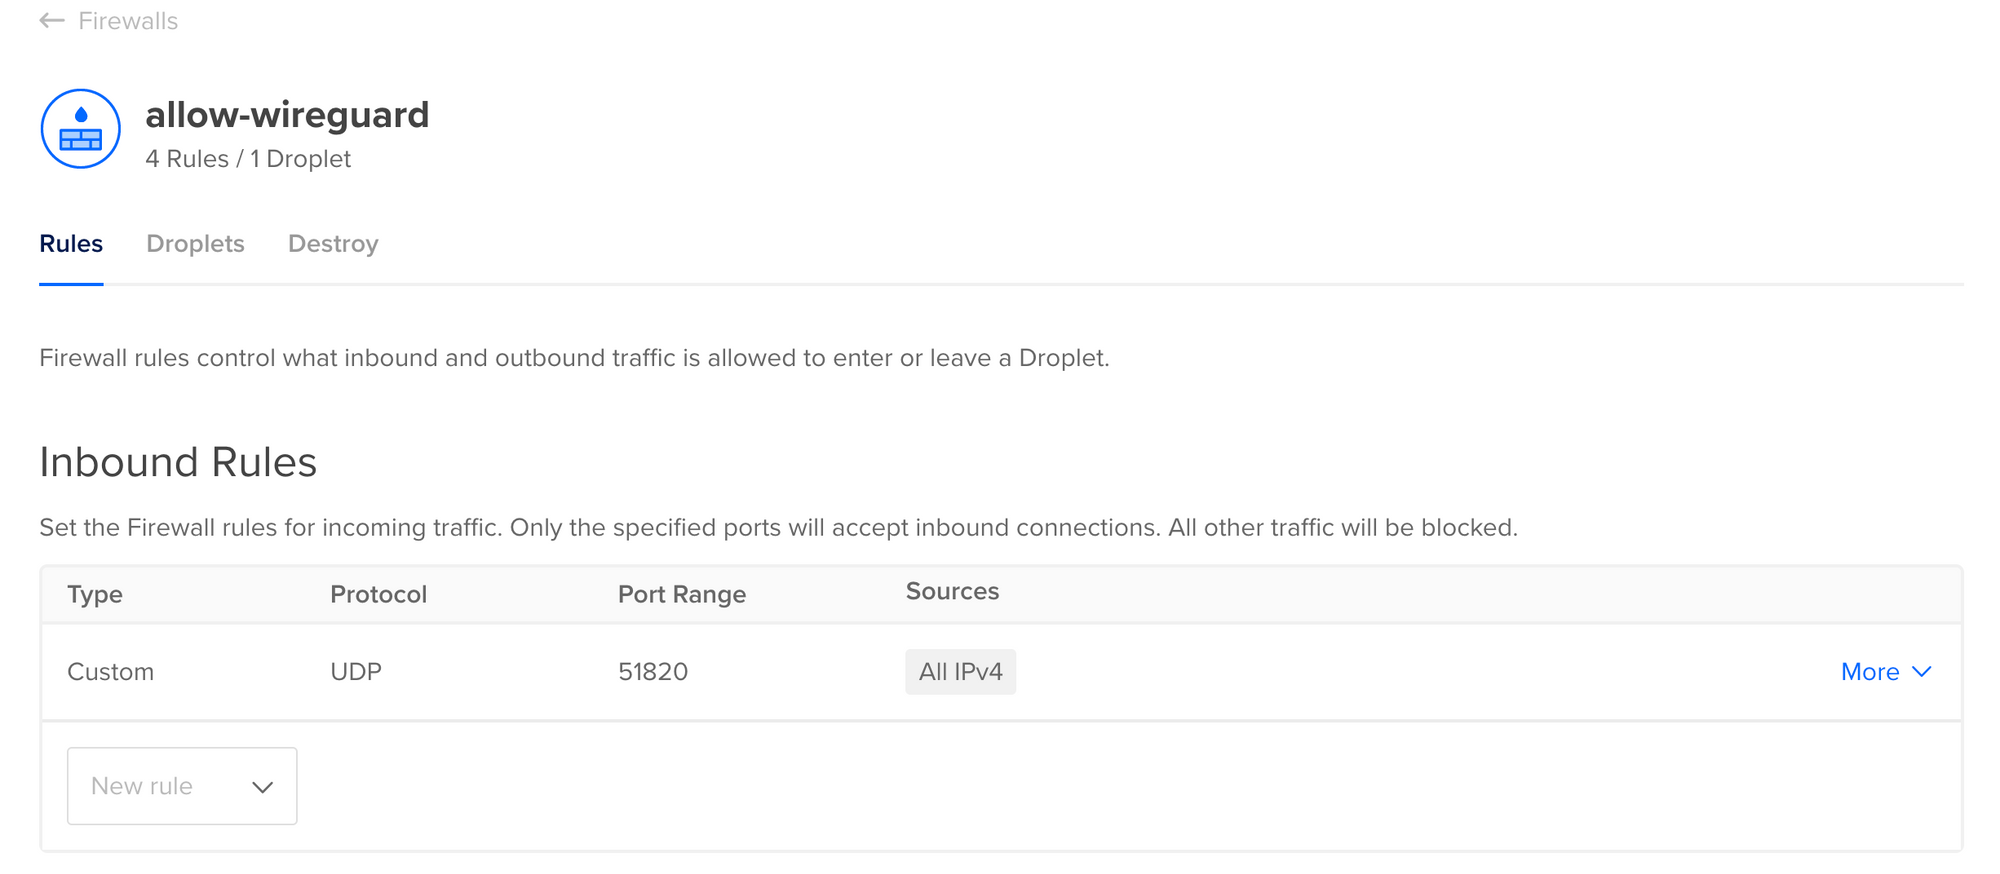
Connecting to the Algo server requires firewalls to be configured properly. There are two types of firewalls - server and external (DigitalOcean). The server firewalls (using Linux Netfilter) are configured during installation and do not require to be modified. You will need to configure the external firewall though, as DigitalOcean (and most other cloud providers) blocks inbound traffic by default.
Depending on the protocols chosen (IPsec, WireGuard), you may need multiple ports to be accessible, although I only plan to use WireGuard. Here are the rest for your reference though.
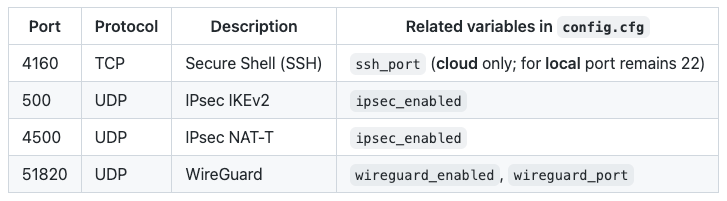
Head over to Networking > Firewalls and Create Firewall. Allow inbound WireGuard traffic on UDP Port 51820. It is also a good practice to limit inbound SSH traffic to certain IP addresses, or block SSH access altogether.
Configure VPN Clients
All the files (certificates, configs) required to configure your desktop and mobile VPN clients using WireGuard will be placed under the algo\configs\<PUBLIC_IP_ADDRESS_OF_DROPLET>\wireguard\ folder. Algo generates a WireGuard configuration file <username>.conf and a QR code <username>.png for each user defined the config.cfg file.
On iOS devices, install the WireGuard app from the iOS App Store, and use it to scan the corresponding QR code.
On macOS devices, install the WireGuard app from the Mac App Store. Once installed, click on the WireGuard icon from the menu, select the Import tunnel(s) from file... option and use the corresponding .conf file. For versions of macOS older than Mojave, see Using macOS as a Client with WireGuard.
Note: To download the .conf files from the droplet your local macOS device, run the following command at the terminal:
# Replacing <PUBLIC_IP_ADDRESS_OF_DROPLET> with <IP> for readability
scp root@<IP>:/root/algo/configs/<IP>/wireguard/<username>.conf Downloads
On Android devices, install the WireGuard app from the Google Play Store, and use it to scan the corresponding QR code.
On Windows devices, install the WireGuard app from their website, import the corresponding .conf file and setup a new connection with it.
WireGuard also works on Linux devices - see this page for detailed instructions.
Also, if you need help with devices not covered here, or other cloud providers, have a look at the Additional Documentation page.
Considerations
That wasn't so difficult, was it? While self-hosting is a technically feasible option, there are several things for you to consider:
- Cost: Even though self-hosting options start as low as $5/month, VPN services like PIA may be available at an even lower cost. Also, if you are transferring large amounts of data, you may have to consider cloud egress costs.
- Region: The costs may rise if you need droplets in multiple regions. You can offset this by turning off droplets when not in use, but that increases your operational overhead.
- Security: You need to harden the droplet for serious use. There is plenty of documentation to help, but the onus is on you.
- Updates: Algo relies on Trail of Bits and the open-source community for continued updates; without a commercial endeavour behind it, it may lose focus over time.
- Maintenance: You need to periodically patch the software, especially if critical vulnerabilities get discovered in the future.
- Anonymity: Finally, don't assume that this lends a cloak of anonymity for piracy, copyright infringement or other malicious activities - your network activities are still visible to DigitalOcean, and you are on the hook for any potential violations to their terms of service.