How to Set up a Secure Private Network with Tailscale
A step-by-step guide to setting up a secure, private network with Tailscale.
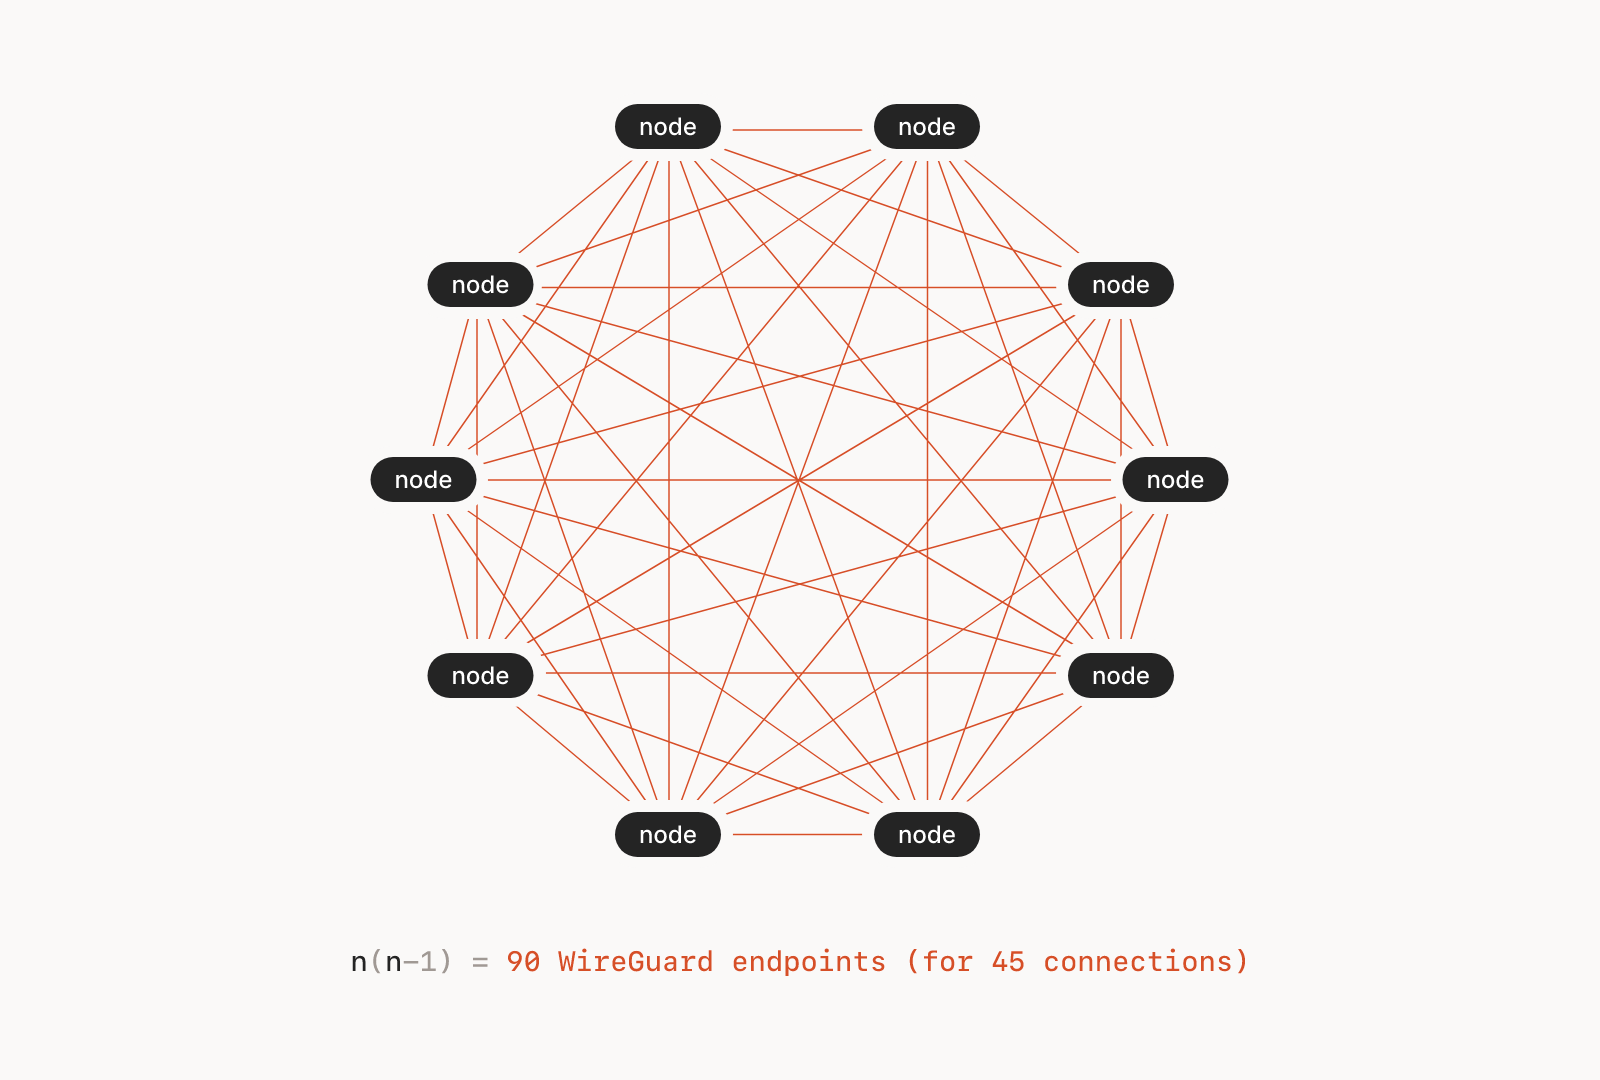
Traditional VPNs are the antithesis of zero trust networks. They create implicit zones of trust in enterprise networks, often leading to catastrophic outcomes when attackers bypass perimeter security controls and move laterally across the organization. Modern VPNs have added some end user-based security controls, but it still doesn't solve the problem of lateral movement.
While true zero trust networks are difficult to adopt given our legacy architectural and technical debt, Tailscale has taken inspiration from and adopted zero trust principles into their "mesh VPN" solution. I'm unclear whether they'll be able to get around the tarnished VPN nomenclature, but the product itself is a compelling alternative. In this deep dive, I'll describe Tailscale in some detail and explain how to create a VPN between your laptop and a Google Cloud VM instance. If you want to follow my coverage on zero trust in general, see this post later.
What is WireGuard?
WireGuard® is a security-focused virtual private network (VPN) protocol that also aims to be faster and simpler than traditional protocols like IPsec and OpenVPN. WireGuard securely encapsulates IP packets over UDP; it uses public-key cryptography for the initial handshake, but leaves key distribution responsibilities to higher layers. WireGuard is preferred by most new-age VPN software and is also my protocol of choice. Read this post first if you want a primer on WireGuard.

What is Tailscale?
Tailscale is an extremely simple way to create a secure private network between your servers, laptops and other devices. Using WireGuard, it creates lightweight encrypted tunnels between the machines (aka a mesh network), and takes on key distribution and management responsibilities. Tailscale node software (i.e. clients) is open source; each node talks to a centralized coordination server (i.e. login.tailscale.com) for authentication and for exchanging the public keys during setup. The private keys don't leave the node though, ensuring end-to-end encryption for node communications. Tailscale also uses interesting techniques for NAT traversal and making connections work across firewalls. To learn more about Tailscale's technical underpinnings, have a look at How Tailscale Works.
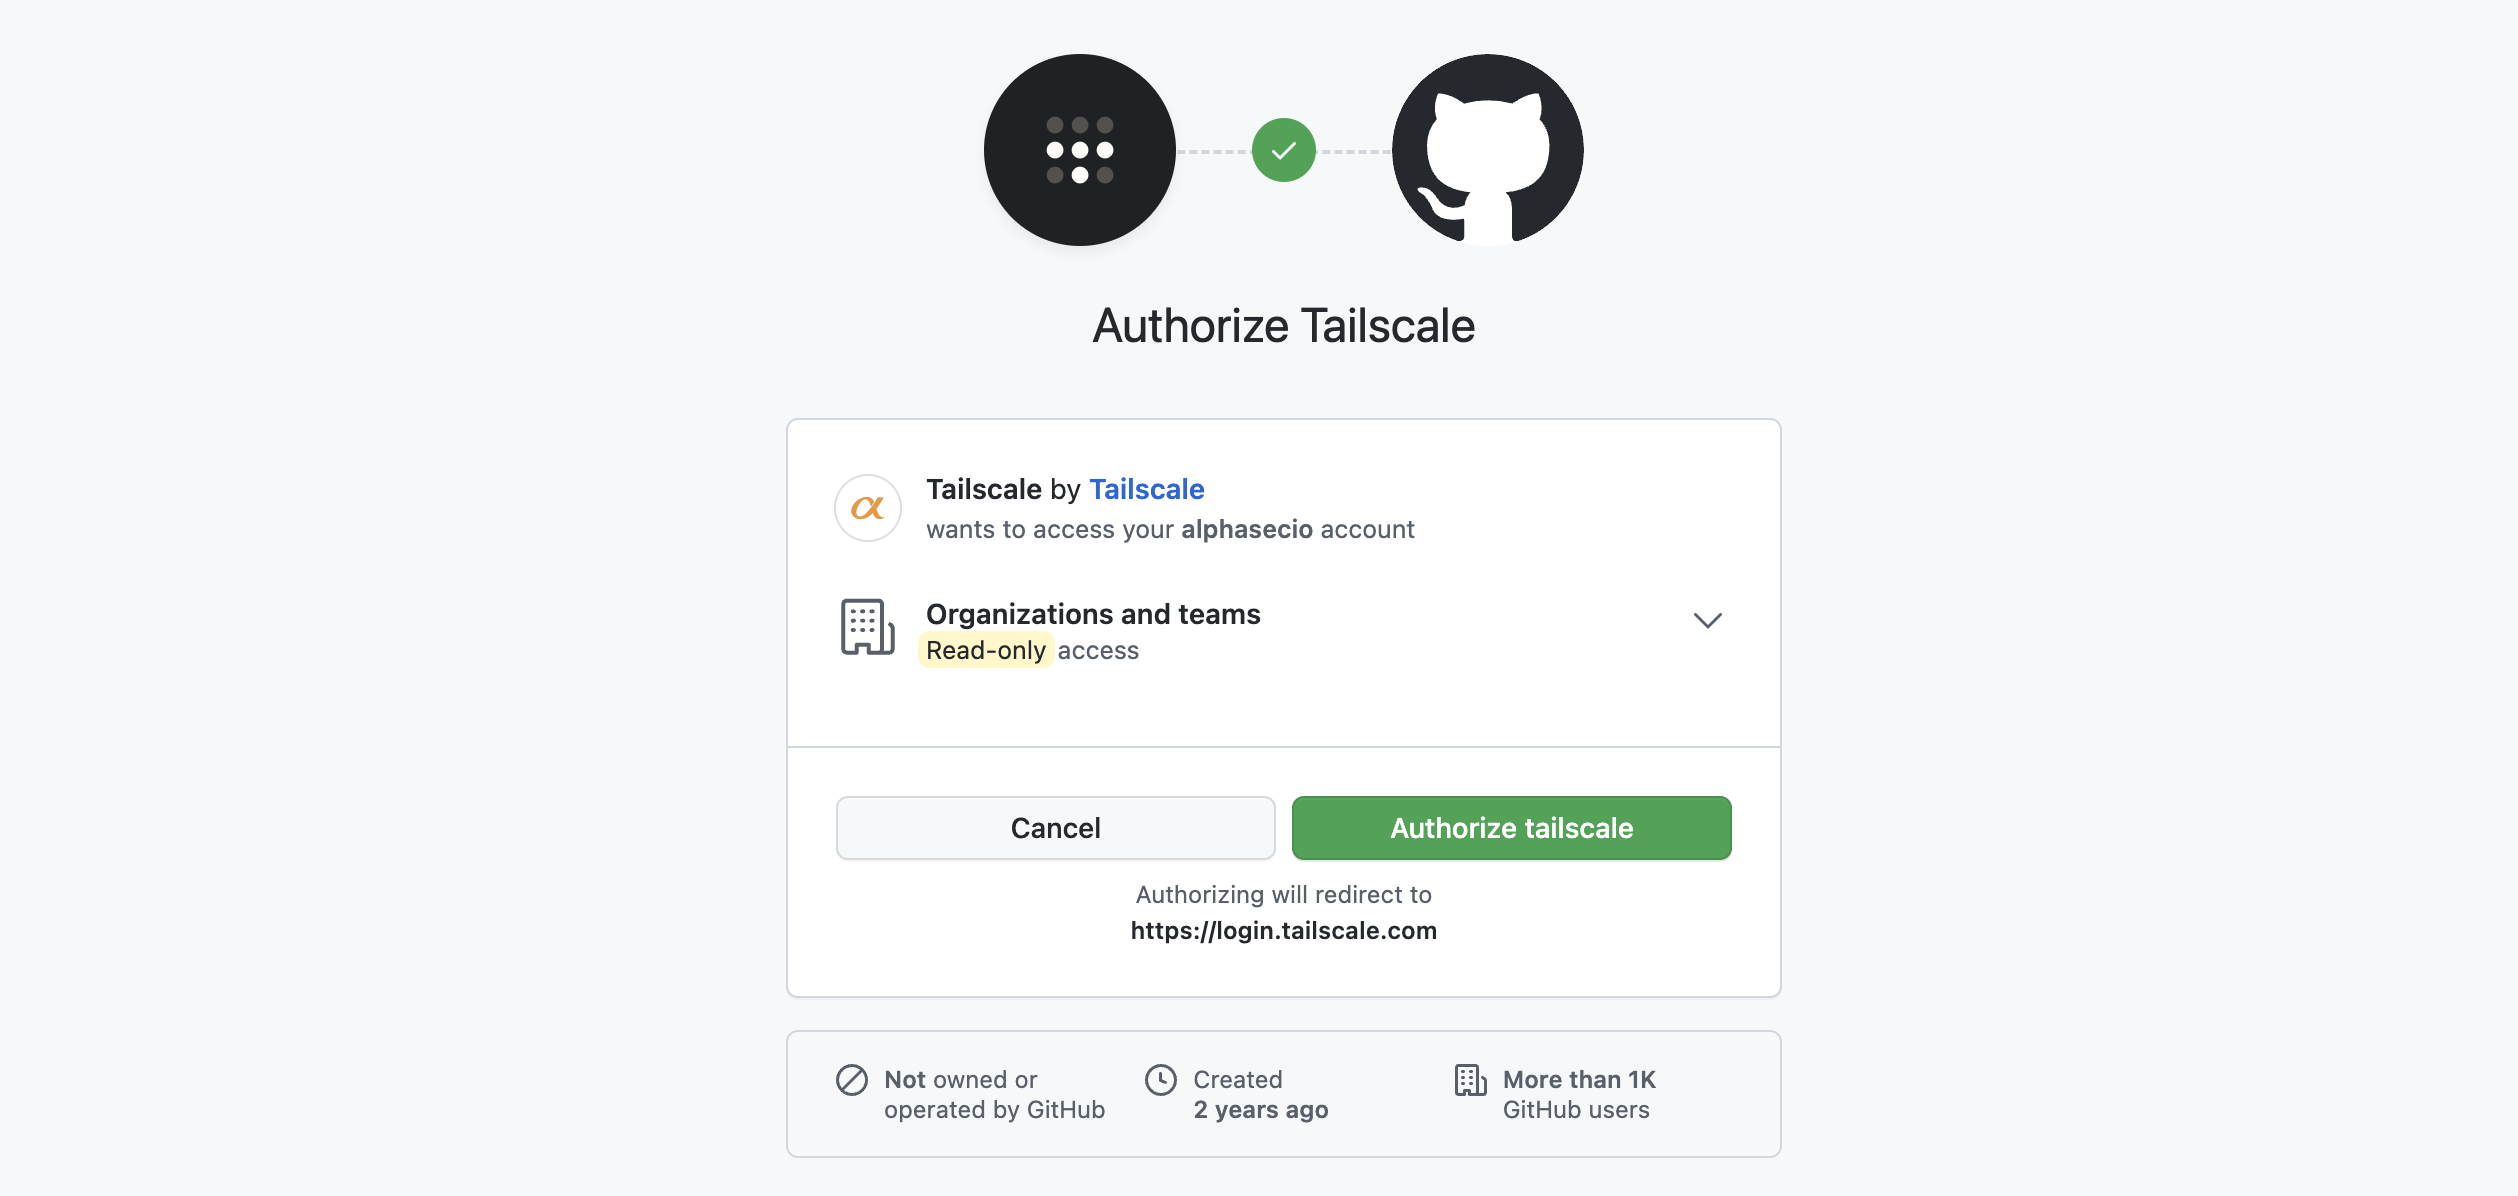
Tailscale is not an identity provider and does not support sign-up using email. Instead, it works with single sign-on / identity providers like Google, Microsoft, GitHub, Okta and others. You can enable multi-factor authentication on your provider, and Tailscale will respect that during login.

Select your preferred identity provider and authorise Tailscale access.
Once you've authenticated a Tailscale client using your identity provider, it automatically exchanges keys and connectivity information with other Tailscale clients on your network, thereby creating a secure, private mesh network.

Install Tailscale on Your Laptop
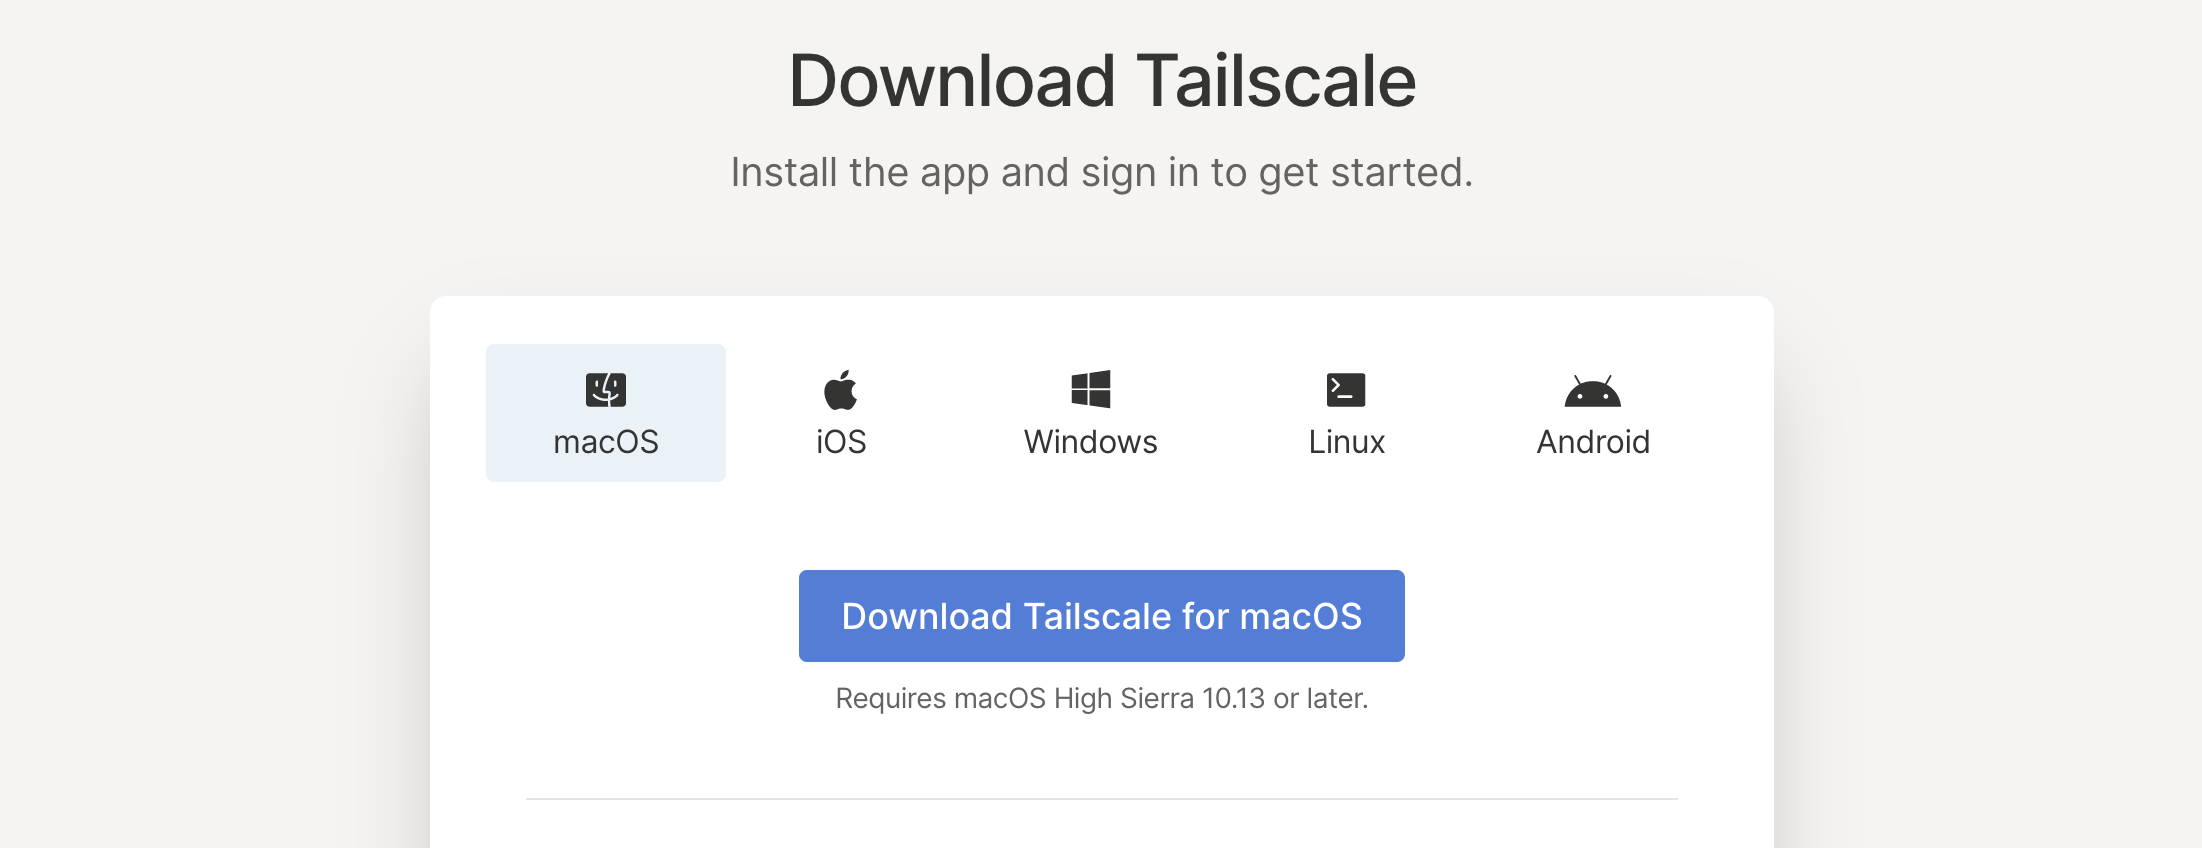
Let's start by installing Tailscale on your laptop. Navigate to the Downloads page, and download the app that is relevant for you. I'll select the macOS version.
Once the app is installed, launch it and click Get Started. Connect your laptop to the default network ("tailnet") by clicking Sign in to your network and authorising Tailscale using your web browser. Choose whether to automatically start Tailscale when you log in to your computer. I'll pick No, I will manually start Tailscale.
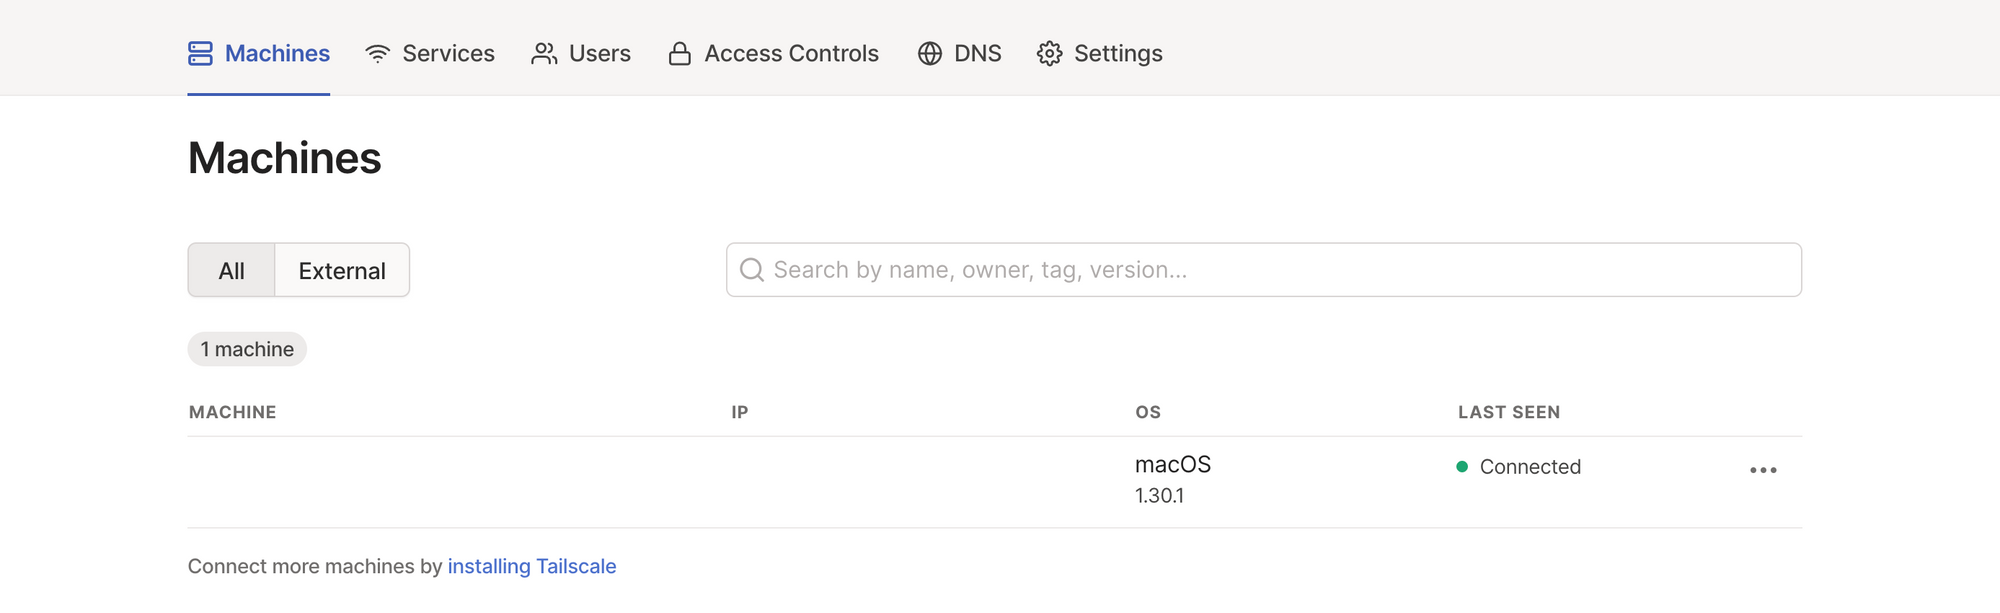
Click Show Tailscale menu to see available network devices, log in to a different account, set up an exit node, or configure Tailscale local preferences. Click Open admin console to see available machines (just your laptop, for now), services, users, and to define access controls, DNS, and other settings. Tailscale Personal plan is quite decent, so you don't have to configure billing right now.
Install Tailscale on a Google Cloud VM Instance
I'm assuming that you already have a Google Cloud account and project set up. If you don't, sign up here - new customers get a generous $300 credit for 90 days, with several always-free products once the trial period expires. Enable billing on your account, create a new project, and follow the steps below.
- If you've just created the trial account, you should have a
defaultVPC network and the corresponding sub-networks for each region already created. If you're using an account that restricts default network creation, go toVPC network>VPC networksand create a VPC network and sub-network first. - Delete the default firewall rules, except
default-allow-ssh, fromVPC network>Firewall. Create two ingress firewall rules,allow-tailscale-ipv4andallow-tailscale-ipv6, which allow traffic from0.0.0.0/0and::/0source IP ranges respectively on UDP port41641to all instances in the network.

- Enable the
Compute Engine APIand create a new VM instance fromCompute Engine>VM instances. Enter the VM name (say,tailscale), select yourregionandzone, choosee2-small (2 vCPU, 2 GB memory)machine type from theGeneral-Purposemachine family, and change the boot disk toUbuntu 20.04 LTS. - Under
Advanced options>Networking, enableIP forwarding. UnderManagement>Metadata, addenable-osloginandTRUEas a key-value pair. Leave other options as default and clickCreate. Allow a few seconds for the VM instance to get created.
Access Tailscale VM from Your Laptop
Once the VM instance is ready, SSH into it using the browser-based SSH option in the Google Cloud console (or your preferred SSH client) and run the following commands. The instructions below are applicable to Ubuntu 20.04; see here for other Linux distributions.
# Add Tailscale's package signing key and repository
curl -fsSL https://pkgs.tailscale.com/stable/ubuntu/focal.noarmor.gpg | sudo tee /usr/share/keyrings/tailscale-archive-keyring.gpg >/dev/null
curl -fsSL https://pkgs.tailscale.com/stable/ubuntu/focal.tailscale-keyring.list | sudo tee /etc/apt/sources.list.d/tailscale.list

# Update the package metadata and install Tailscale
sudo apt update
sudo apt install tailscale

# Authenticate via your web browser and connect your machine to the Tailscale network
sudo tailscale up

# To find your Tailscale IPv4 address
tailscale ip -4
Tailscale calls itself a "frustratingly easy VPN" for a reason - just like that, your VM will show up on the admin menu, and be a part of your secure private network. Tailscale automatically assigns each machine a unique 100.x.y.z IP address, and the connectivity can be maintained even when the machines switch networks or are deployed behind firewalls. A simple ping <VM IP Address> would elicit a successful response.

SSH into Tailscale VM from Your Laptop
A keen observer would have noticed the SSH flag on the Tailscale VM. This doesn't happen by default; SSH access needs to be advertised using sudo tailscale up --ssh. This is a fairly recent feature, one that blurs the lines between Tailscale as a layer 3/4 VPN, and Tailscale as a potential layer 7 remote access solution like Teleport. Named Tailscale SSH, it allows Tailscale to manage the authentication and authorisation of SSH connections on your tailnet. See here for more details.
Before you can use Tailscale SSH though, you need to define appropriate ACLs (access controls) in the tailnet policy to allow both network and SSH access. Here is a sample policy that worked for me.
{
	// Define "admin" group membership
    "groups": {
		"group:admin": ["user@domain"],
	},
	"acls": [
		// Allow "admin" group network access to devices with tag "prod"
		{
			"action": "accept",
			"src":    ["group:admin"],
			"dst":    ["tag:prod:*"],
		},
	],
	"ssh": [
		// Allow "admin" group SSH access to devices with tag "prod"
		{
			"action": "accept",
			"src":    ["group:admin"],
			"dst":    ["tag:prod"],
			"users":  ["ubuntu", "root"],
		},
	],
	"tagOwners": {
		// Allow "admin" group to apply the tag "prod"
		"tag:prod": ["group:admin"],
	},
}
Once you define and save this policy under Access Controls, click on ... next to the Tailscale VM under Machines, and click Edit ACL tags.... Apply the tag:prod label to this machine and click Save.
Finally, navigate to the DNS tab and click Enable MagicDNS. As the name suggests, MagicDNS automagically register unique domain names for devices on your network so you don't need to remember those pesky IP addresses. Go ahead, just type ping tailscale and see it in action. Or, you know, just ssh root@tailscale and wonder in amazement!
Done, What Next?
Of course, in a production environment, you wouldn't (shouldn't) be so light on security. Review Tailscale SSH and other best practices to ensure you have the right ACLs and connectivity in place. Advertise routes on the Google Cloud VM to reuse the Google Compute Engine DNS names. And delete the default-allow-ssh public firewall rule as you have set up Tailscale SSH.
The fun doesn't end here though. You can route traffic through specific machines to keep your internet activity private using exit nodes. Connect to your home NAS device on the go. Share files between your own devices using Taildrop. Even share an existing service with nodes outside of your domain with node sharing.