How to Set up Your Own Blog using Ghost on DigitalOcean
A step-by-step guide to setting up your own blog for free using Ghost on DigitalOcean.
If you are an ardent follower of Ben Thompson's Stratechery blog, you probably heard of the Sovereign Writer concept and why it is important to host your own blog. Or maybe you simply wish to take a stab at writing and are curious if hosting your own blog economically is even feasible. Either way, your search brought you here. And while this approach may not give you full control of your self-publishing destiny, it is a good first step. So, read on to understand how you can use Ghost and set up a blog with your own domain on DigitalOcean.
What is Ghost?
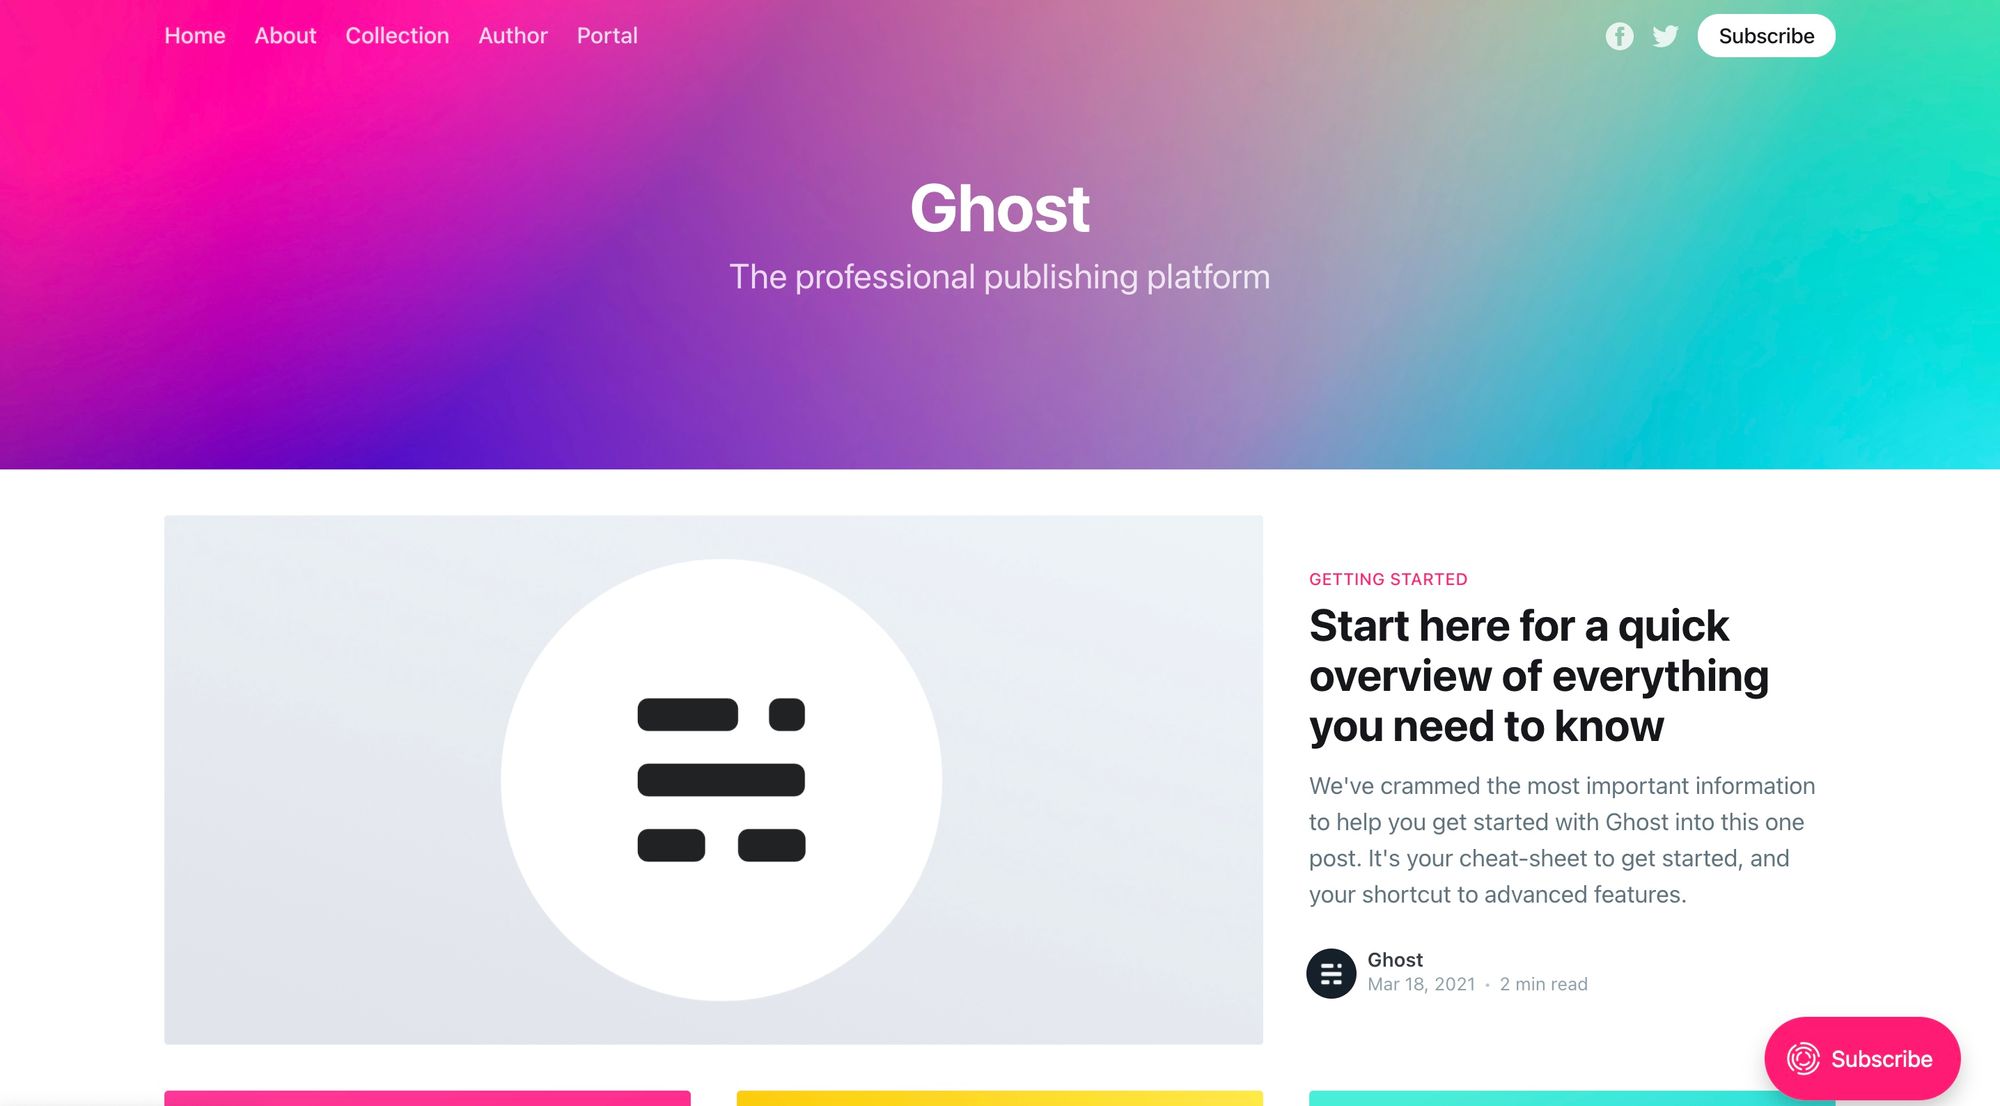
Firstly, what's Ghost? Put simply, it's a full-featured publishing platform and an open-source alternative to Medium, Substack etc. This tutorial walks through the process of deploying a self-hosted version of Ghost on DigitalOcean. If you prefer Google Cloud Platform (GCP) as a hosting provider, see this tutorial instead.
Secondly, this tutorial assumes that you already own the domain that you'll use to host your blog. If you don't, head over to Cloudflare Registrar or Namecheap and register your domain first. Depending on your choice of domain name and TLD (.com, .io etc), you can expect to pay between a few dollars and tens of dollars per year.
Set up Your DigitalOcean Account
Let's start with DigitalOcean now - if you don't have an account, sign up here. If you sign up using my link, you’ll receive a $100, 60-day credit as soon as you add a valid payment method to your account. And while this is not as generous as the always-free products offered by GCP or AWS, it is enough to get started and decide whether self-hosting is for you or not.
Deploy the DigitalOcean Droplet
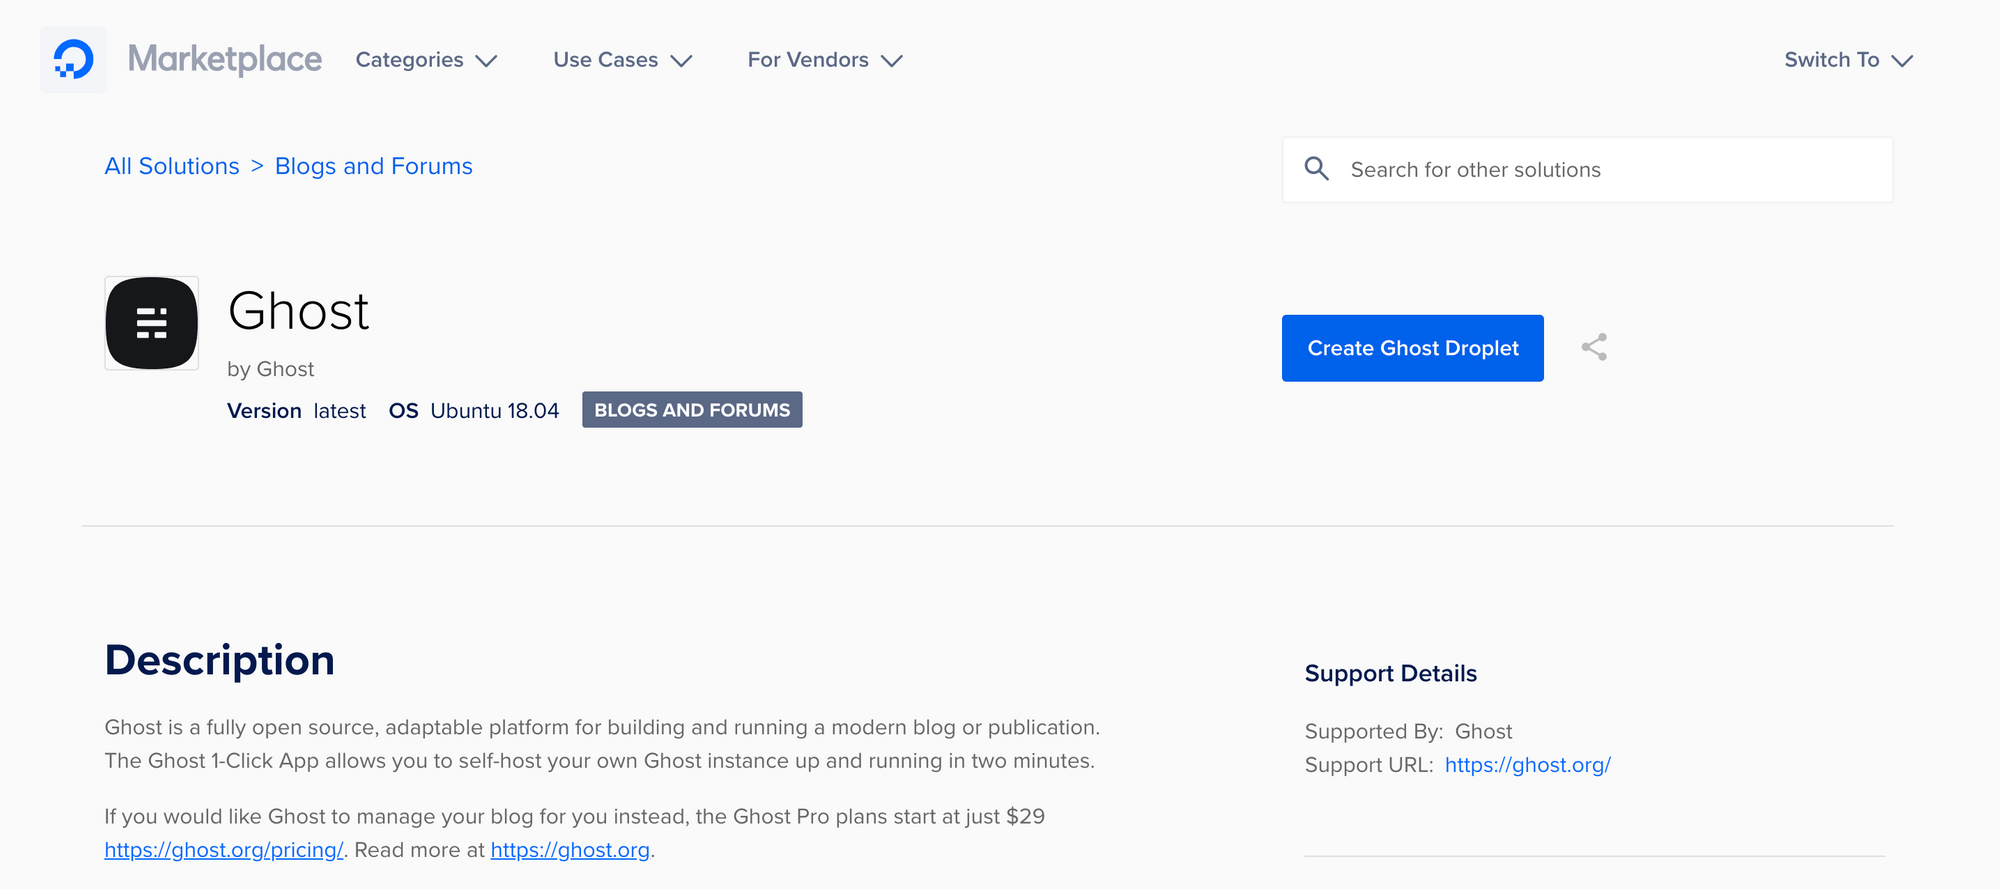
Once you have created a DigitalOcean project and set up the billing details, create a Ghost Droplet using the Ghost 1-Click App for self-hosted Ghost deployment. This app is fully supported by Ghost.org and comes pre-deployed with the Ghost, Nginx, MySQL and Node.js binaries.
On the ensuing configuration page, choose the $5/month Basic Shared CPU option. The $40/month droplet is the default selected but, if you are just starting out, a $5/month droplet should be plenty sufficient and you can always upgrade the droplet if you see an uptick in traffic.
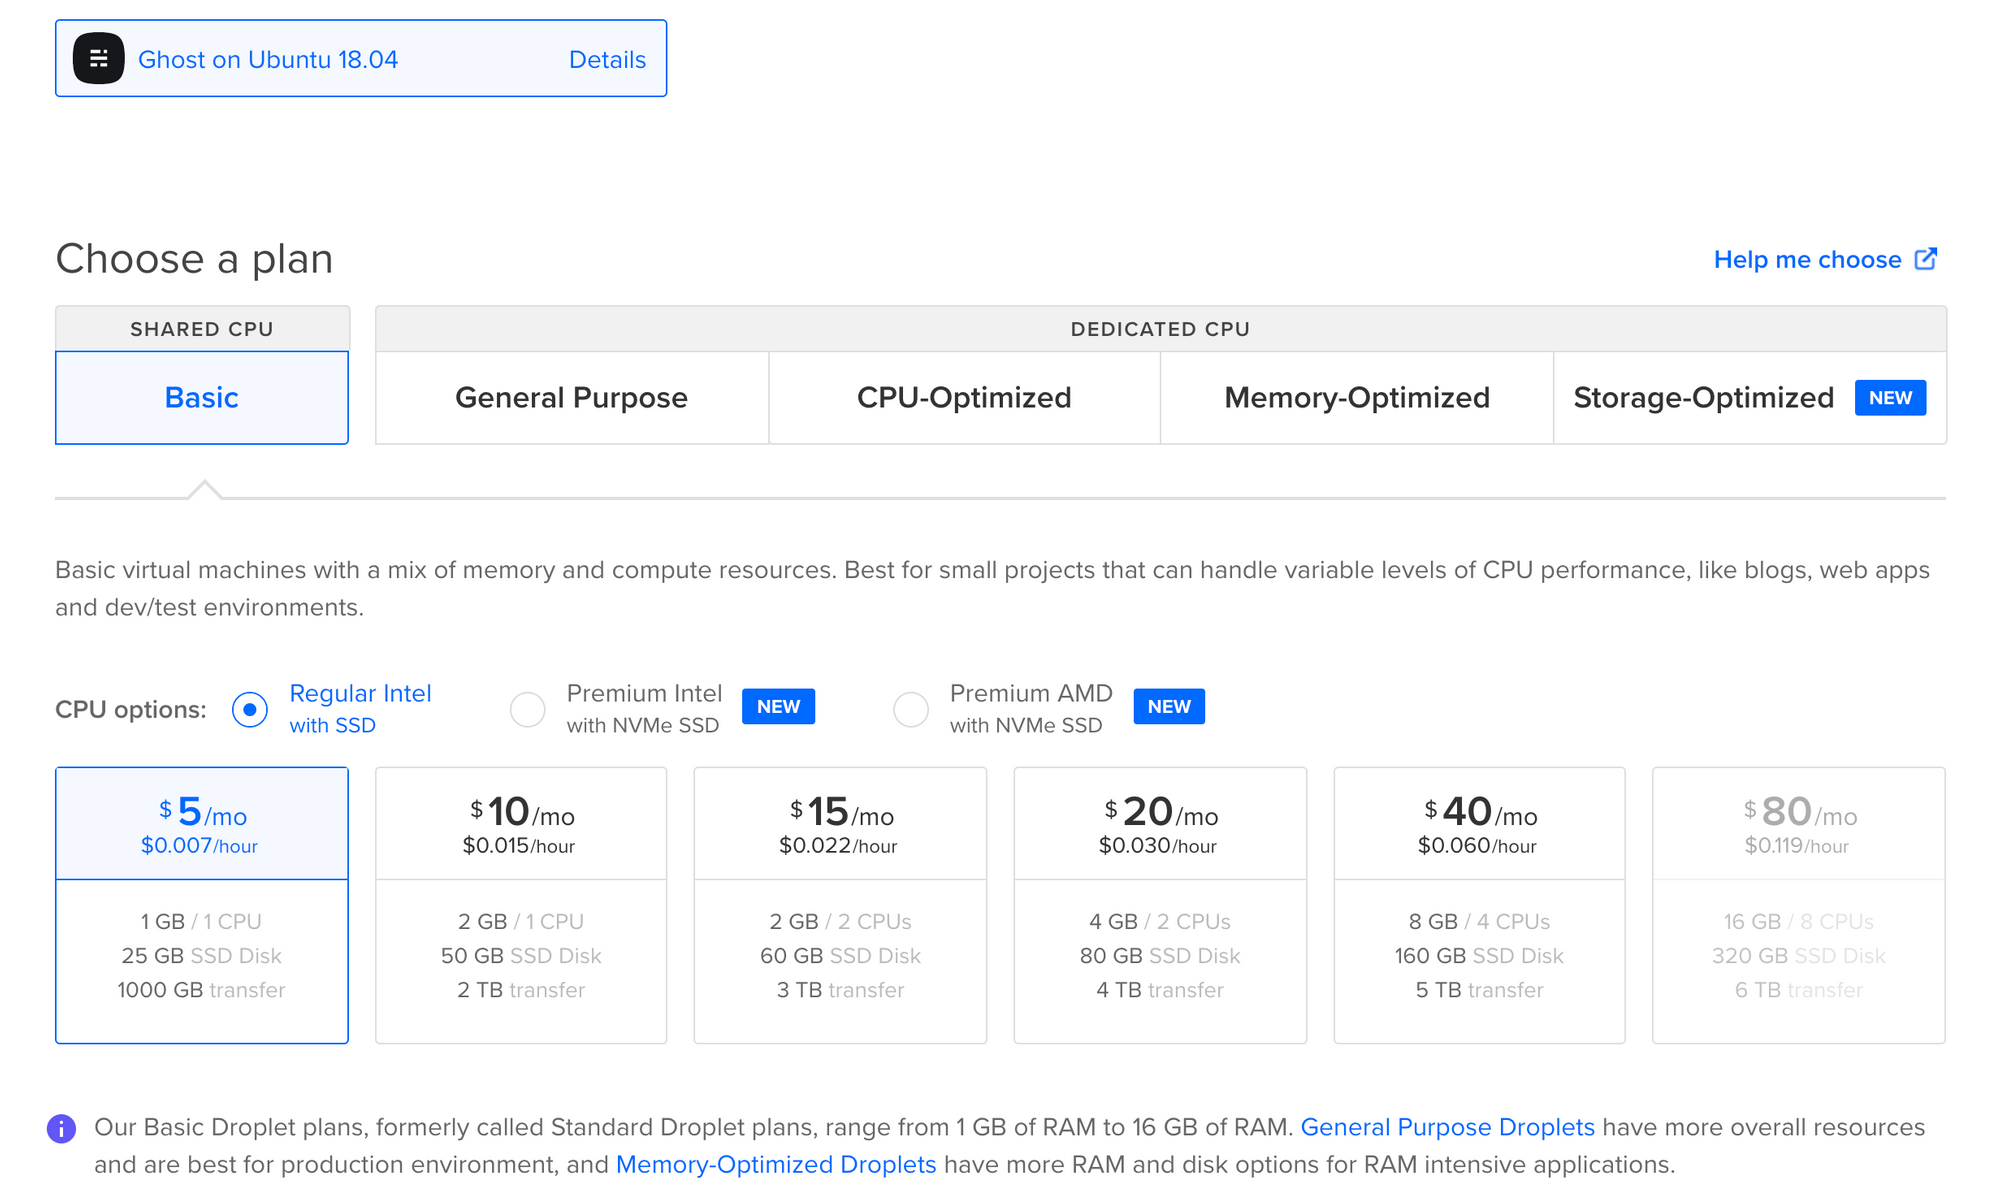
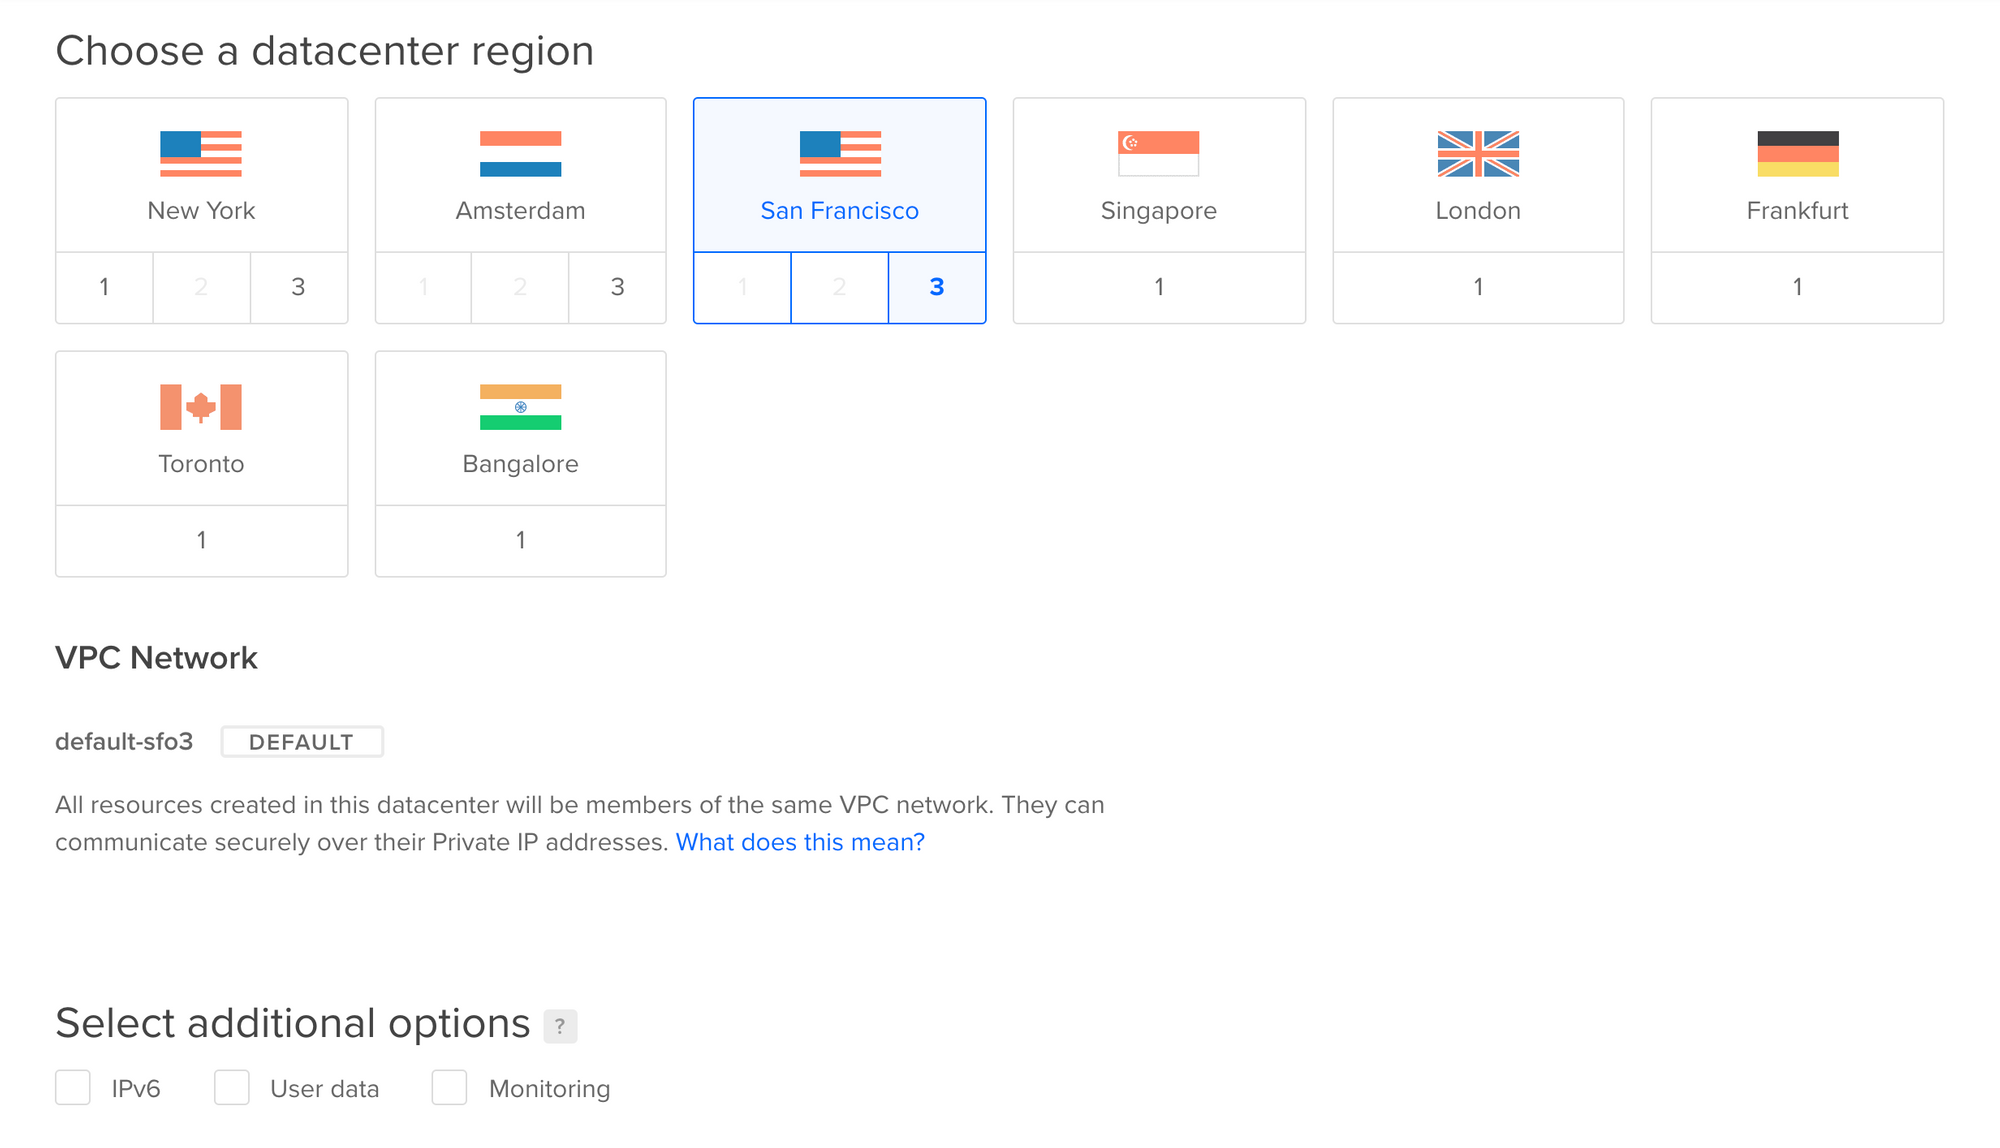
Next, choose your desired datacenter region leaving other options as default.
Access Your Droplet Remotely
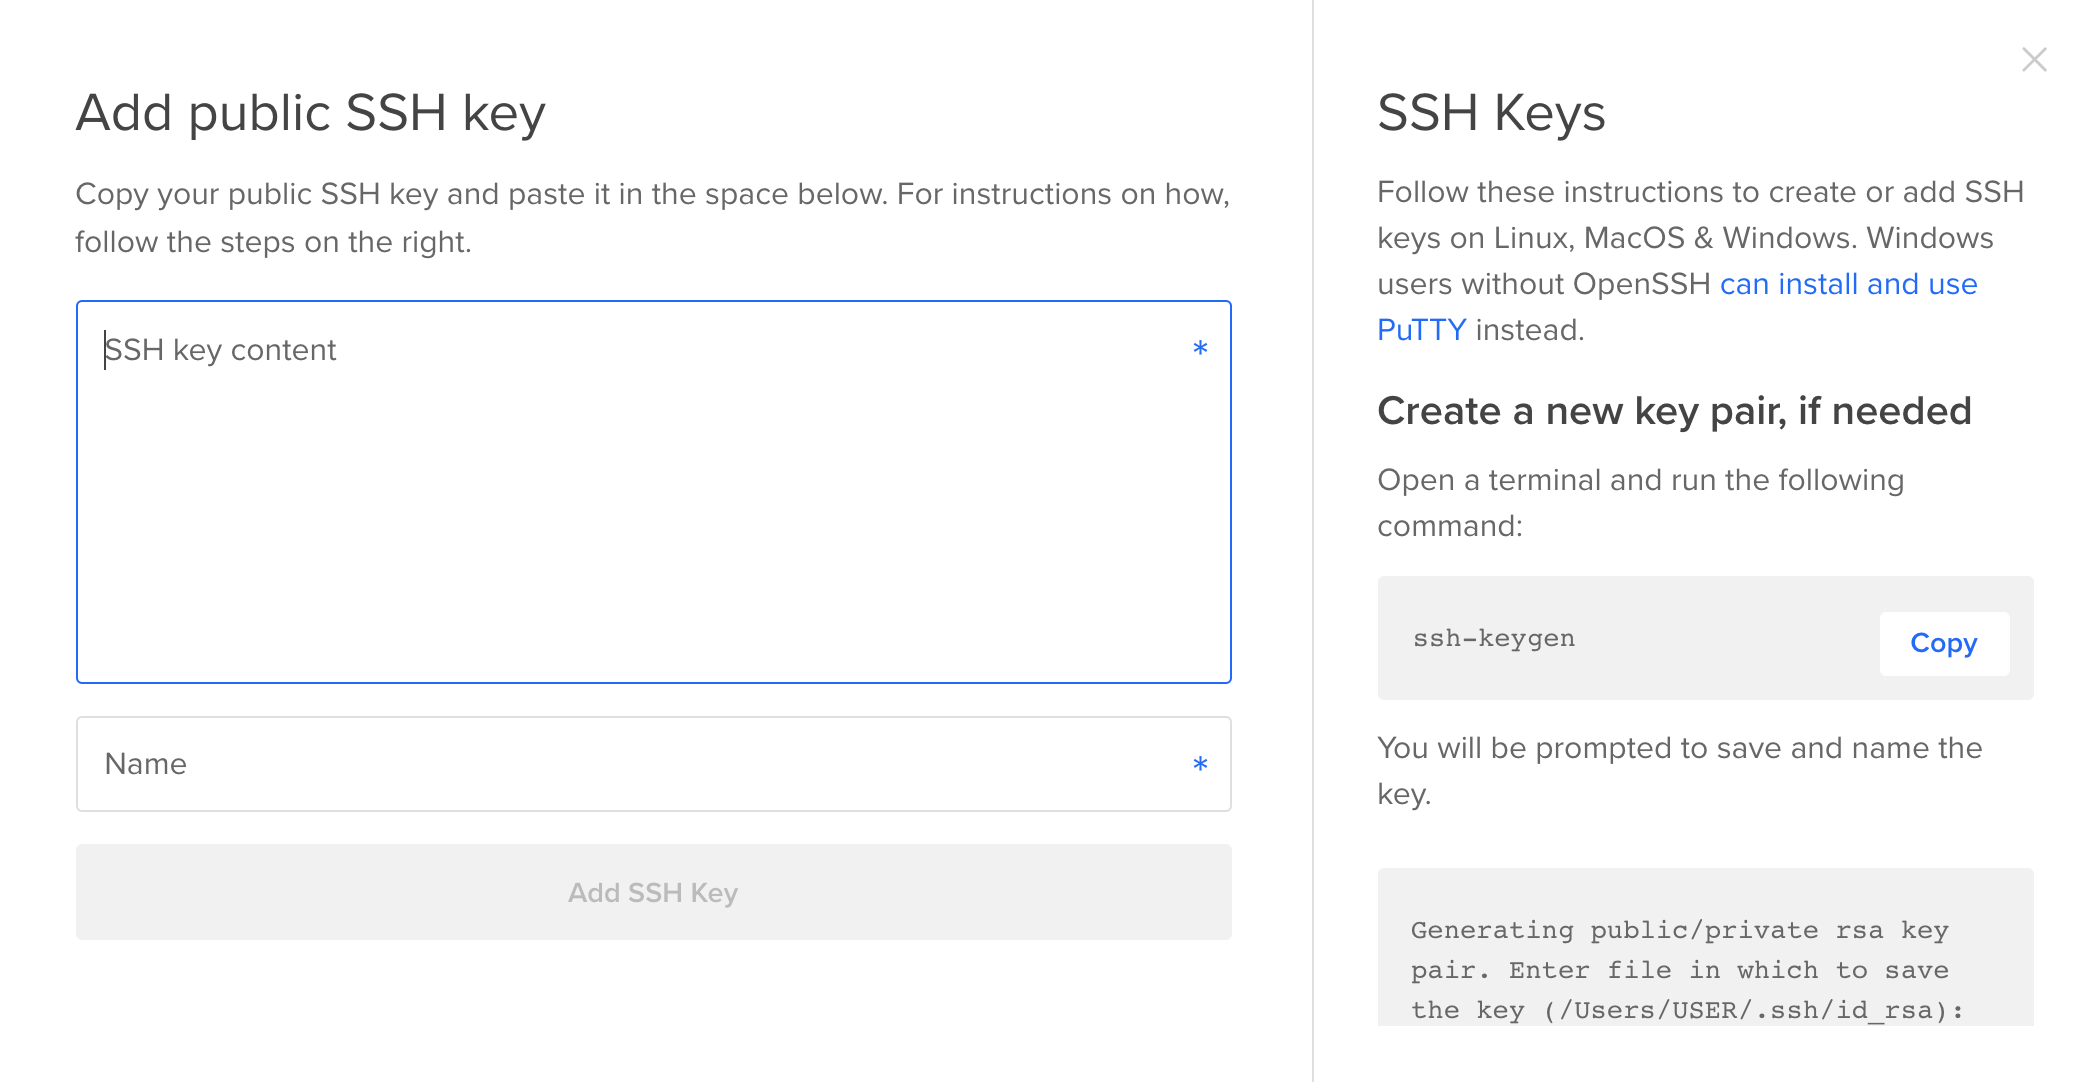
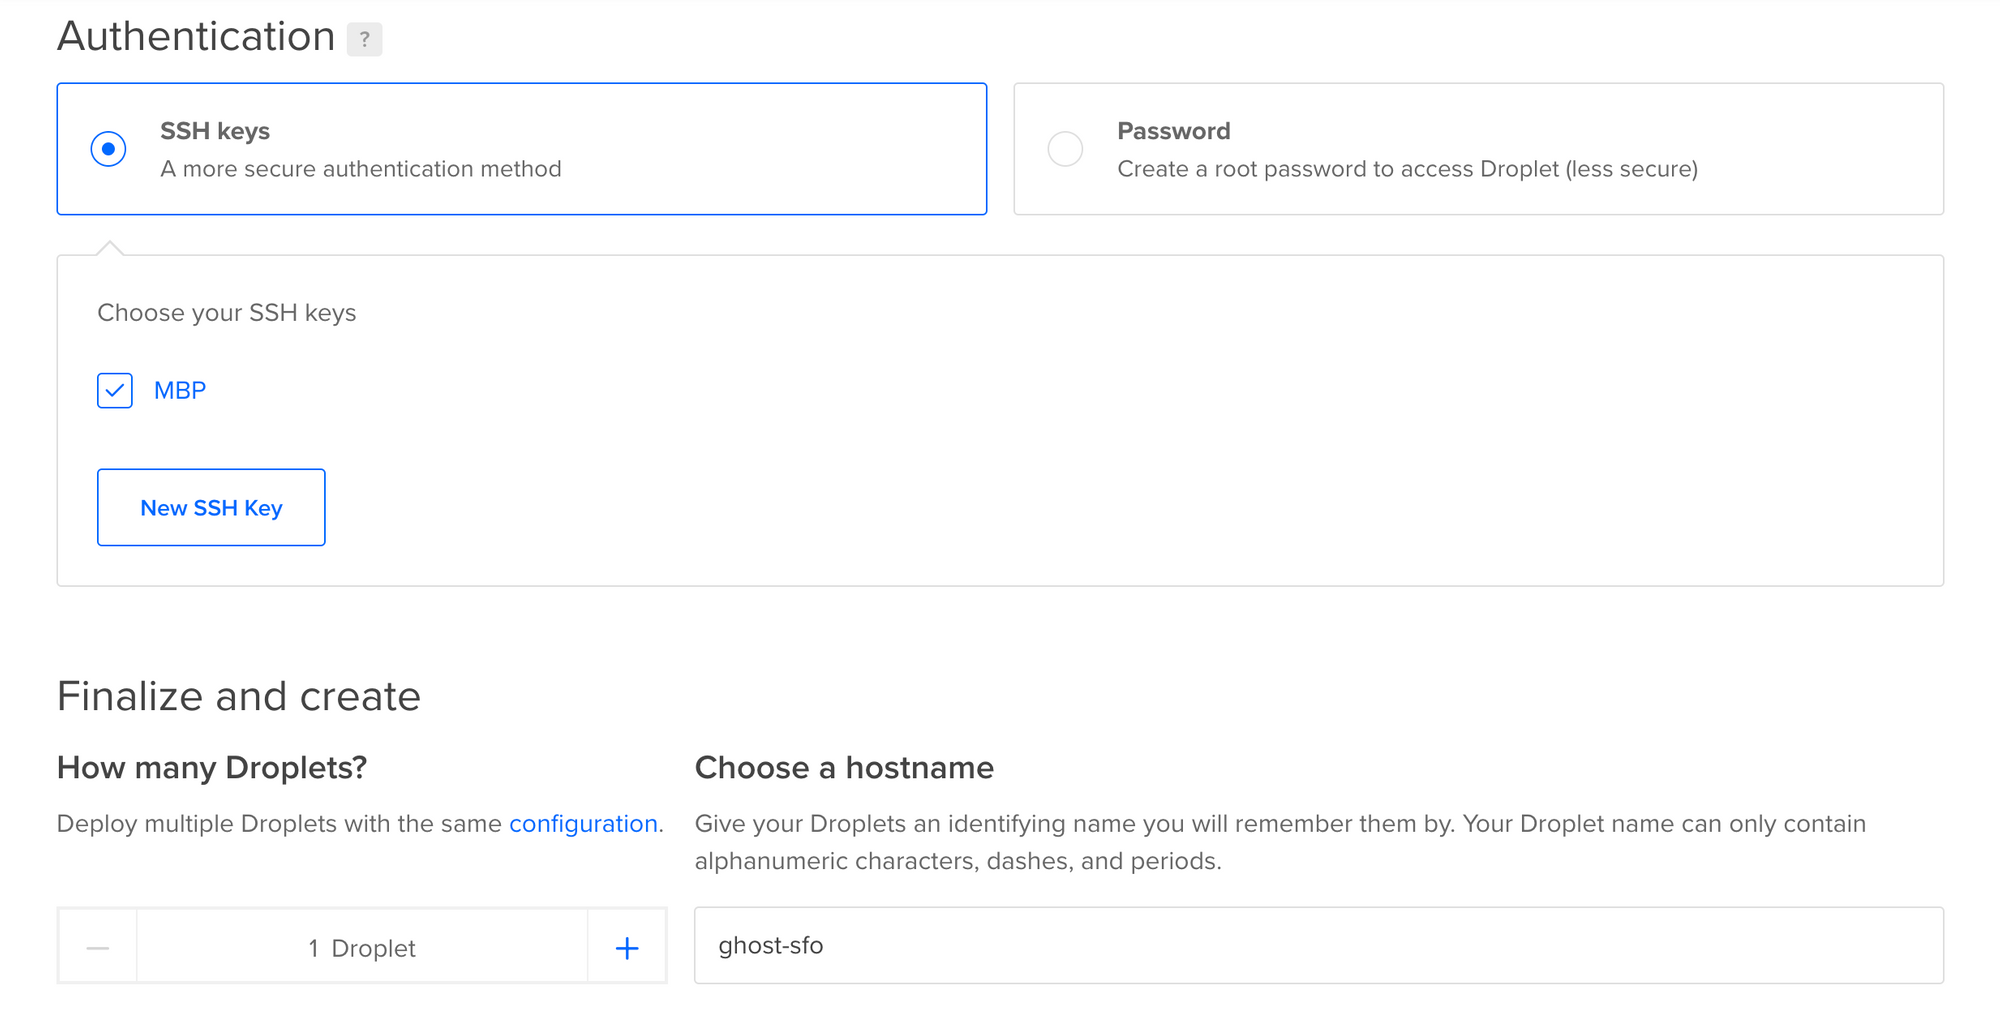
In order to access your droplet remotely, you need to set up SSH (Secure Shell Protocol) keys now. You could create a root password for authentication instead, but it is the less secure option. Droplets that use SSH keys have password authentication disabled by default.
- Follow the instructions to create your public-private SSH key pair.
- Copy and paste the contents of the .pub file, typically
id_rsa.pub, into the SSH key content field on the left. - Ensure that you keep the private key file secure, typically
id_rsa, and do not share it or upload it to public repositories. - PS: for more detailed guidance, have a look at How to Add SSH Keys to New or Existing Droplets.
Finally, use the default hostname assigned to your droplet or specify your own and create the droplet.
Deploy and Configure Ghost
Once the droplet is ready, create a DNS A-record and point your registered domain name to the public IP address of the VM instance you just created. Next, log in to your droplet using your SSH credentials and provide the requested details.
# Login via SSH
ssh root@your_droplet_ip

Ensuring Ghost-CLI is up-to-date…
…

Ghost will prompt you for two details:

Your domain
Add an A Record -> your_droplet_ip & ensure DNS has fully propagated
Or alternatively enter http://your_droplet_ip
Your email address (only used for SSL)
Press enter when you’re ready to get started!
The droplet will automatically ensure it’s running the most recent version of Ghost, and will prompt you to press Enter to finalize the setup. Follow the installation prompts to configure Ghost.
If you do not receive errors during any of the steps above, congratulations! You have now set up your personal blog at your chosen domain. Launch <your_droplet_ip> for a first glimpse of your publishing destiny; administrative access is available at your <your_droplet_ip>/ghost.
To upgrade or maintain the Ghost install in future, you’ll have to become the ghost-mgr user in order to have the correct permissions. After that, all tasks can be completed with the Ghost-CLI tool.
sudo -i -u ghost-mgrThat's it. Go ahead and write your first post!