How to Set up a Decentralized Web Profile using dLinks
A brief on setting up a decentralized web profile using dLinks from Namebase.
If you are an avid social media person, you would have heard of "link in bio" services like Linktree. One link to rule them all. Helping you consolidate your key web properties like social media profiles, blogs, subscription links, tipping jars into a single web profile. What if you could build a decentralized version? Enter dLinks.
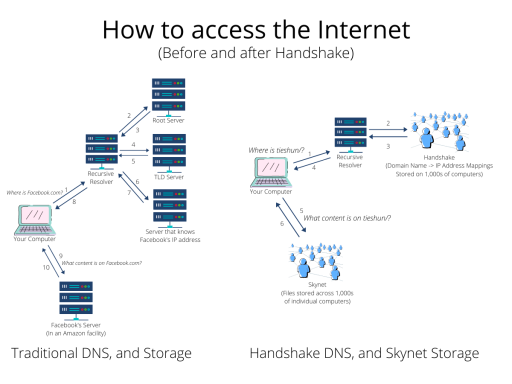
In a recent post on registration of Handshake domains using Namebase, I highlighted a few cool things that you can do with your Handshake name. Building a fully decentralized web profile using dLinks is one such use case. dLinks is built using Handshake and Skynet, a decentralized hosting service.
Setting up your dLinks profile is actually quite straightforward. Once you have acquired an Handshake domain via Namebase, navigate to the dLinks application.
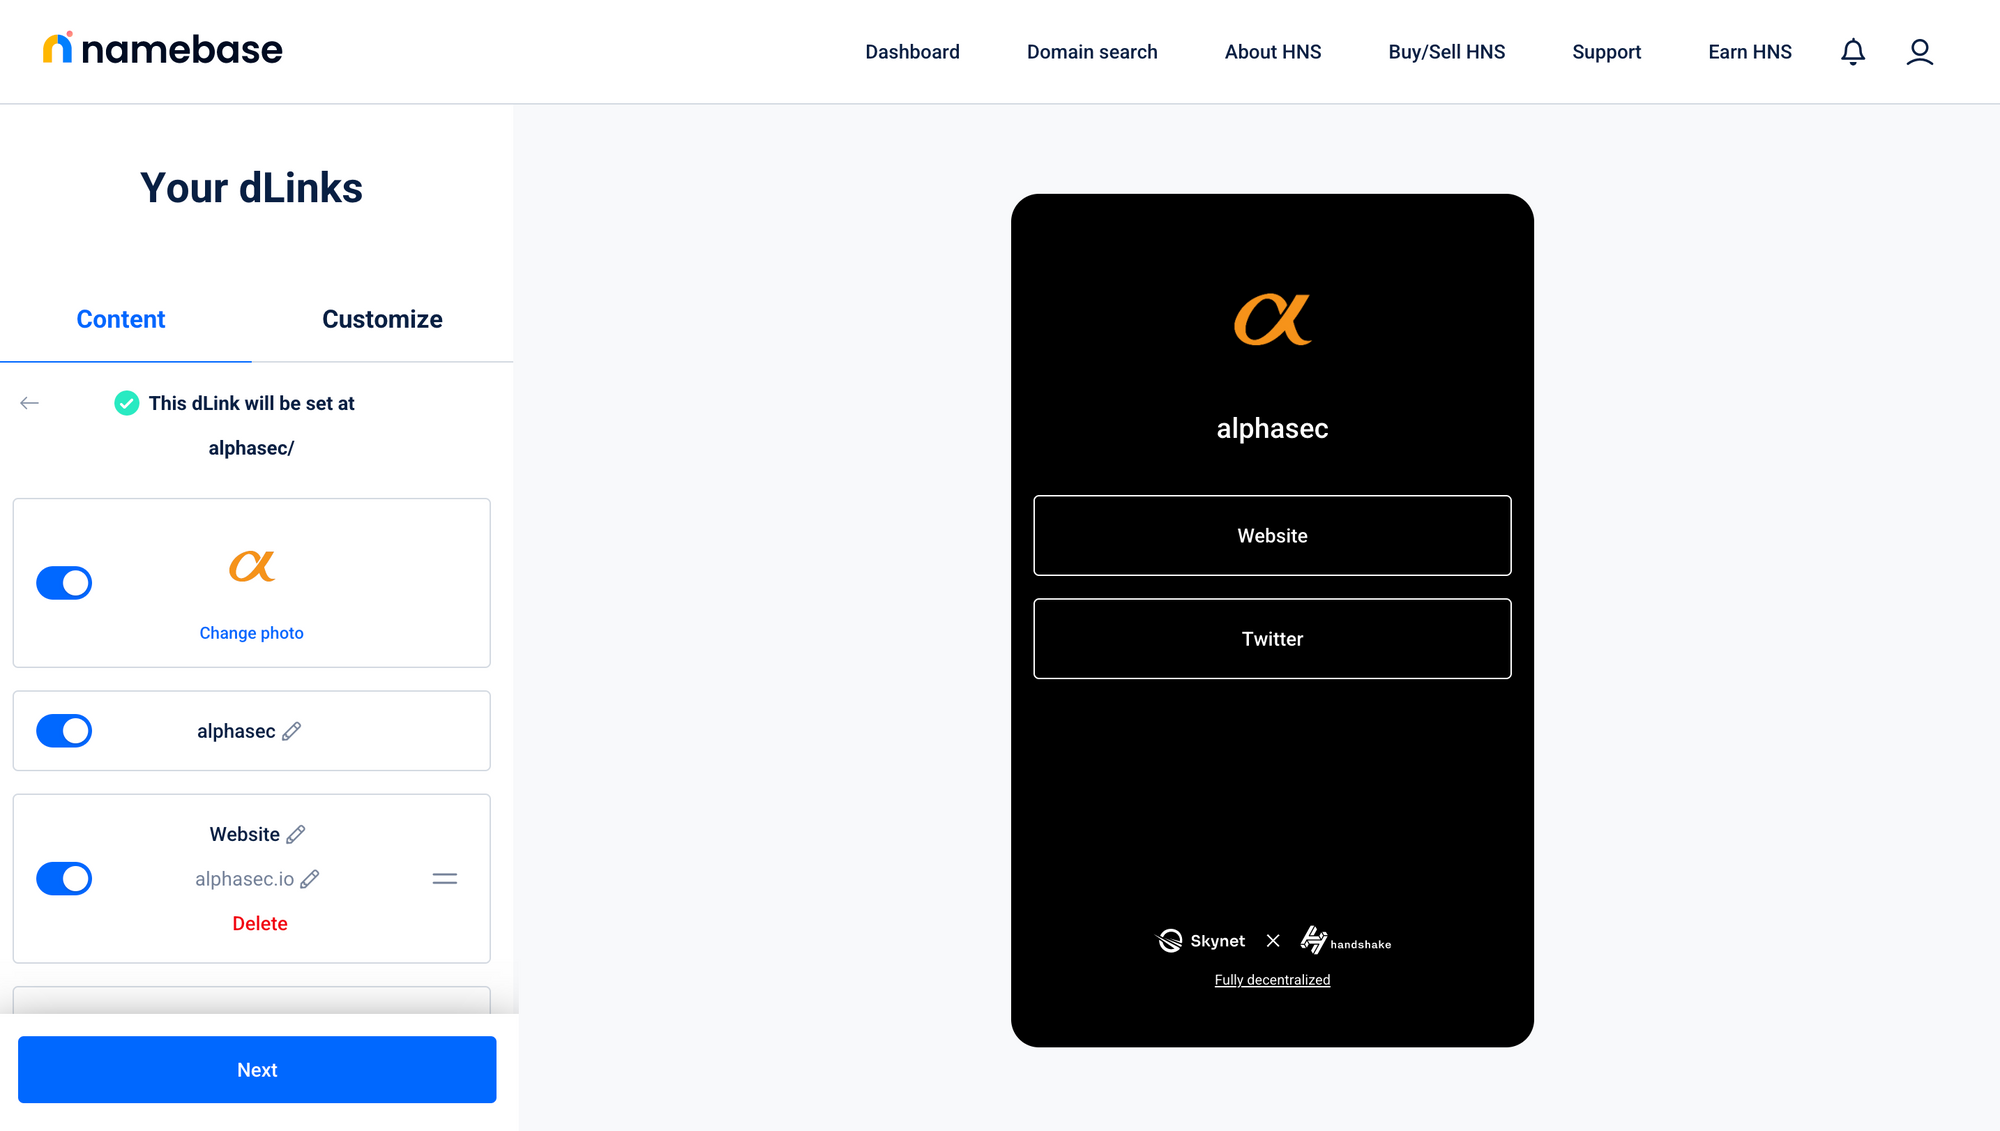
Click on the Create new button, and select one of your Handshake names. Set key attributes of your profile like photo and name, and add name-value blocks as desired. Click Next to select the branding template. Once you are happy, click Publish and you are done.
In my previous post, I covered different options to access Handshake domains from a web browser. The easiest (though not the most secure) option is the HNS.to gateway. As an example, launch alphasec.hns.to in your browser to see my decentralized web profile. For more use cases, check out this post by Namebase.