Detect Security Risks in Your Cloud Account using CloudSploit
How to detect security risks in your GCP account using the CloudSploit open source tool.
The shared responsibility model in public cloud (aka hyperscaler) platforms like AWS, Azure or GCP is well recognized. These platforms have spent and continue to spend billions securing the underlying cloud infrastructure, and offer a ton of best practice guidance on securing their services and customer workloads. Yet, cloud customers still struggle to fulfill their share of the security responsibilities, often resulting in headline-grabbing data breaches or leakages from easily avoidable misconfigurations.
What is CSPM?
Cloud Security Posture Management (CSPM) was defined by Gartner and others to highlight capabilities that proactively and reactively identify and remediate security risks in public cloud platforms. Each of these platforms offer native CSPM services to help their customers, and so do security vendors such as Palo Alto Networks, Aqua, Checkpoint et al. However, these commercial offerings may not always be affordable for customers just starting out with cloud, despite security being a top priority. So, today, we'll take a look at CloudSploit by Aqua, an open-source project designed to allow detection of security risks in cloud infrastructure accounts. CloudSploit is unlikely to be as exhaustive as commercial tools, but it's a good starting point for you.
For the sake of this post, we're going to run the scans against Google Cloud Platform (GCP), but CloudSploit also supports Amazon Web Services (AWS), Microsoft Azure, Oracle Cloud Infrastructure (OCI) and Github. See this Github page for configuration options on the other platforms. And see this article if you want to understand how CloudSploit handles your data and access to your platform instance.
Set up CloudSploit Service Account
First, let's create a service account (non-interactive identity) with view-only privileges to the GCP project you want to assess.
- Launch GCP Console and navigate to
IAM & Admin>Service Accounts. - Click on
Create Service Accountoption. Service account details:
a.Service account name: CloudSploit
b.Service account ID:
c.Service account description: CloudSploit API Access - Click
Create. - Grant this service account access to the project:
a.Select a role>Basic>Viewer. - Click
ContinueandDone. - Click on the newly created service account and navigate to
Keystab.
a. Click onAdd Keydropdown and selectCreate new key.
b. Choose default JSON option and clickCreate.
c. Move JSON file to a safe location and reference inconfig.jsfile later. - Navigate to
APIs & Services>Dashboardand click onEnable APIs and Services. Enable the following services one by one:
a.Cloud DNS API
b.Cloud Logging API
c.Stackdriver Monitoring API
d.Compute Engine API
e.Cloud Key Management Service (KMS) API
f.Cloud SQL Admin API
g.Kubernetes Engine API
h.Service Management API
i.Service Networking API
j.Cloud Resource Manager API
Deploy and Configure CloudSploit on GCP
Next, let's create a GCP VM instance and deploy CloudSploit from Github, along with the dependencies.
- In the GCP Console, navigate to
Compute Engine>VM instancesandCreate Instancewith the following settings.
a.Name: cloudsploit
b.Region/zone: <your desired region/zone>
c.Machine configuration: General-purpose > E2 Series > e2-micro
d.Boot disk OS version: Ubuntu 20.04 LTS
e.Boot disk size: 20 GB - If you wish to improve the security posture of the GCP VM, here are 3 things you can do.
SSH into the instance using the Google Cloud Console (or your preferred SSH client) and run the following commands. If you are using Google Cloud Console, click on the Settings dropdown and select the Upload file option to upload the JSON service account credential file to this VM instance.
# Update package lists and installed packages
sudo apt-get update && sudo apt-get upgrade

# Install Node.js (npm will get installed too)
sudo apt-get install -y nodejs

# Clone CloudSploit git repo from Github and install
git clone https://github.com/aquasecurity/cloudsploit.git
$ cd cloudsploit
$ npm install

# Copy the uploaded JSON credential file to this location
cp <file_location>/<file_name.json> .

# Copy the example config file and edit it
cp config_example.js config.js
nano config.js

# Update the credential file location under the GCP section
google: {
// OPTION 1: If using a credential JSON file, enter the path below
credential_file: process.env.GOOGLE_APPLICATION_CREDENTIALS || '</path/to/file_name.json>',
}
# Save and exit
Run Cloud Security Scans
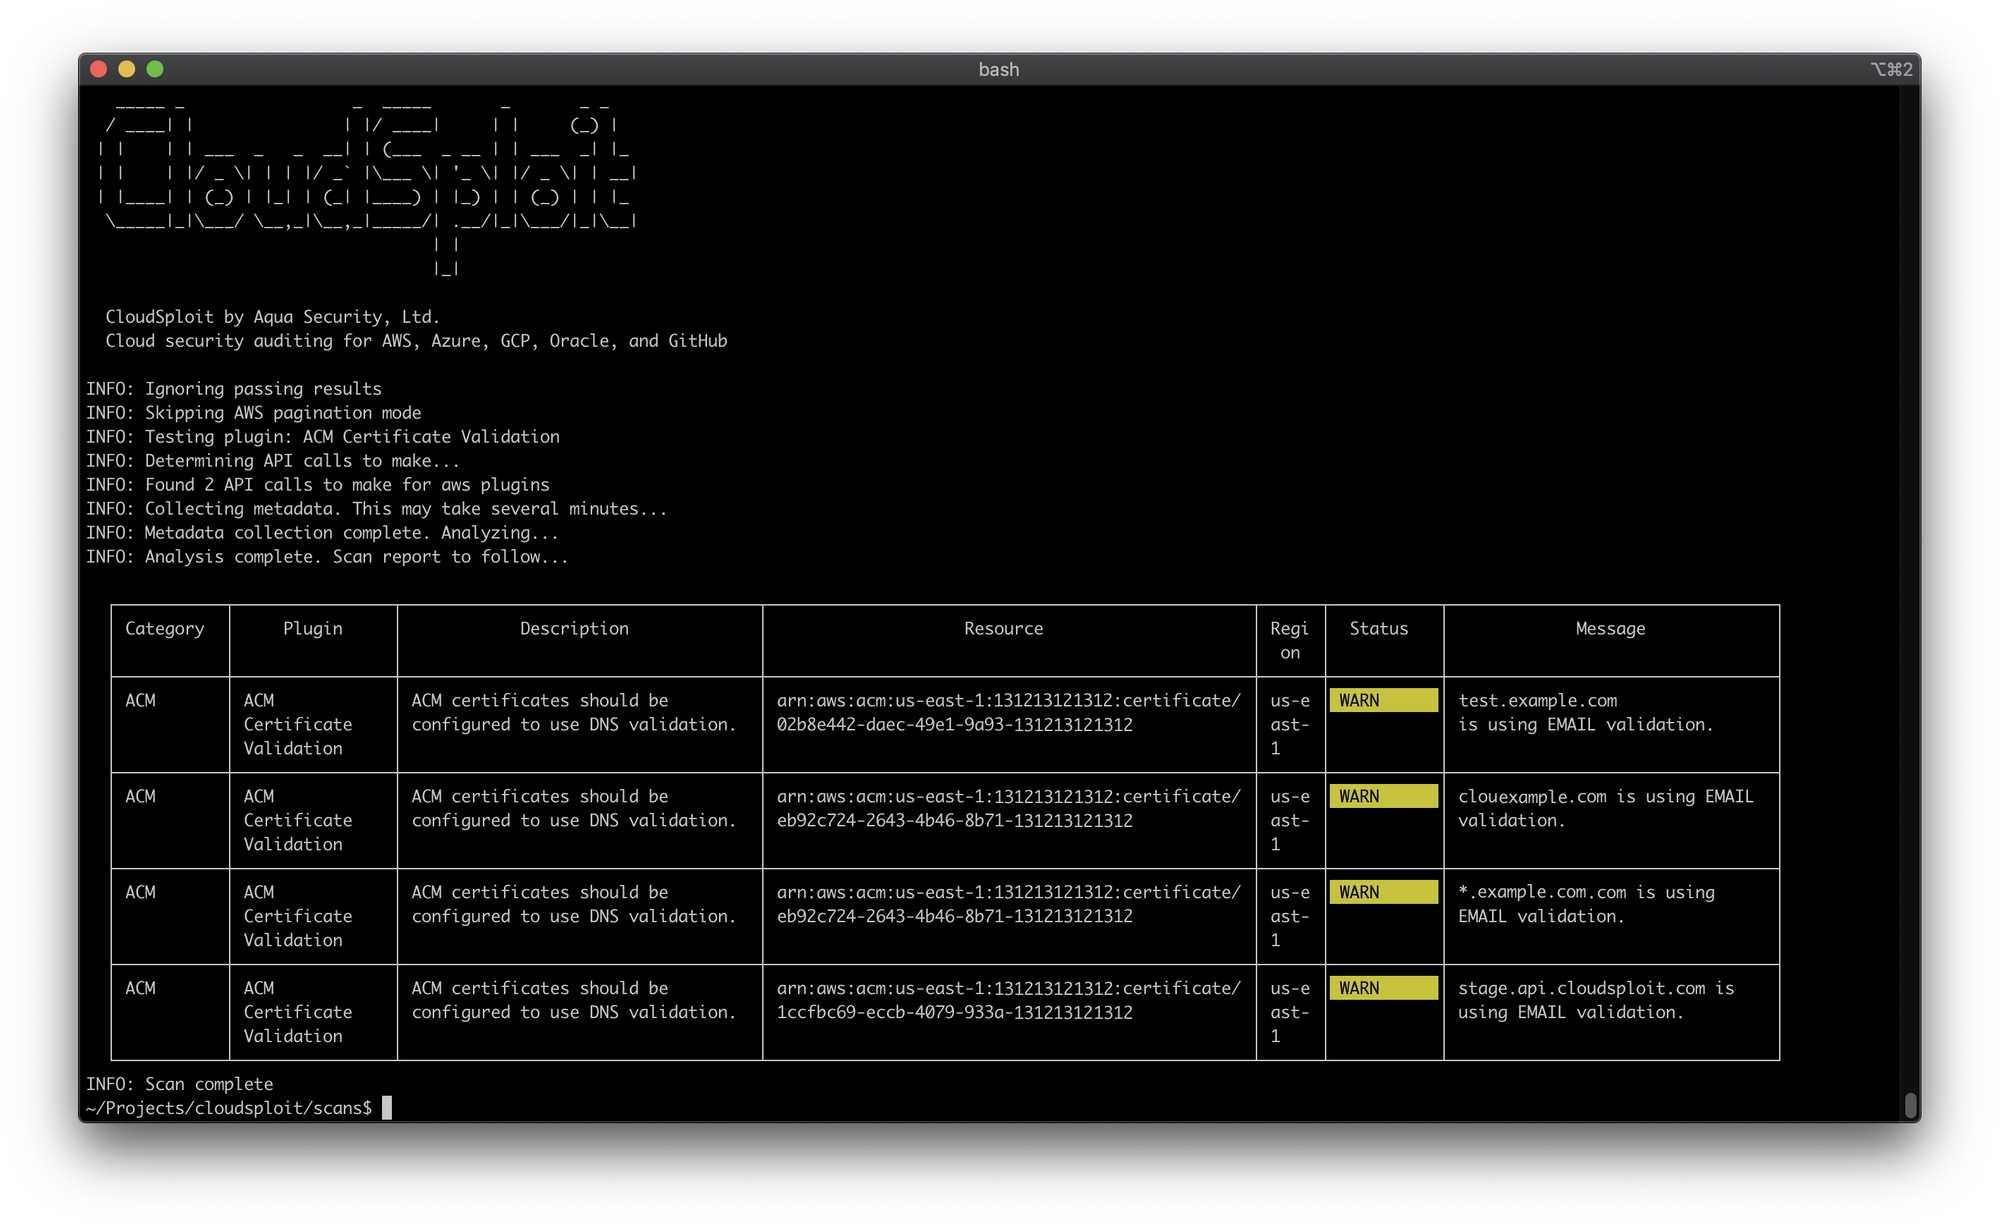
To run a standard scan, showing all outputs and results, simply run:
./index.js --config=./config.jsWithout the --config flag, CloudSploit defaults to AWS instead of GCP. To print a table to the console, and save JSON and CSV files:
./index.js --console=table --csv=results.csv --json=results.jsonTo run a compliance scan, use the --compliance flag. For instance, to run scans against the CIS (Level 1 & 2) benchmark and PCI-DSS:
./index.js --compliance=cis --compliance=pciThe scan is usually quick, but may sometimes take up to a minute to complete. You can find more flags, including the configuration options for other cloud platforms, at the Github page.
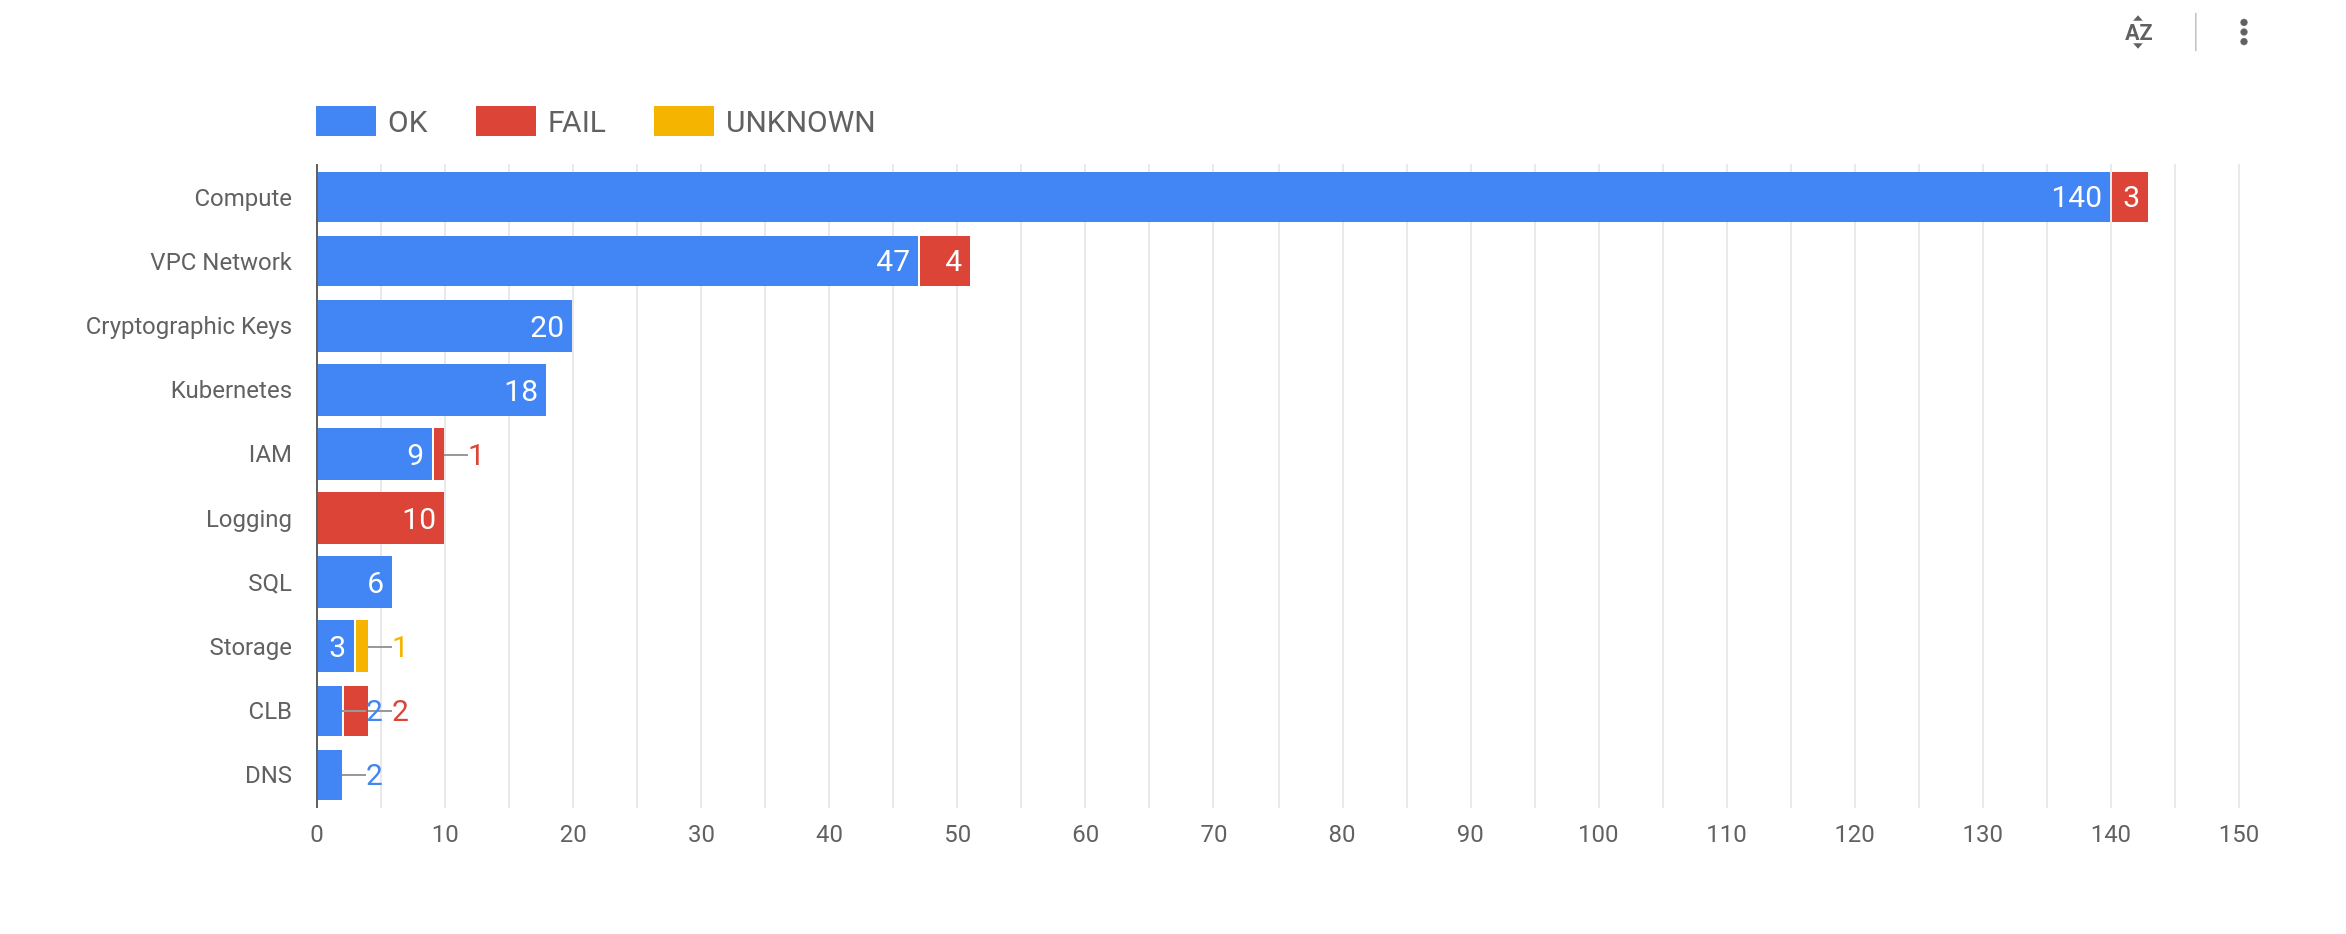
Visualize Scan Results
Finally, you can use your favourite visualization tool to graphically represent the scan results from the CSV/JSON files. I uploaded the CSV file to Google Data Studio and built a quick dashboard to demonstrate the potential.
Good luck with your journey to secure your cloud accounts!